Step-by-step tutorial
Step 1
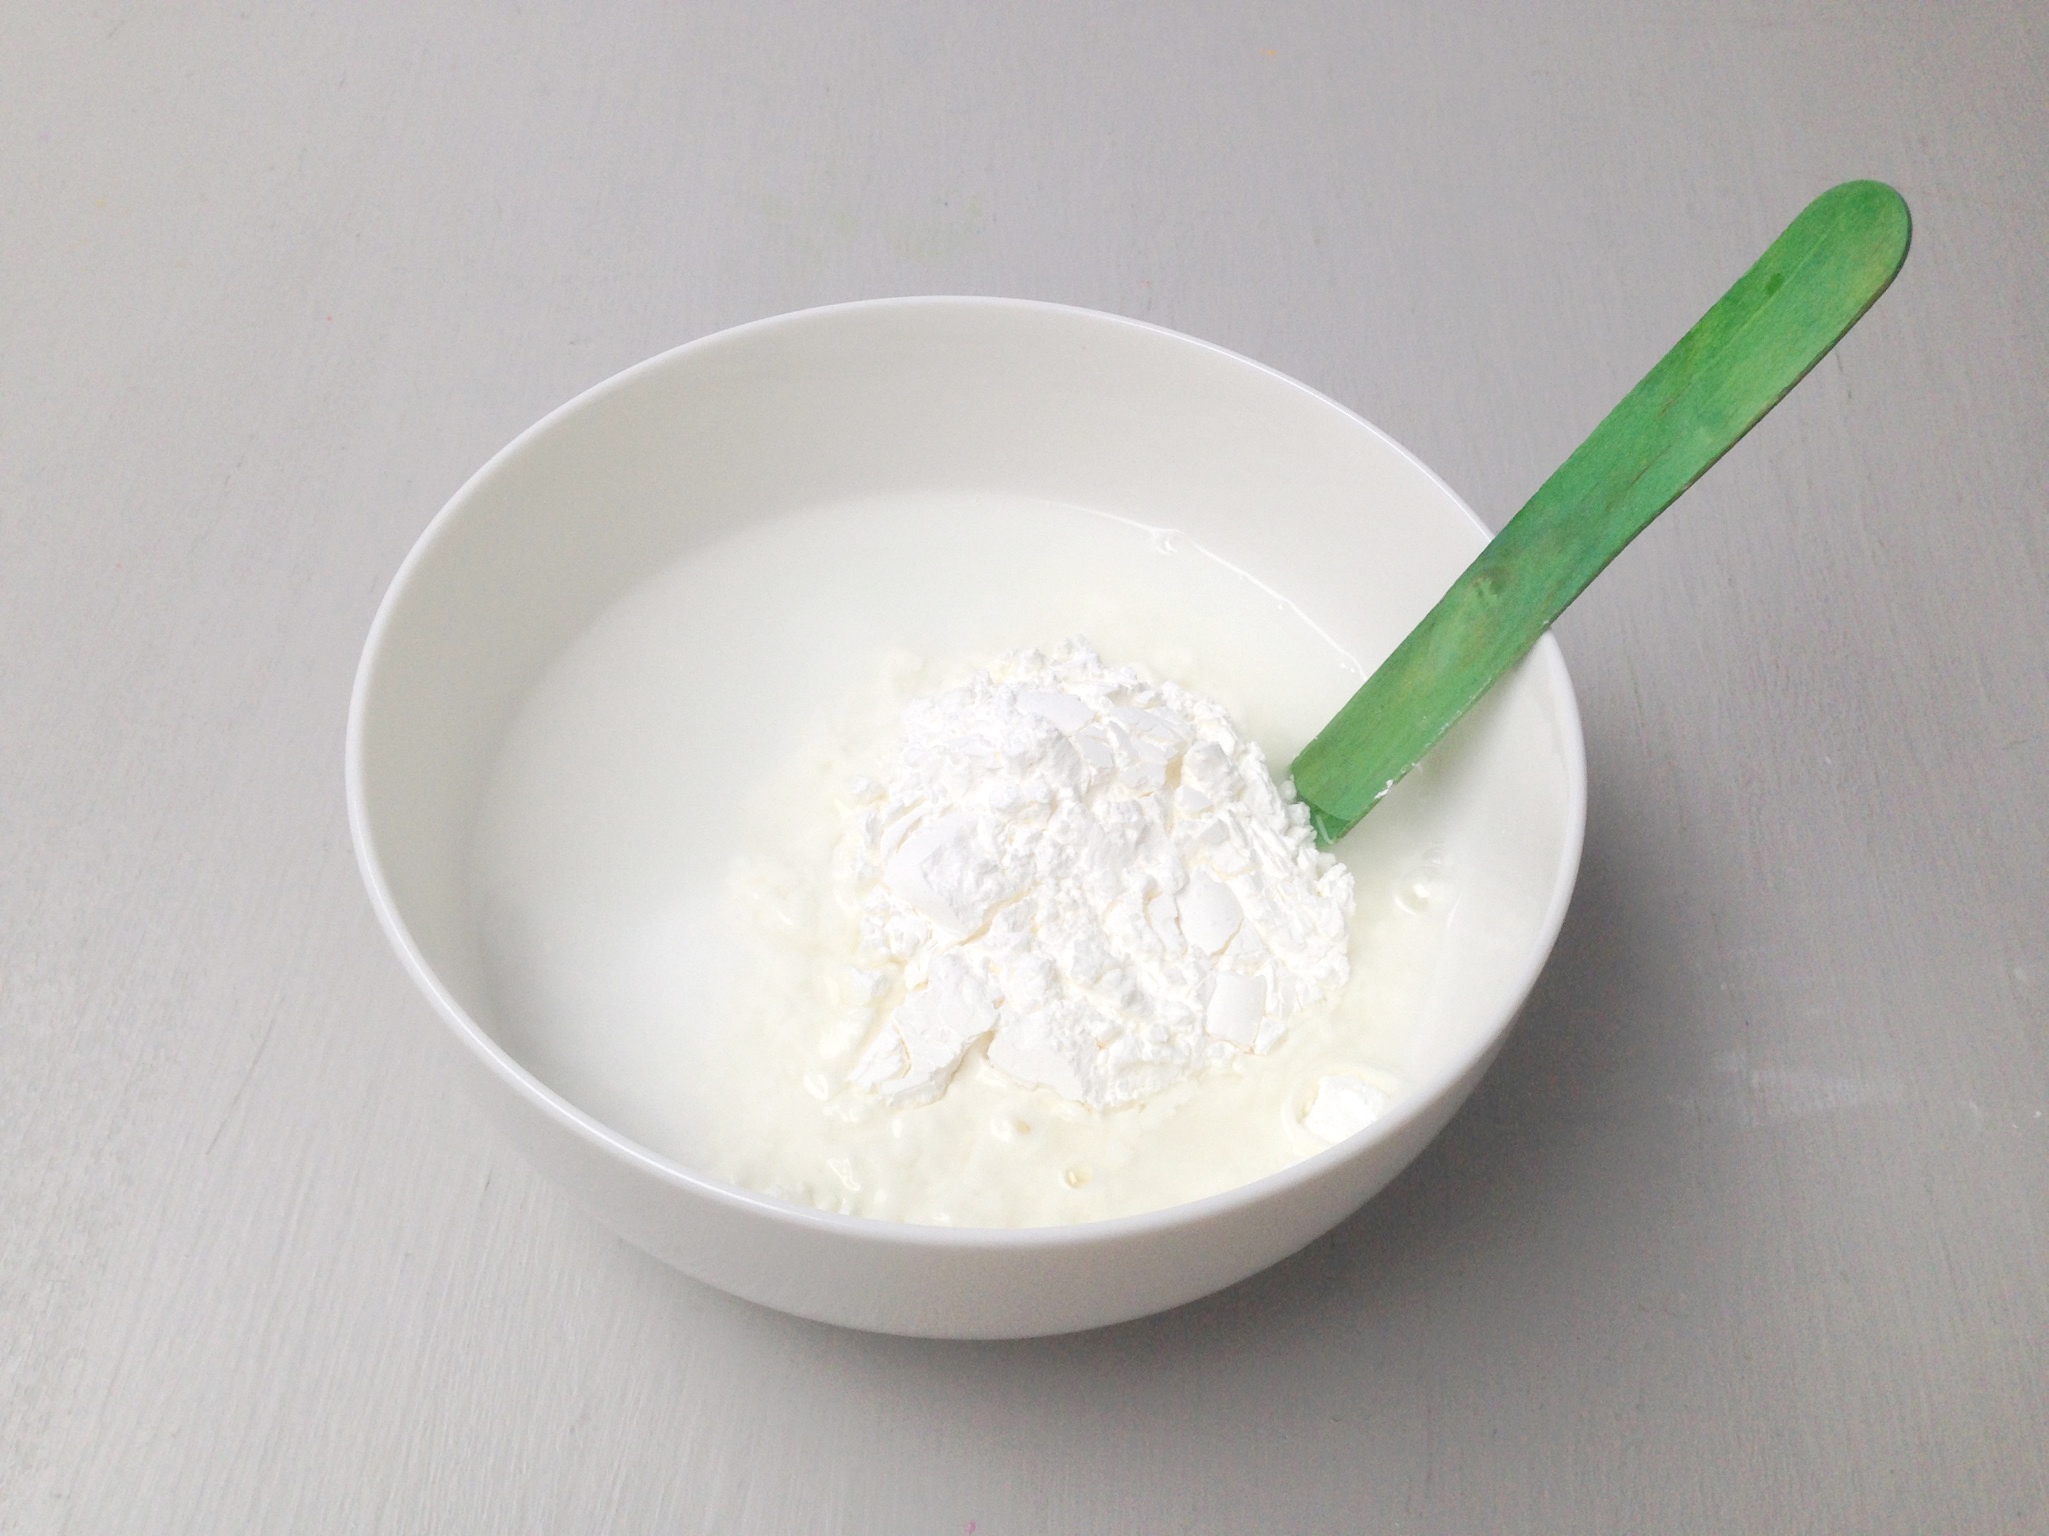
Mix cornstarch, water, and baking soda together in a large bowl.

Step 2
Microwave the bowl and mixture for one minute. Give it a quick stir and then, microwave it for another minute. The mixture should now be slightly thickened.Continue microwaving the mixture in 20 second intervals, stirring between each interval. When the mixture starts to look like mashed potatoes, take it out of the microwave and cover it with a wet paper towel to let it cool down.Tip: Be careful when handling the bowl as it will be hot! Alternative option: If you would like, you can also cook the mixture on the stove until it has thickened.

Step 3
Once the dough is cool to the touch, knead it a bit until it has a well-mixed, smooth consistency. If the dough is too dry, knead in a little water. If the dough is too wet, try sprinkling in a bit of baking soda (not too much though!).Once the dough is ready, follow along below to create some cool sea formations!
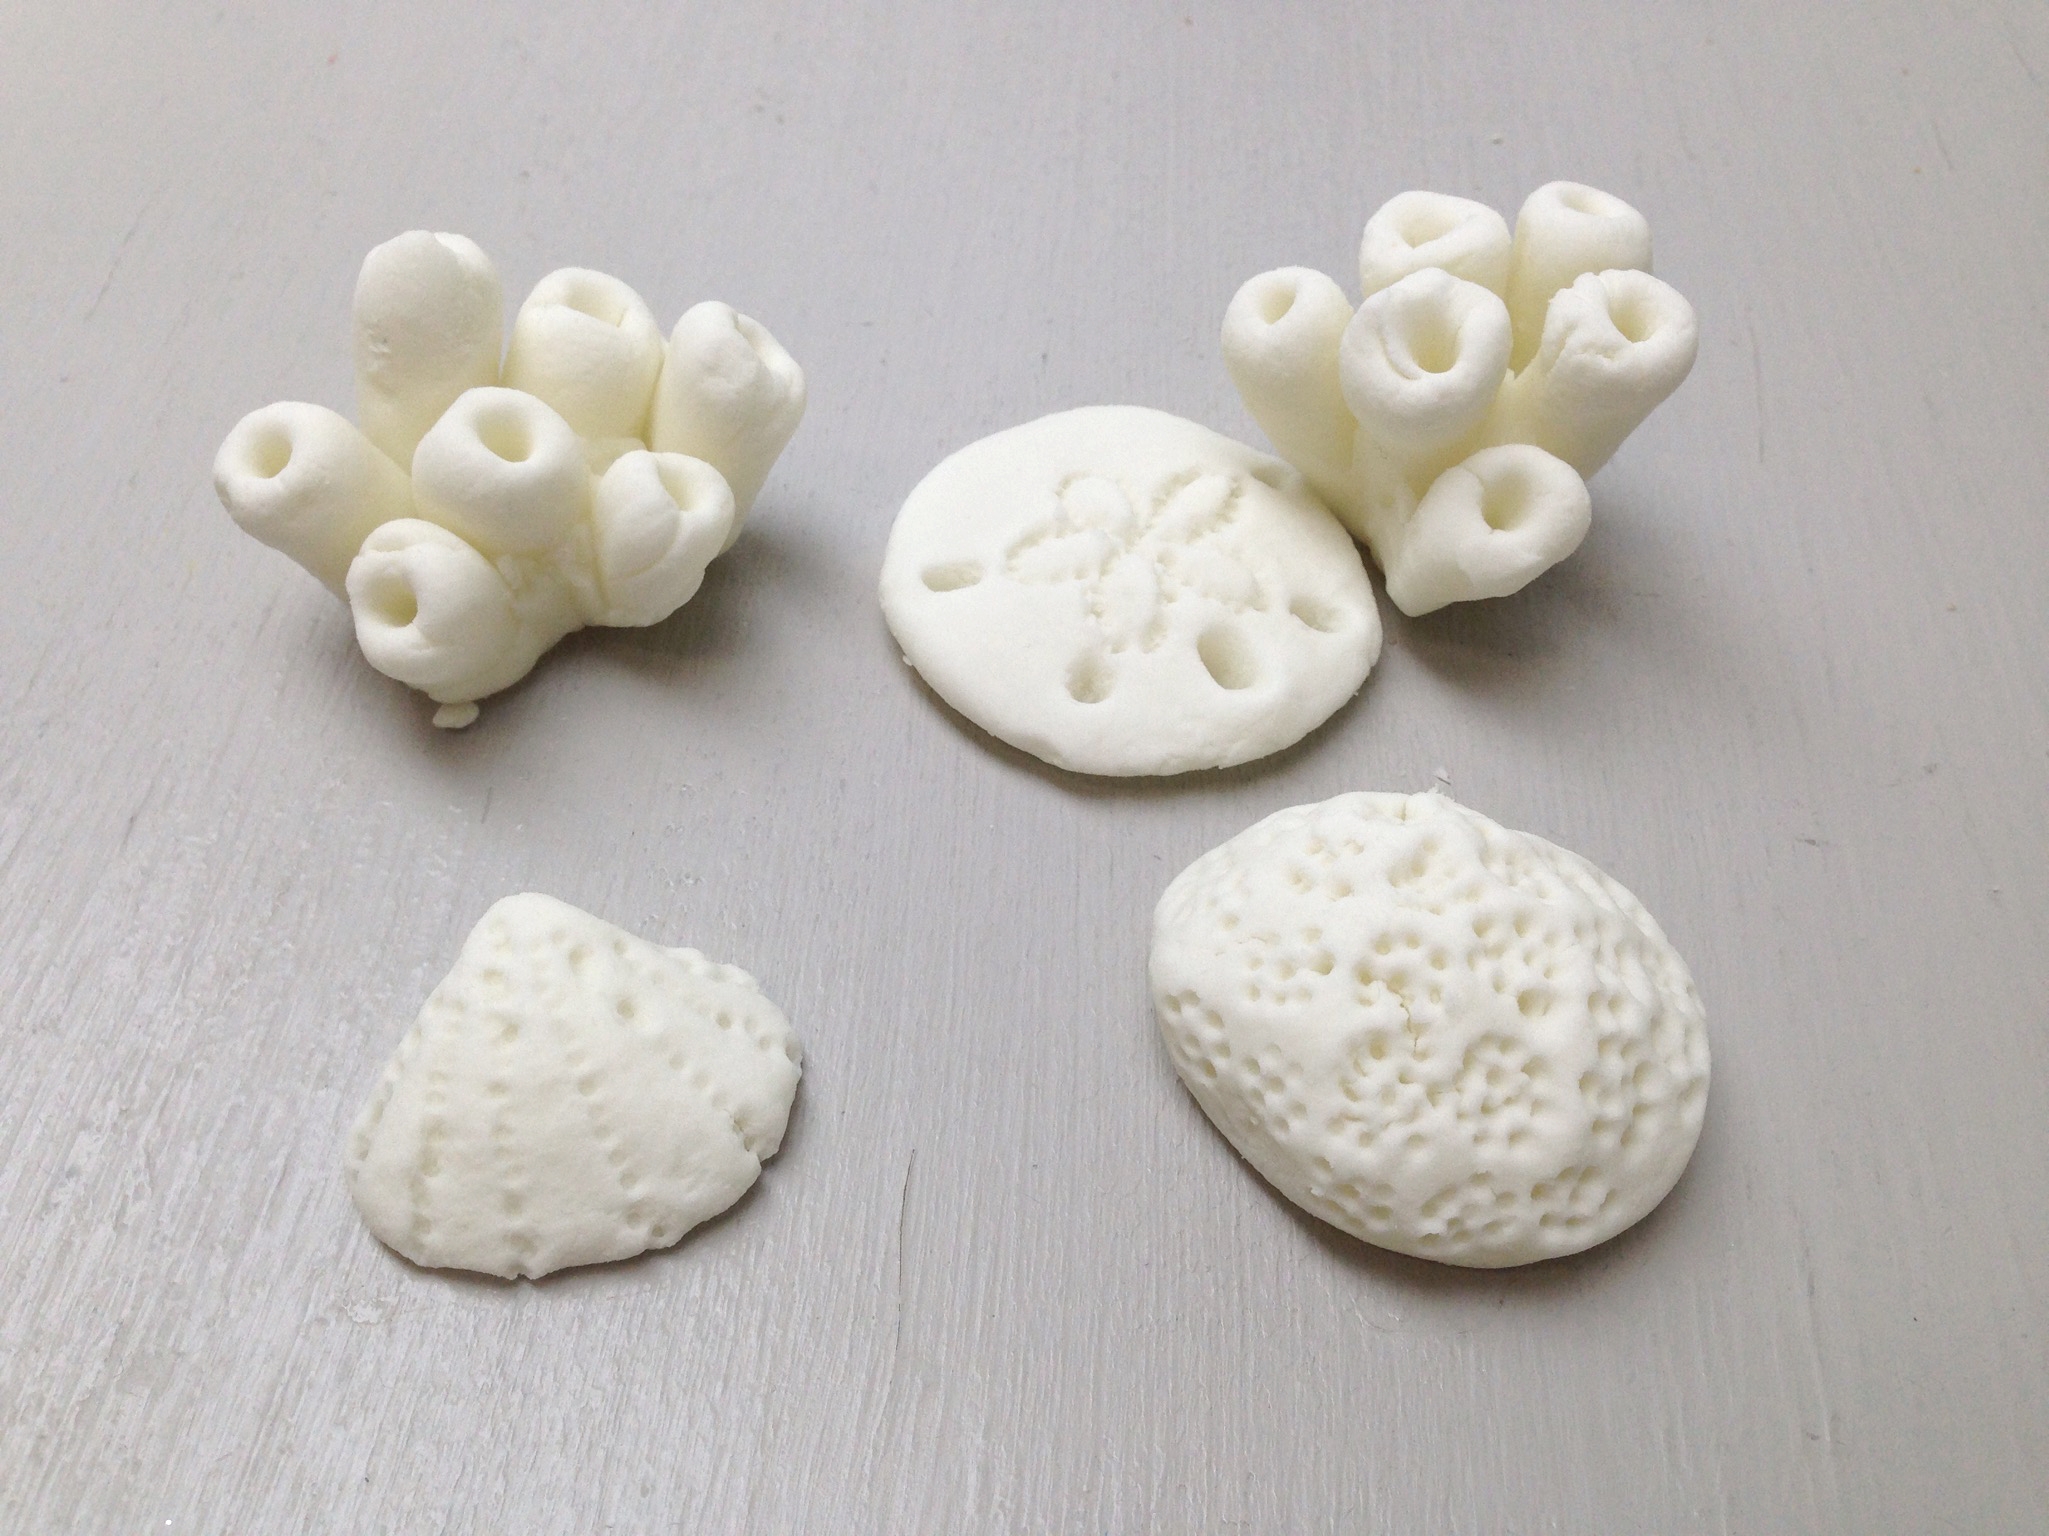
Step 4
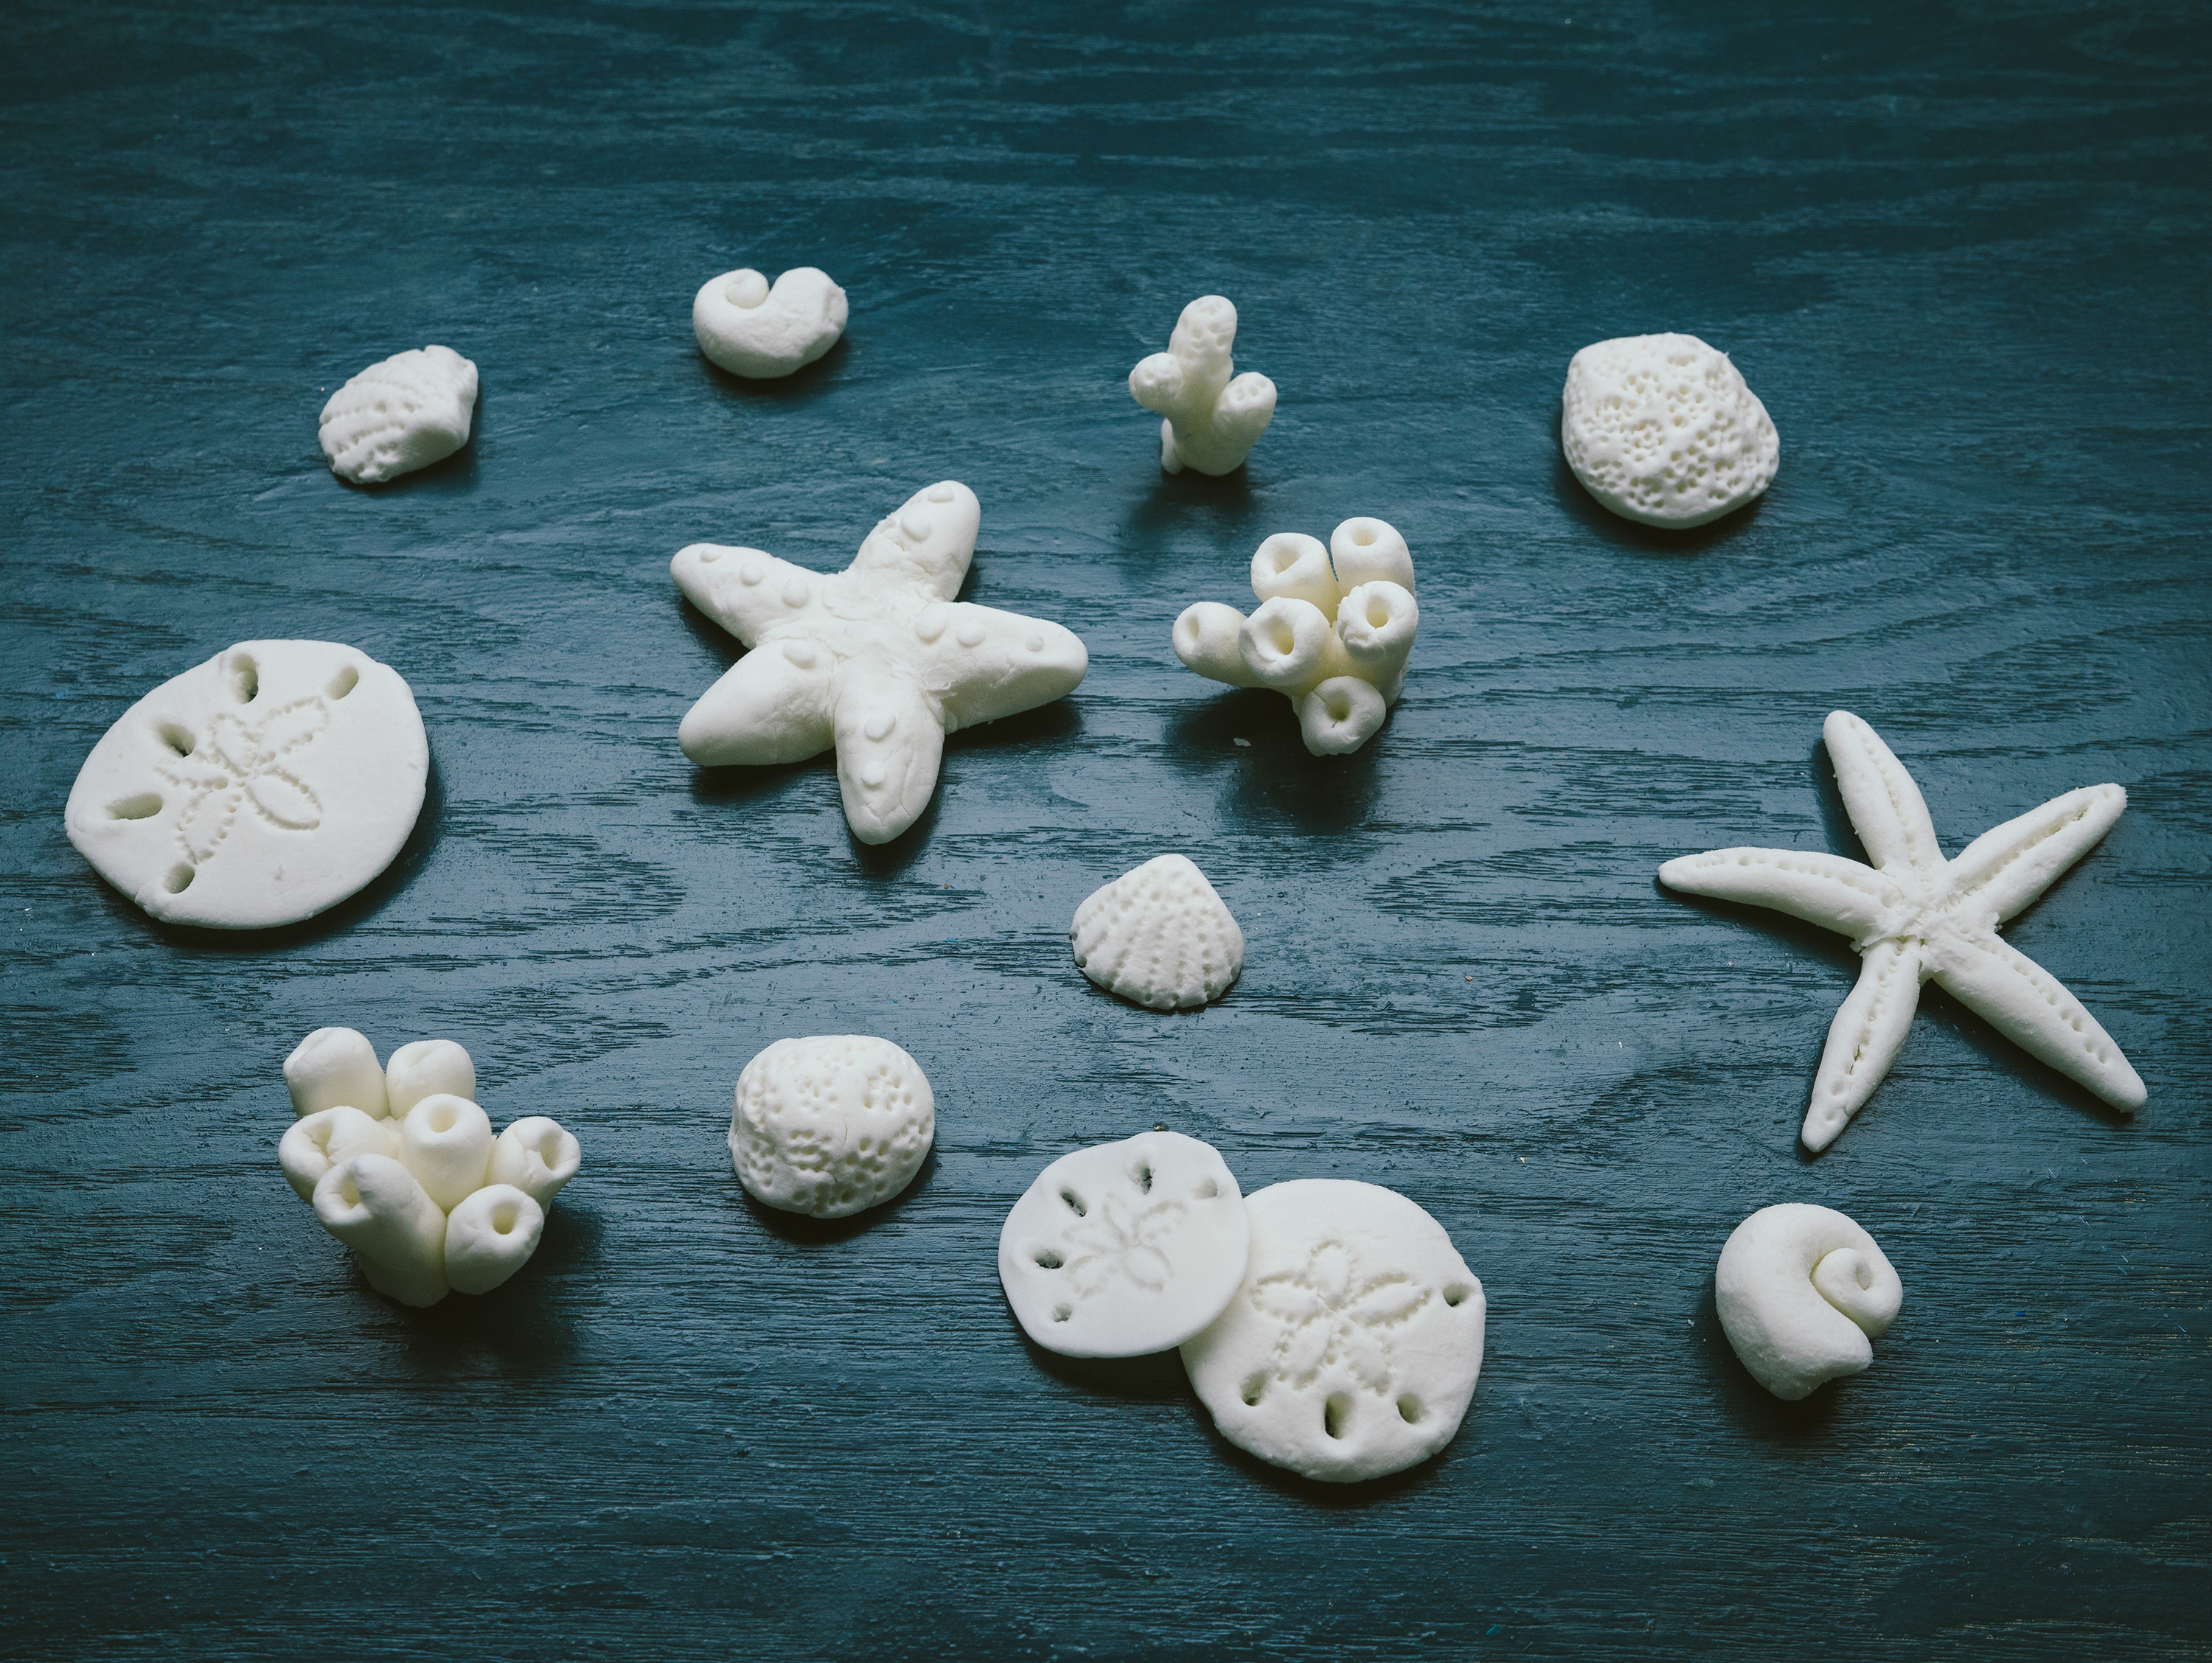
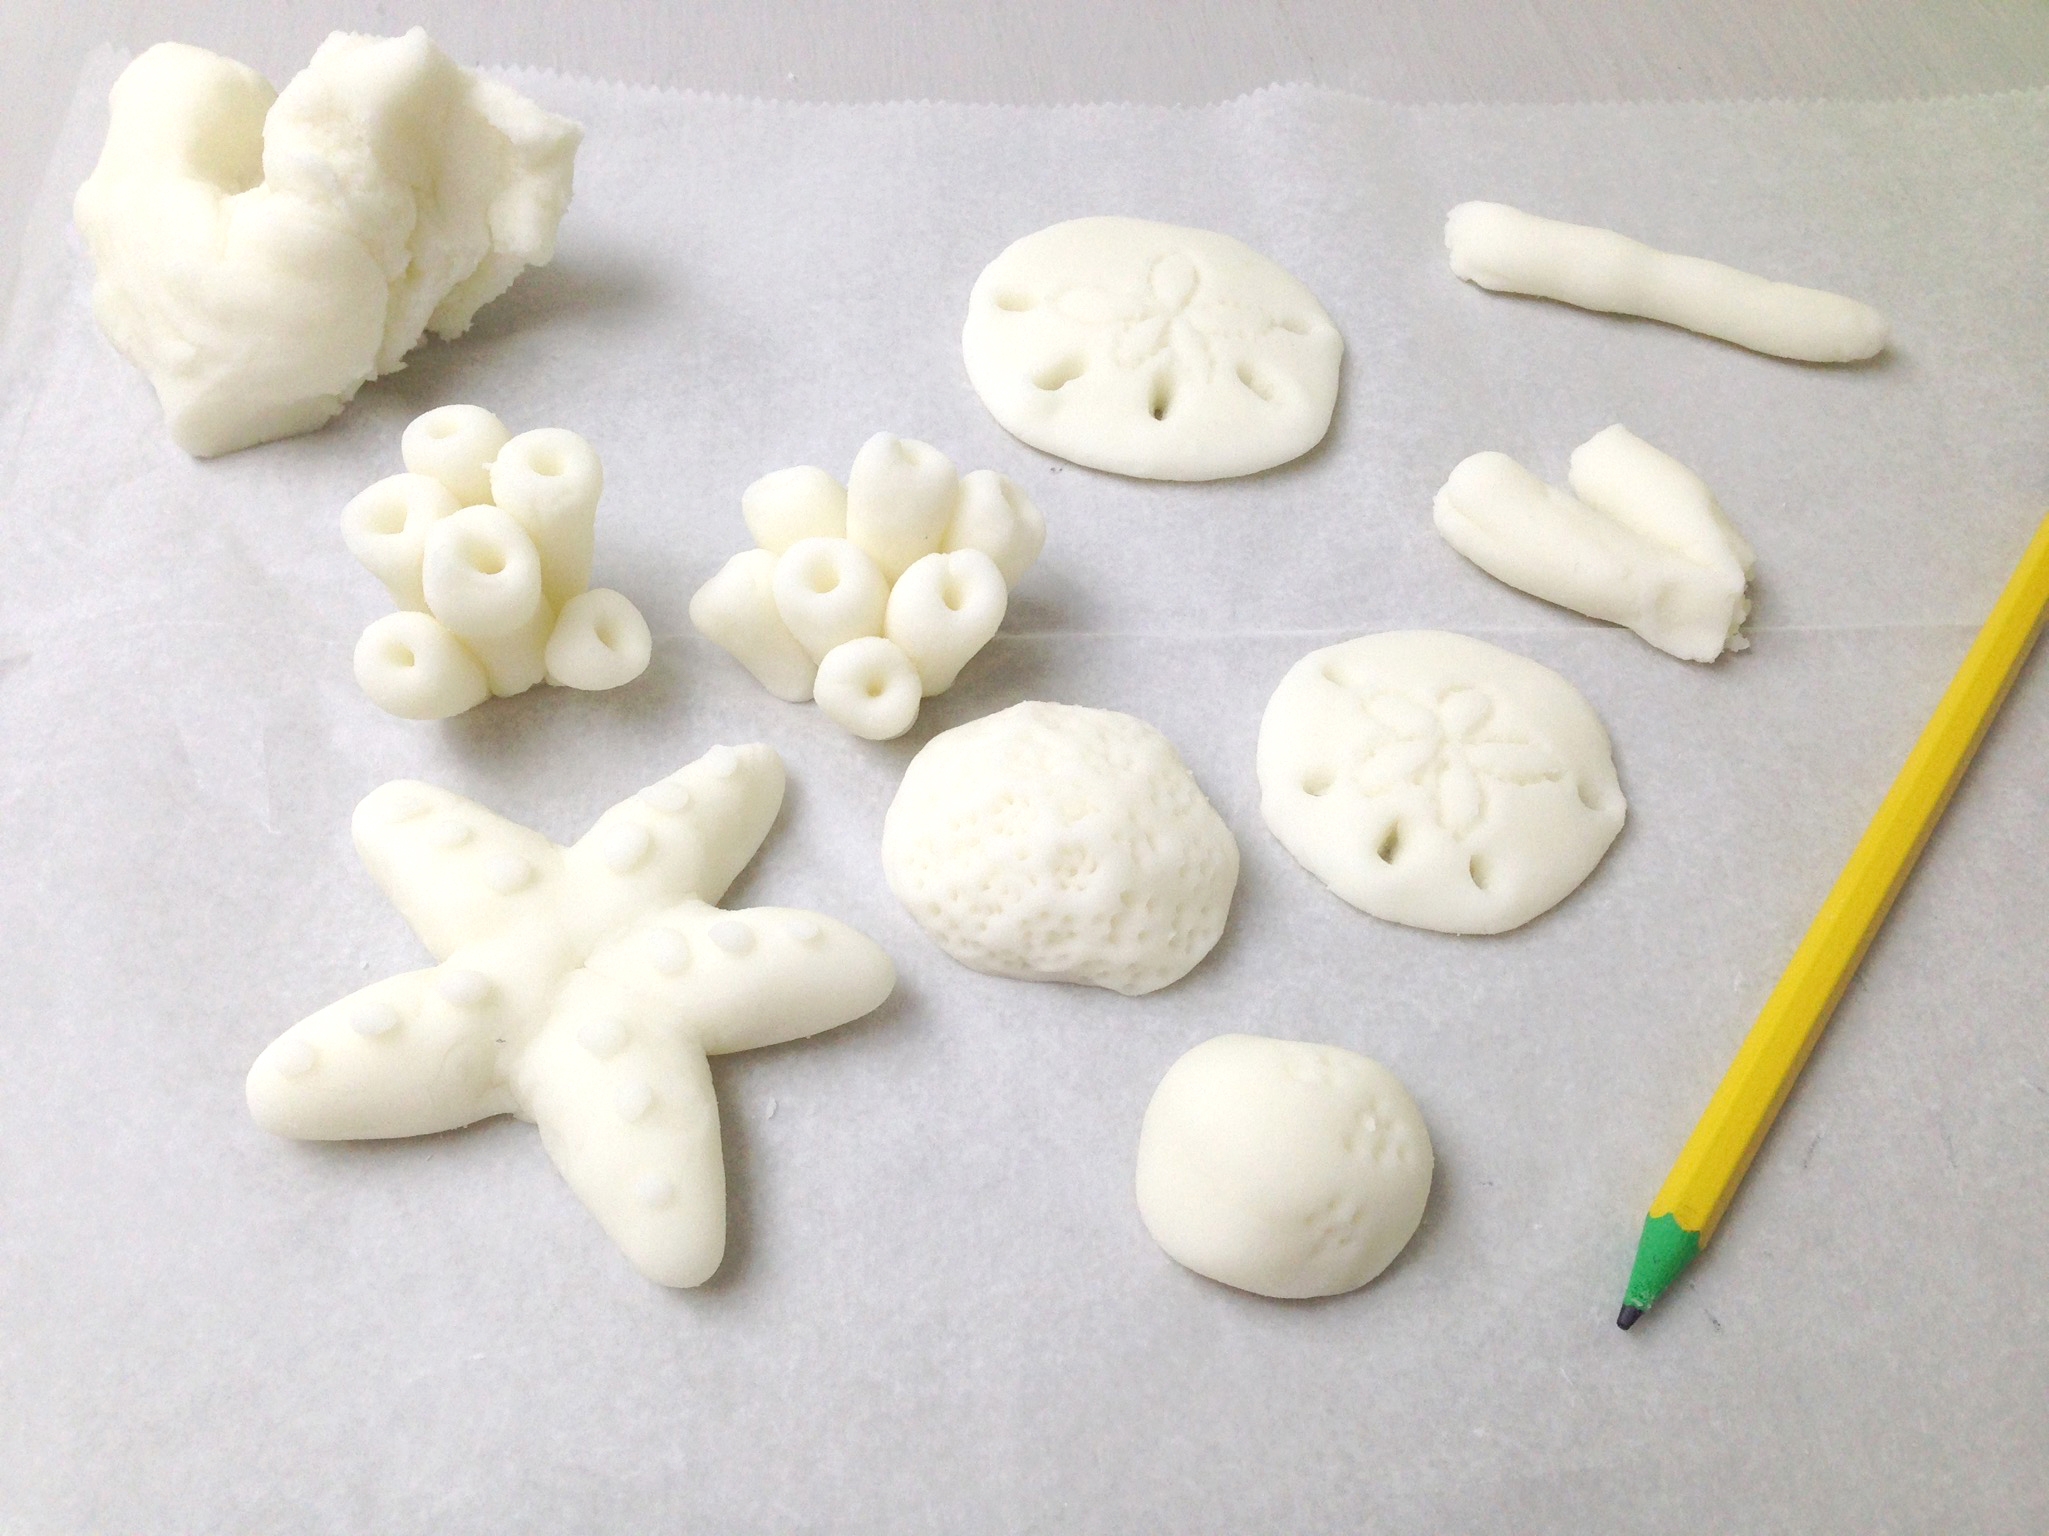
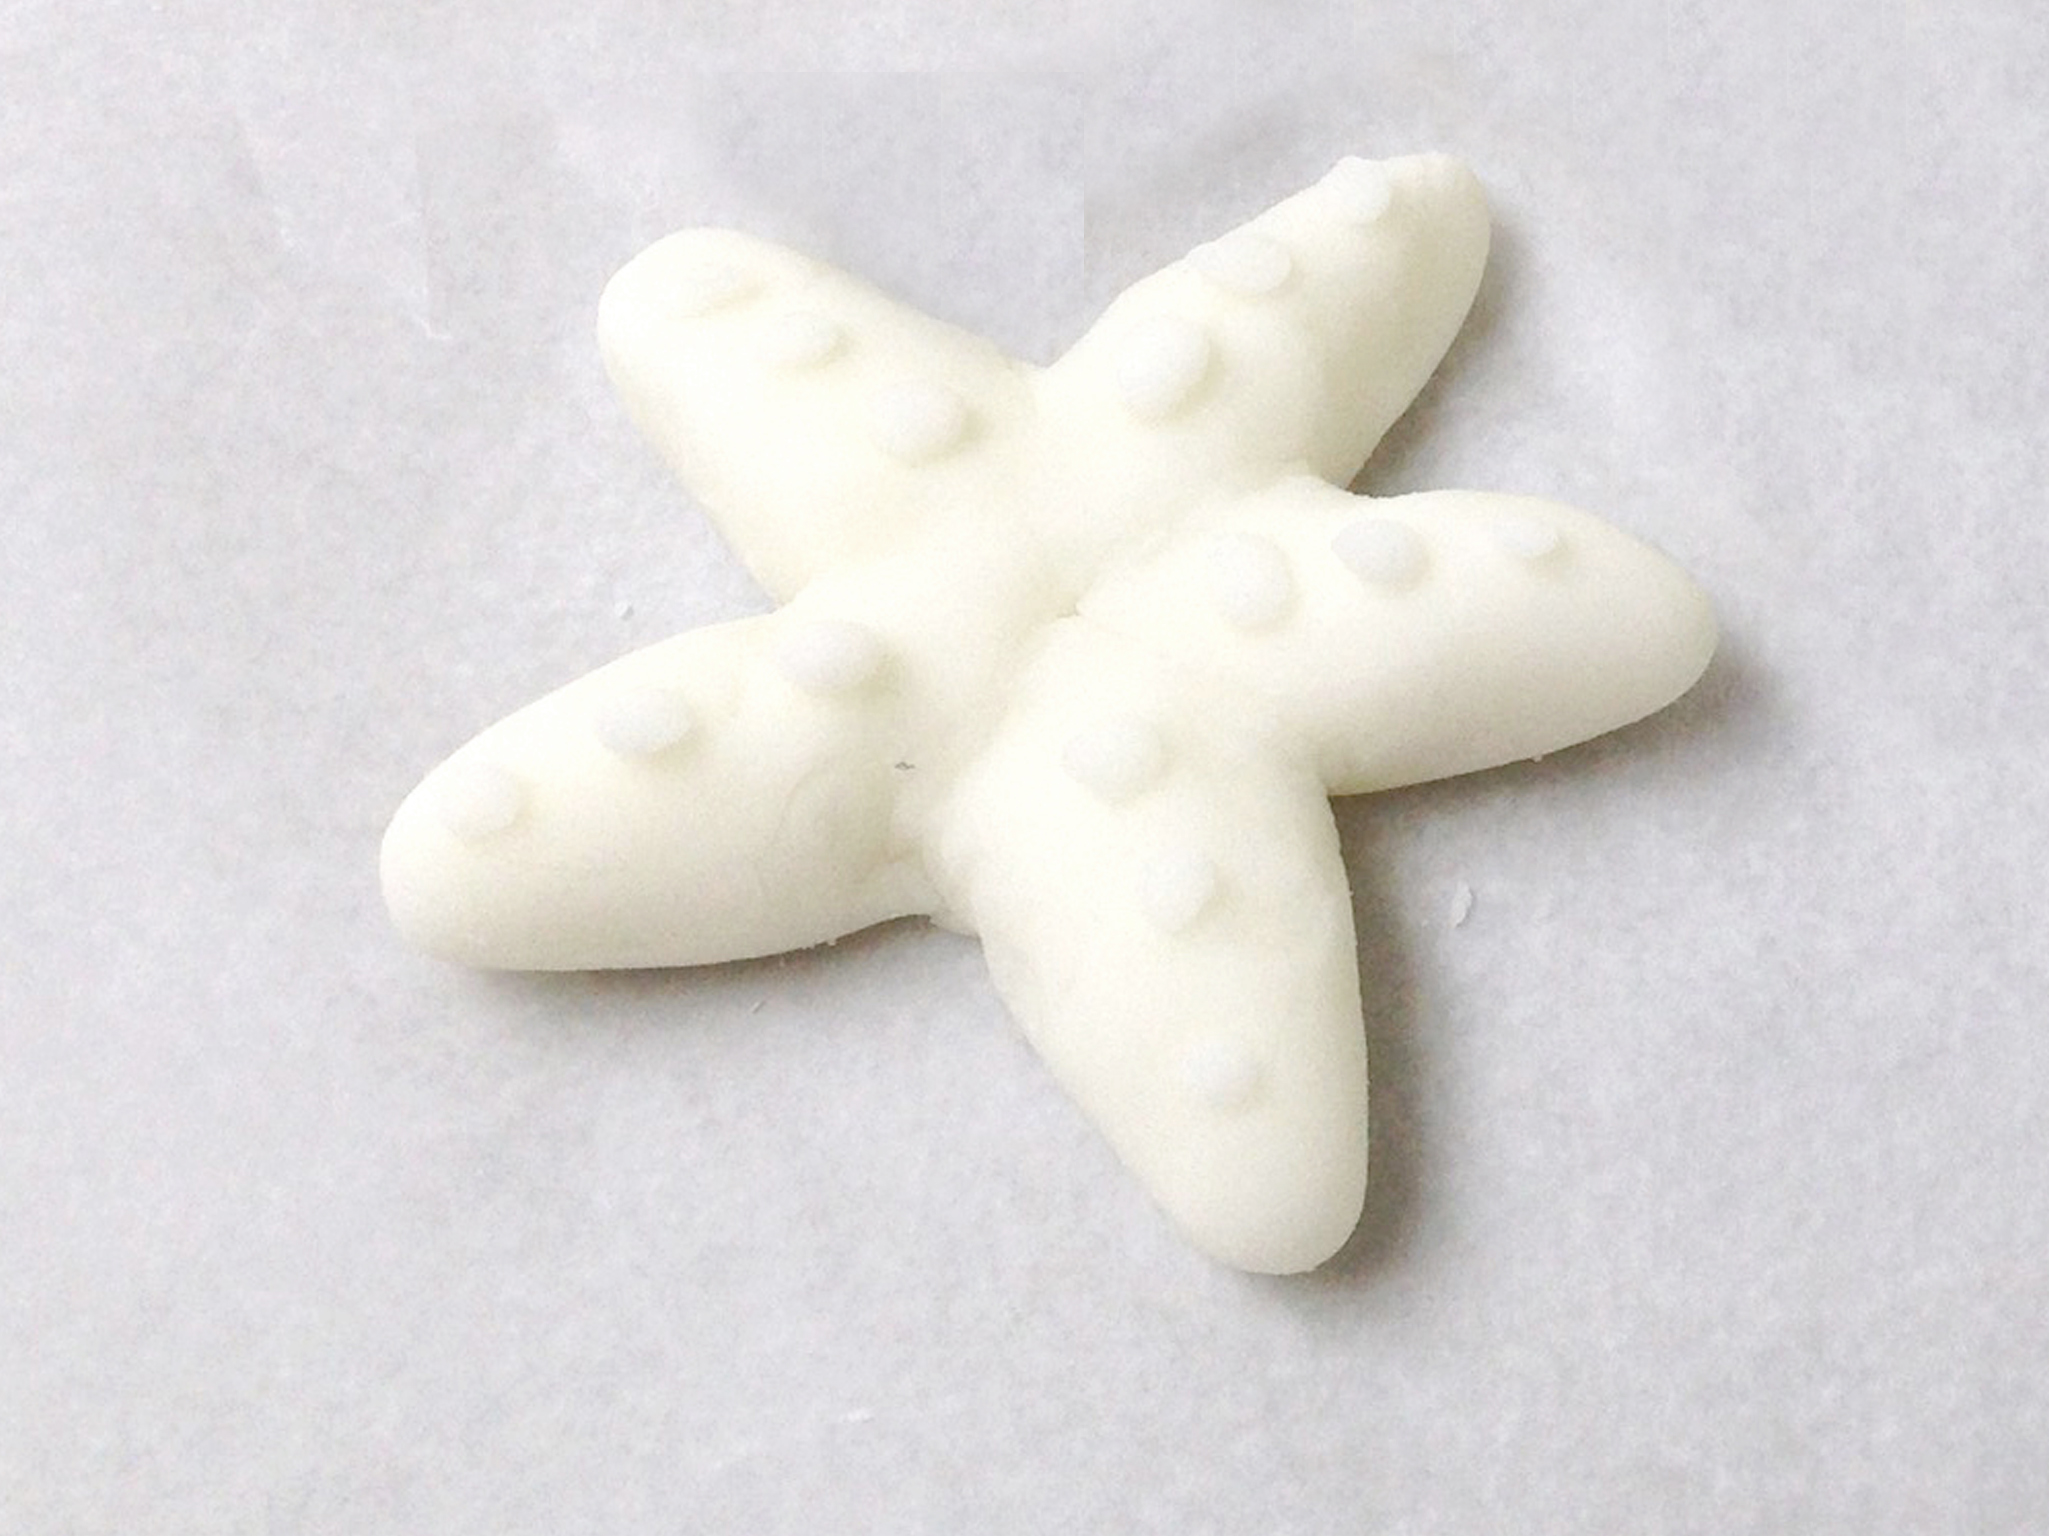
Starfish: Roll out five teardrop shapes to form the base. Add a bumpy texture by adding small spheres.
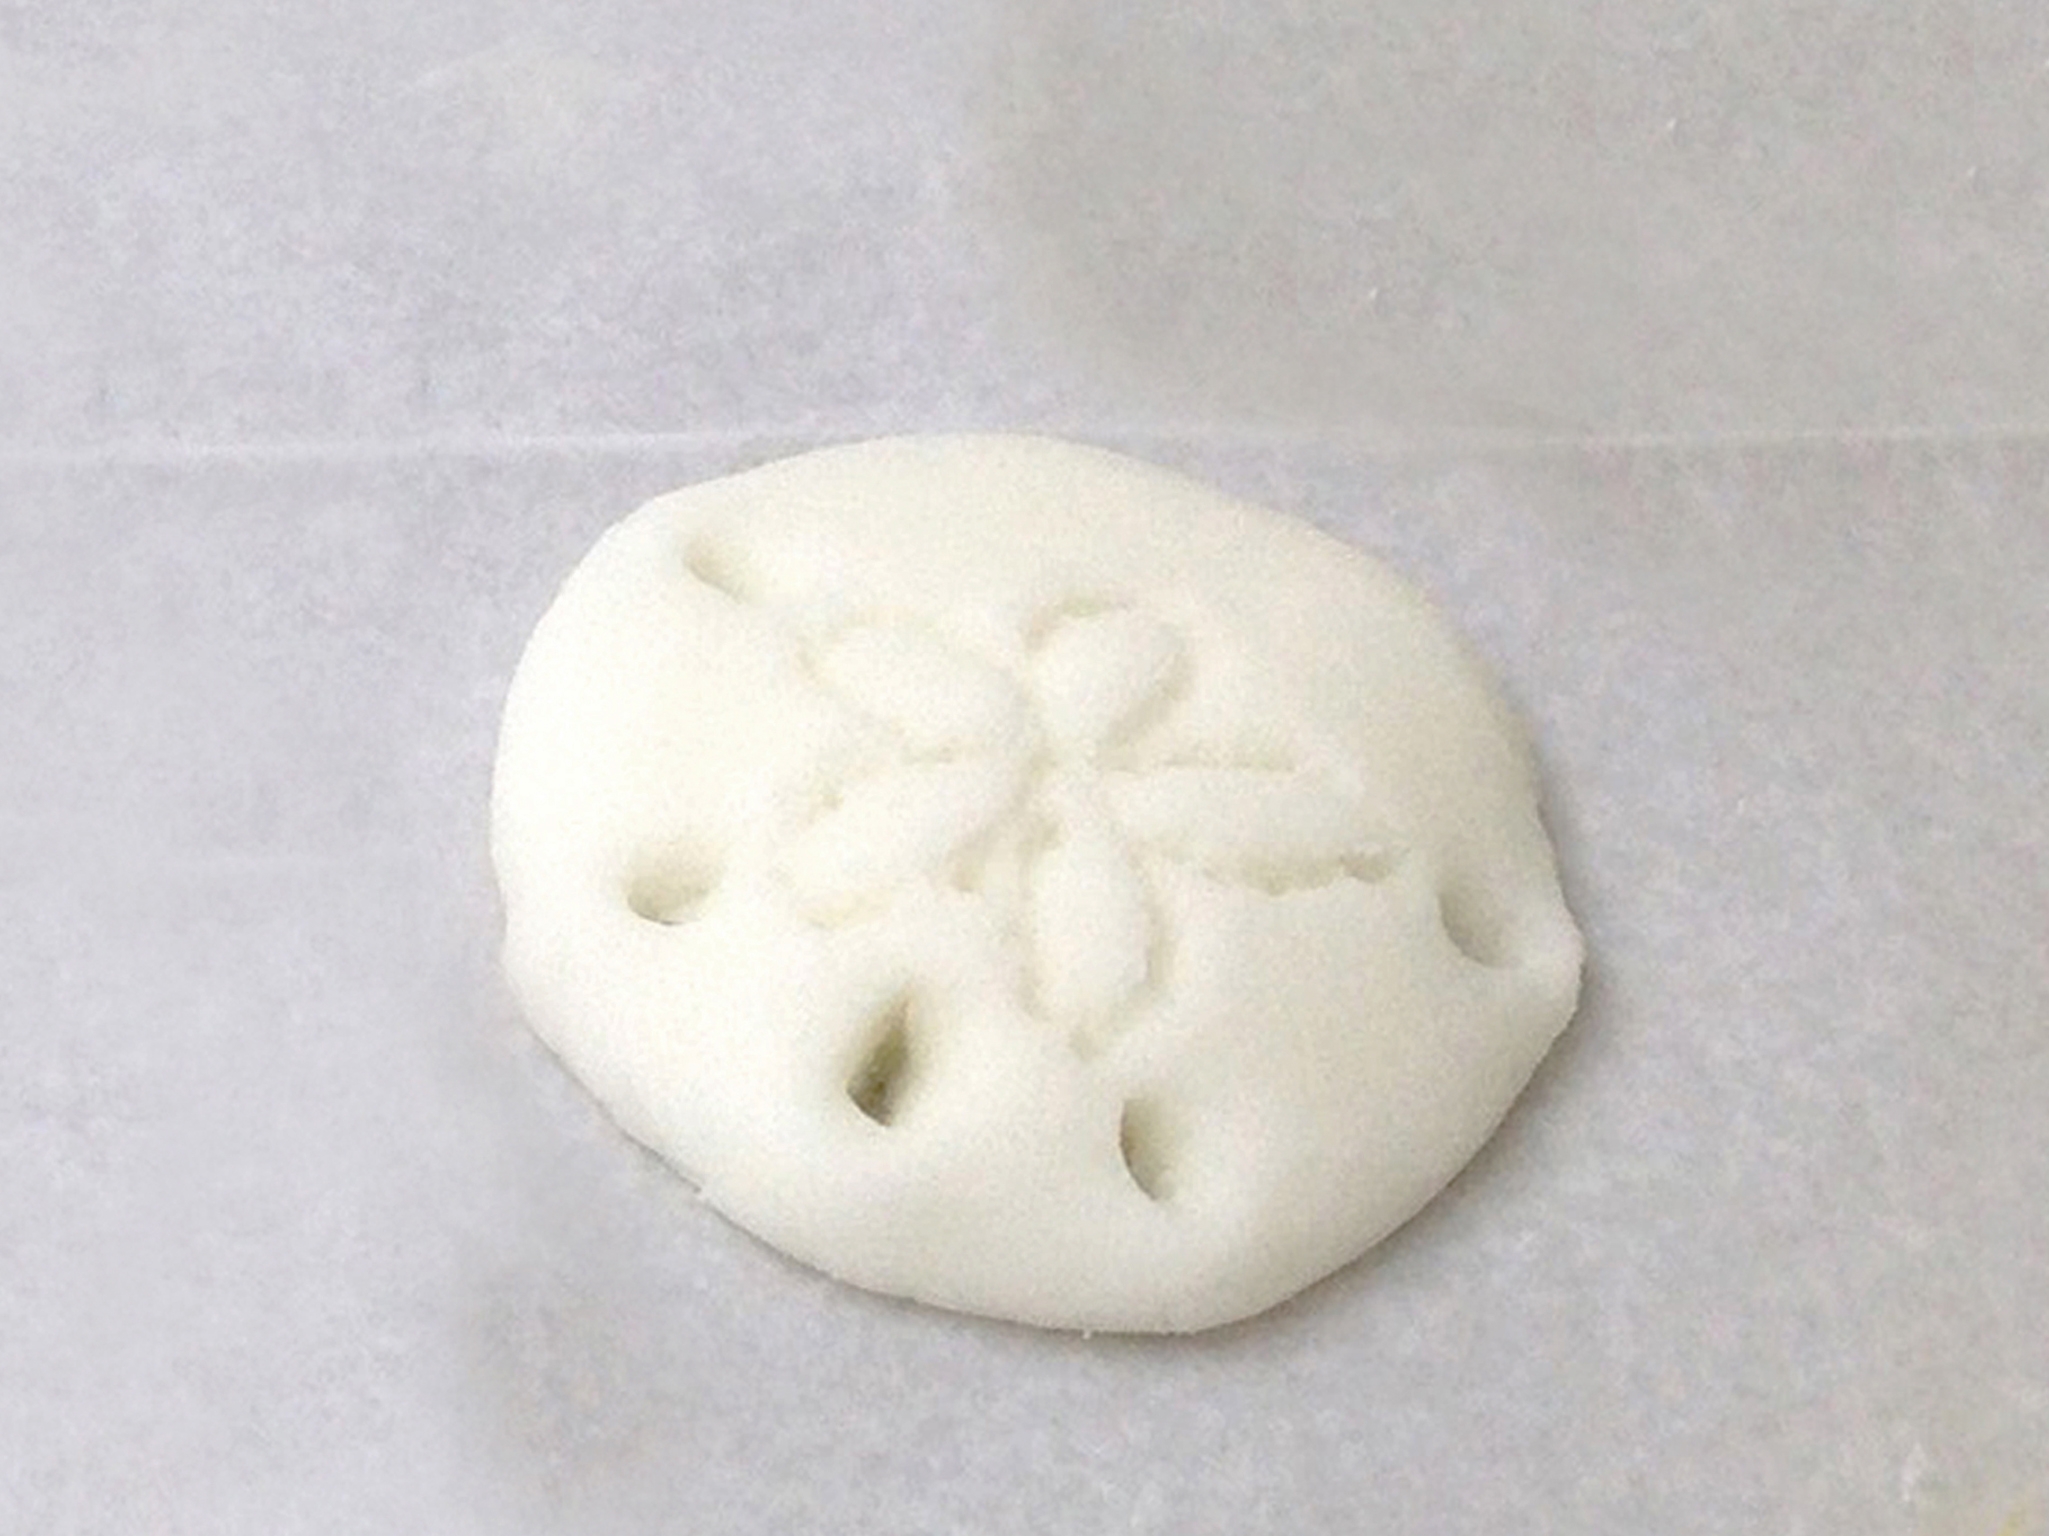
Step 5
Sand dollar: Roll a round ball of dough and flatten it. With a pencil tip, gently outline a flower shape in a dotted pattern. Poke out holes to add additional details along the edges.
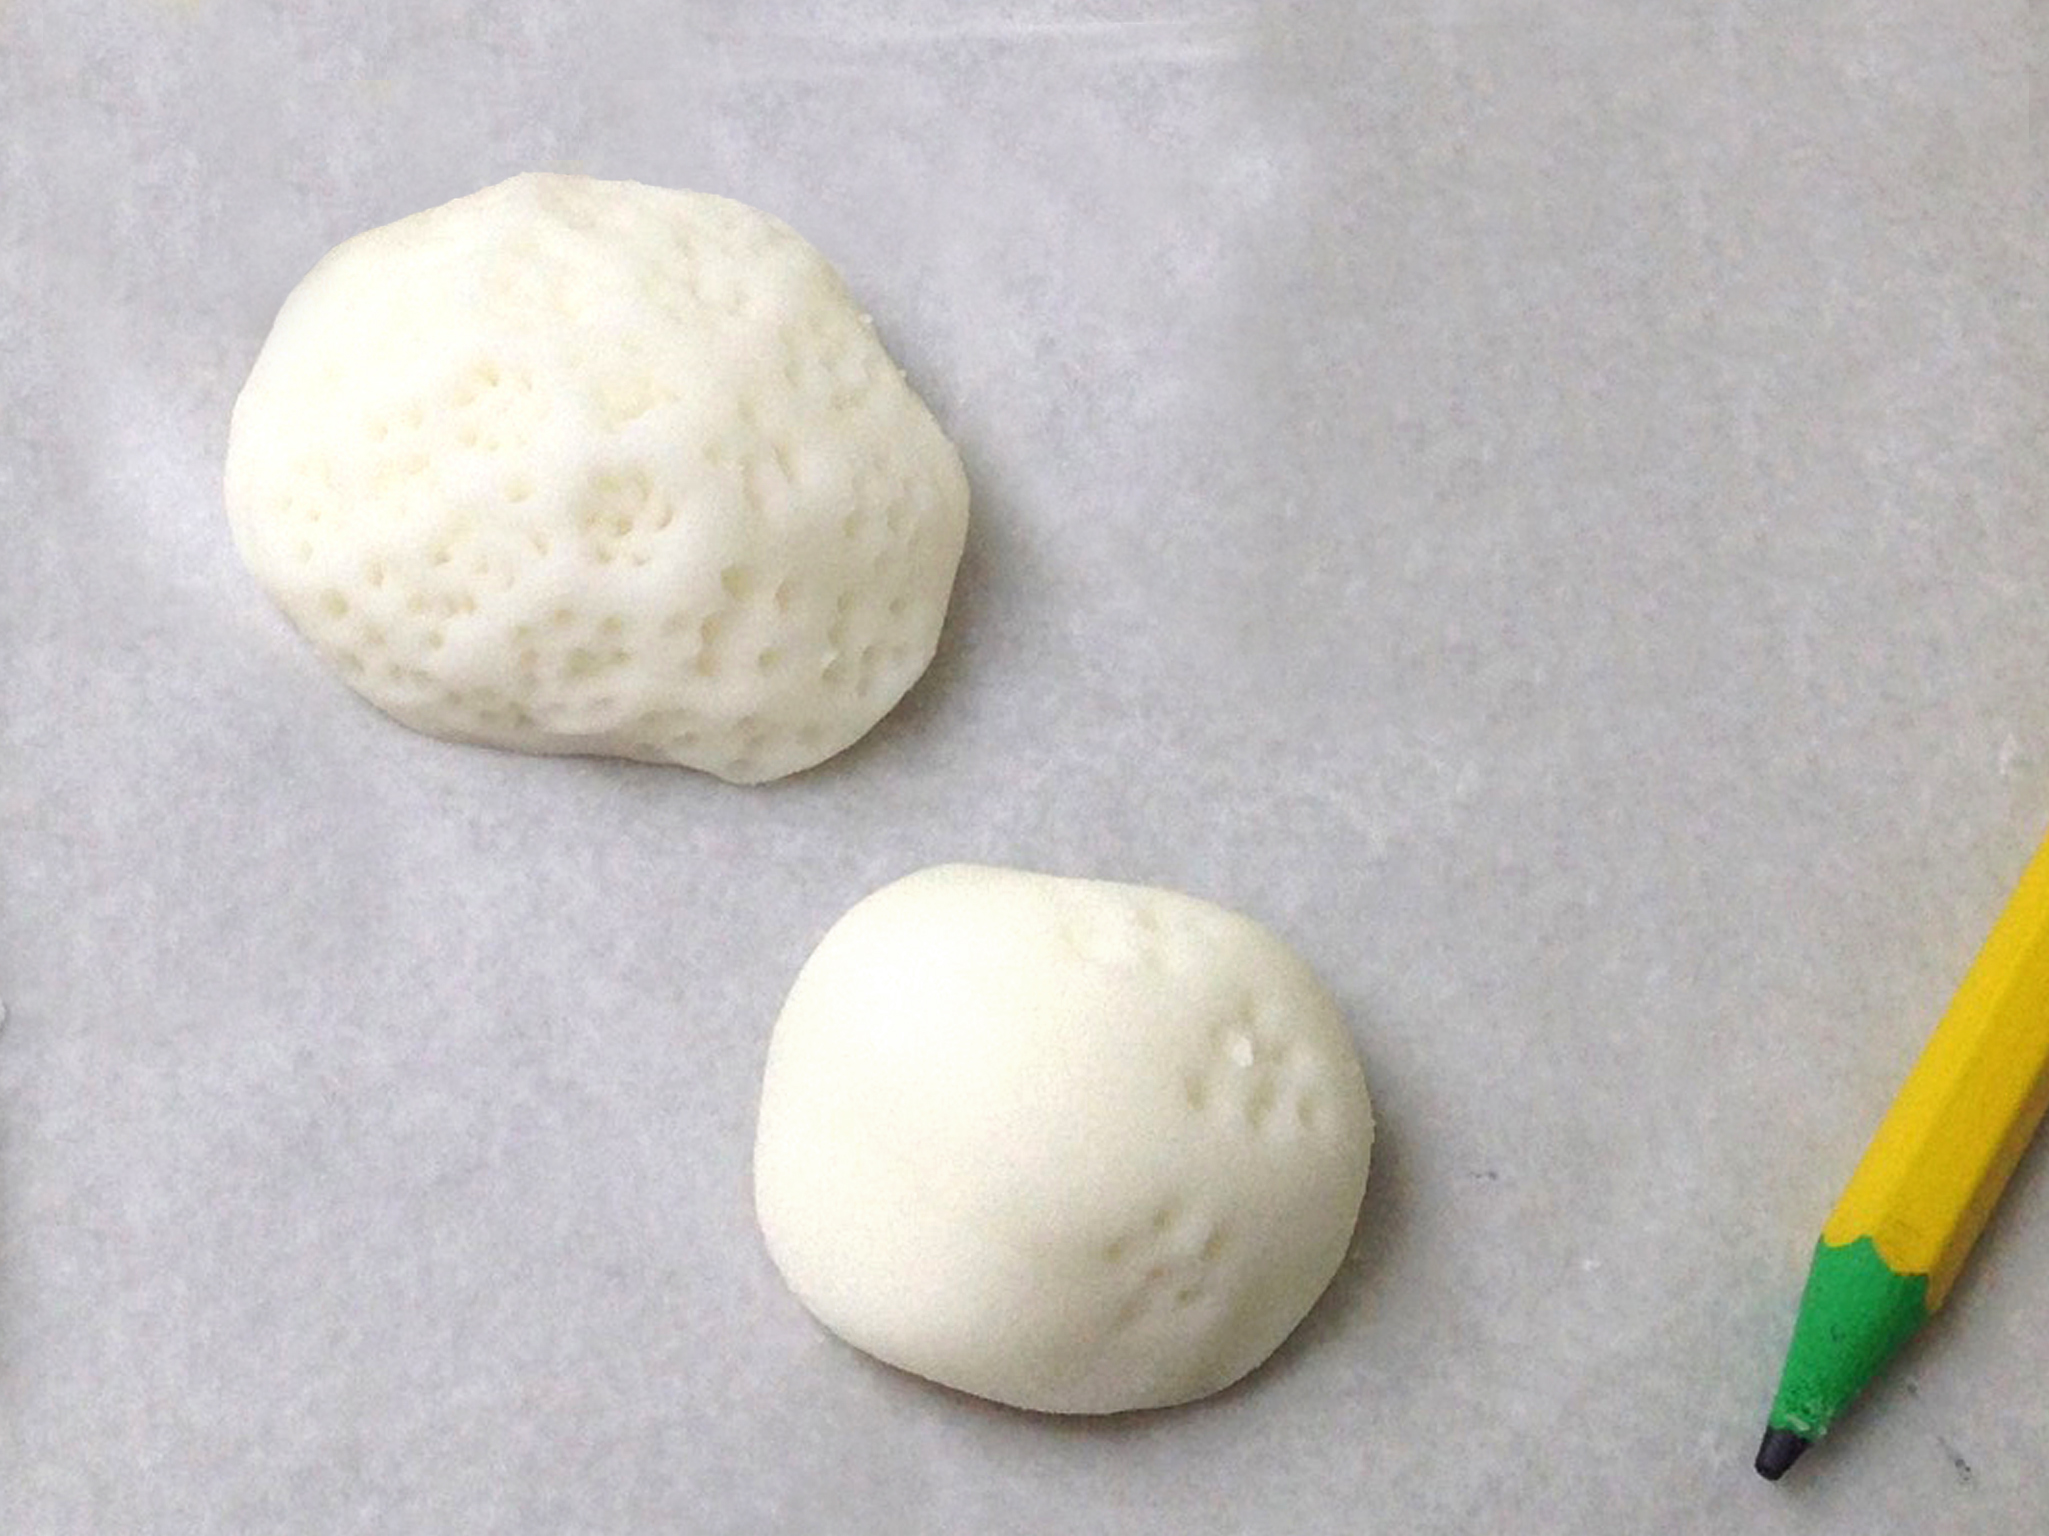
Step 6
Coral rocks:Roll a round ball and use the tip of a pencil to create clusters of small holes
Step 7
Tube Sponge:Roll out a few logs of different lengths and clump them together at one end. Use a pencil to poke out a hole at the tip of each tube. Get creative! What other beach formations can you think of?

Step 8
Step 4:Once you are done, leave them to dry for about 2 days. (This may vary depending on the temperature and humidity in your area).
Tip
For faster results, your creations can be baked in the oven at 175 F for 45 minutes, but the heat will turn your creations light brown.


