
Step-by-step tutorial
Learn more

When you hard boil an egg, molecular chemistry is at work. Eggs are made up mostly of two kinds of molecules: protein and water. The proteins in a raw egg are like twisted and folded strings, floating in a watery soup. They’re held that way by weak chemical bonds within the protein (and by the water, which pushes on different parts of the protein).
When you heat up the egg, though, the proteins start moving and shaking. They shake so much that they break their weak bonds and unfold. As they unfold, the proteins end up making new, stronger chemical bonds between each other. That turns the egg into a latticework of protein, with water trapped in between. This is what’s going on when the boiled egg turns from transparent to white.
Once the boiled egg cools down, the proteins settle and the bonds solidify to make the rubbery egg we’re familiar with. When they’re still hot, though, the bonds between the proteins are moldable, kind of like clay. What would happen, then, if you molded an egg before it cooled down? Try it out in this project and see for yourself!Step 1
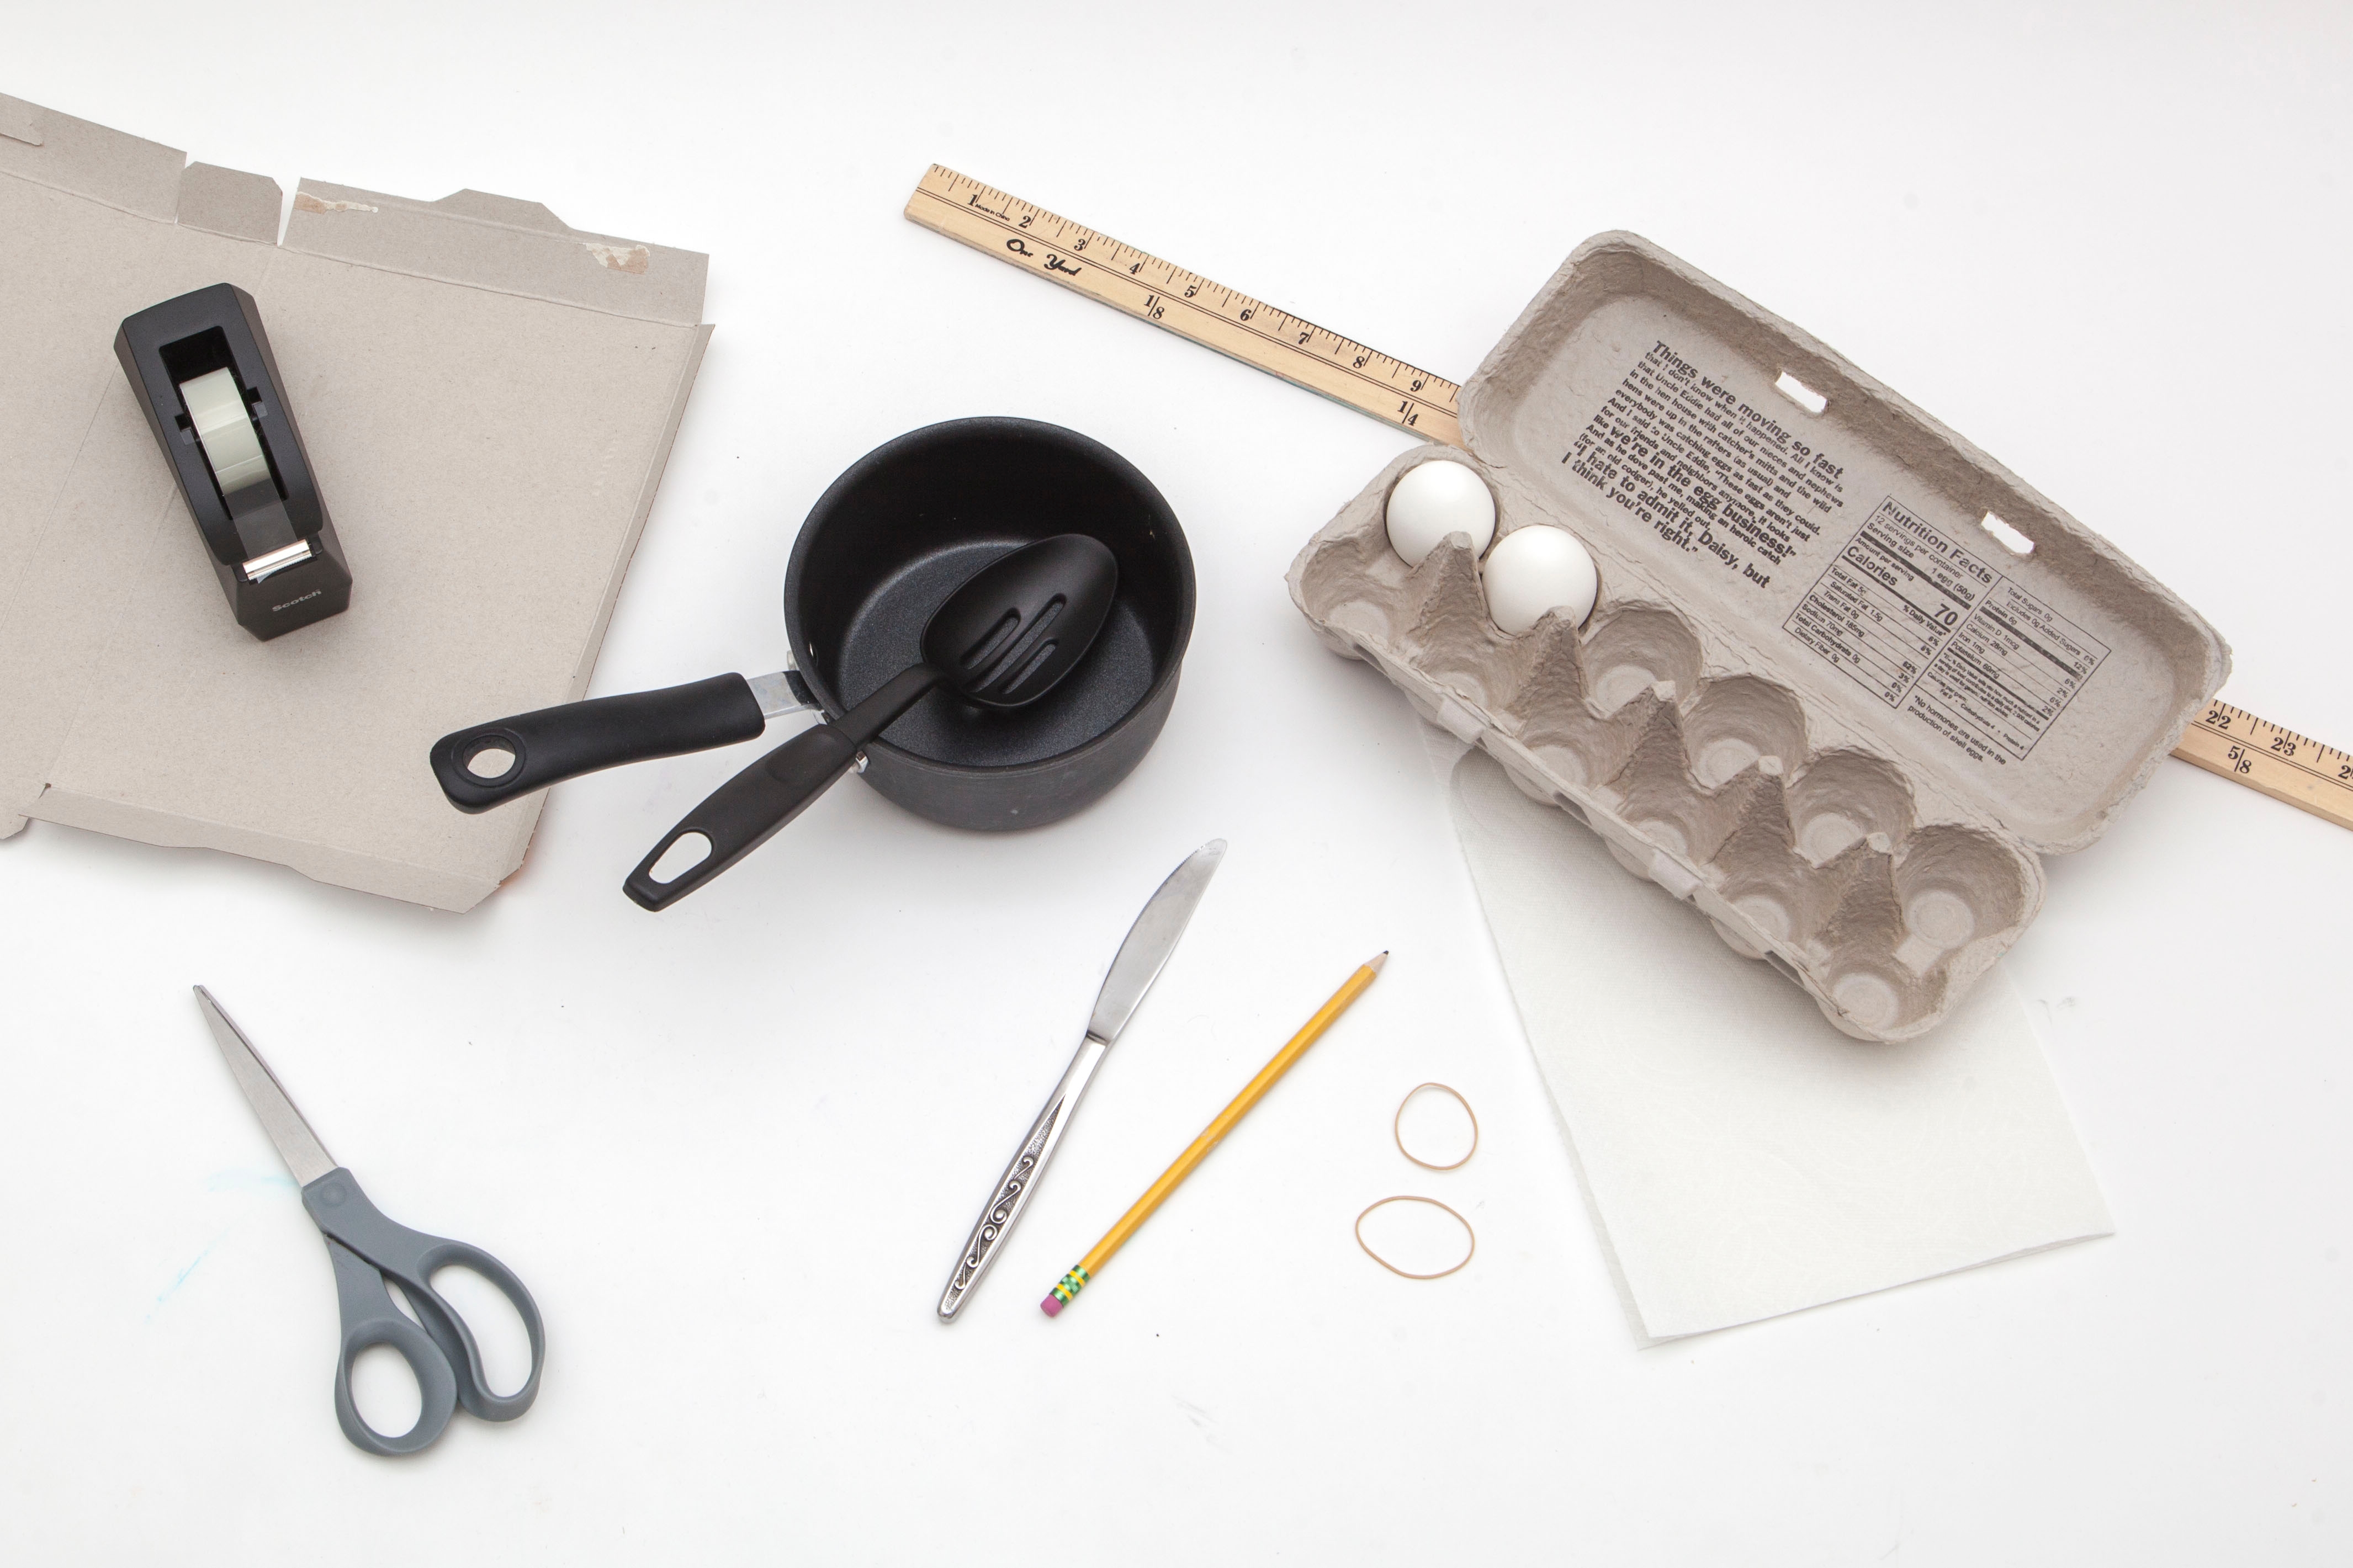
Gather your materials.

Step 2
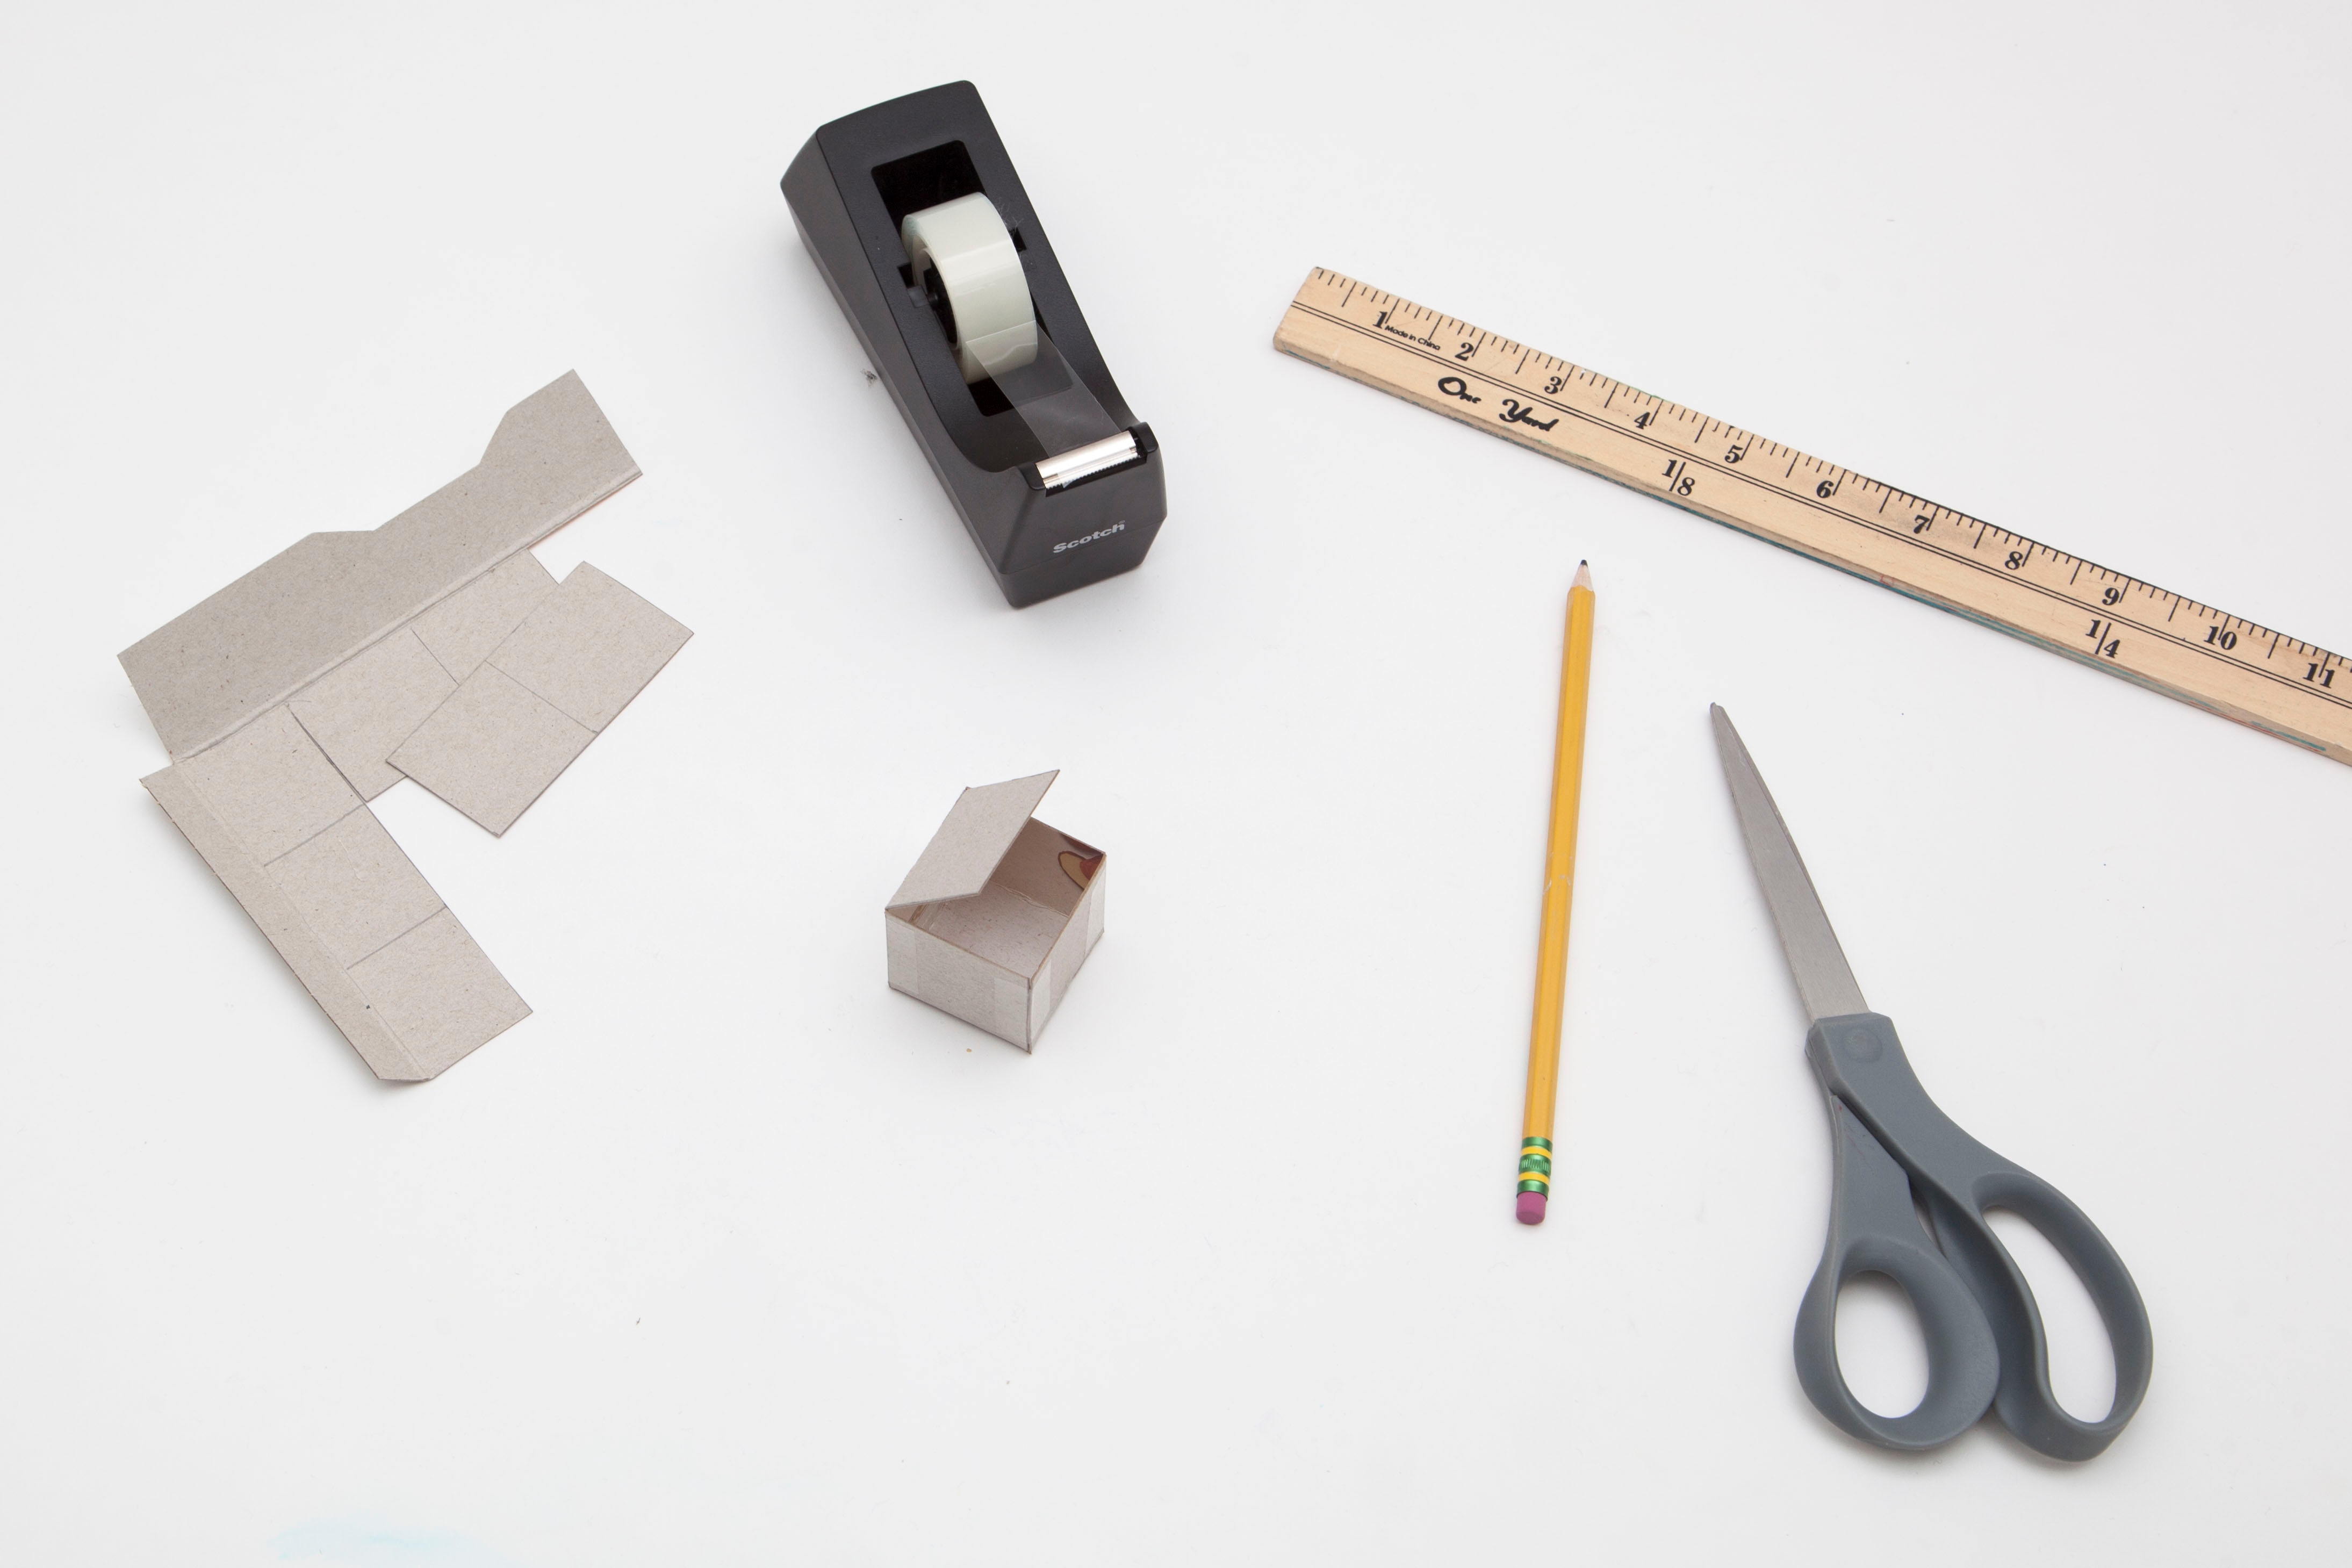
Make a 1 ½-inch square box out of the cereal box. Fold it together inside out, so the waxy outside of the cereal box is on the inside. Tape the box together.
Step 3
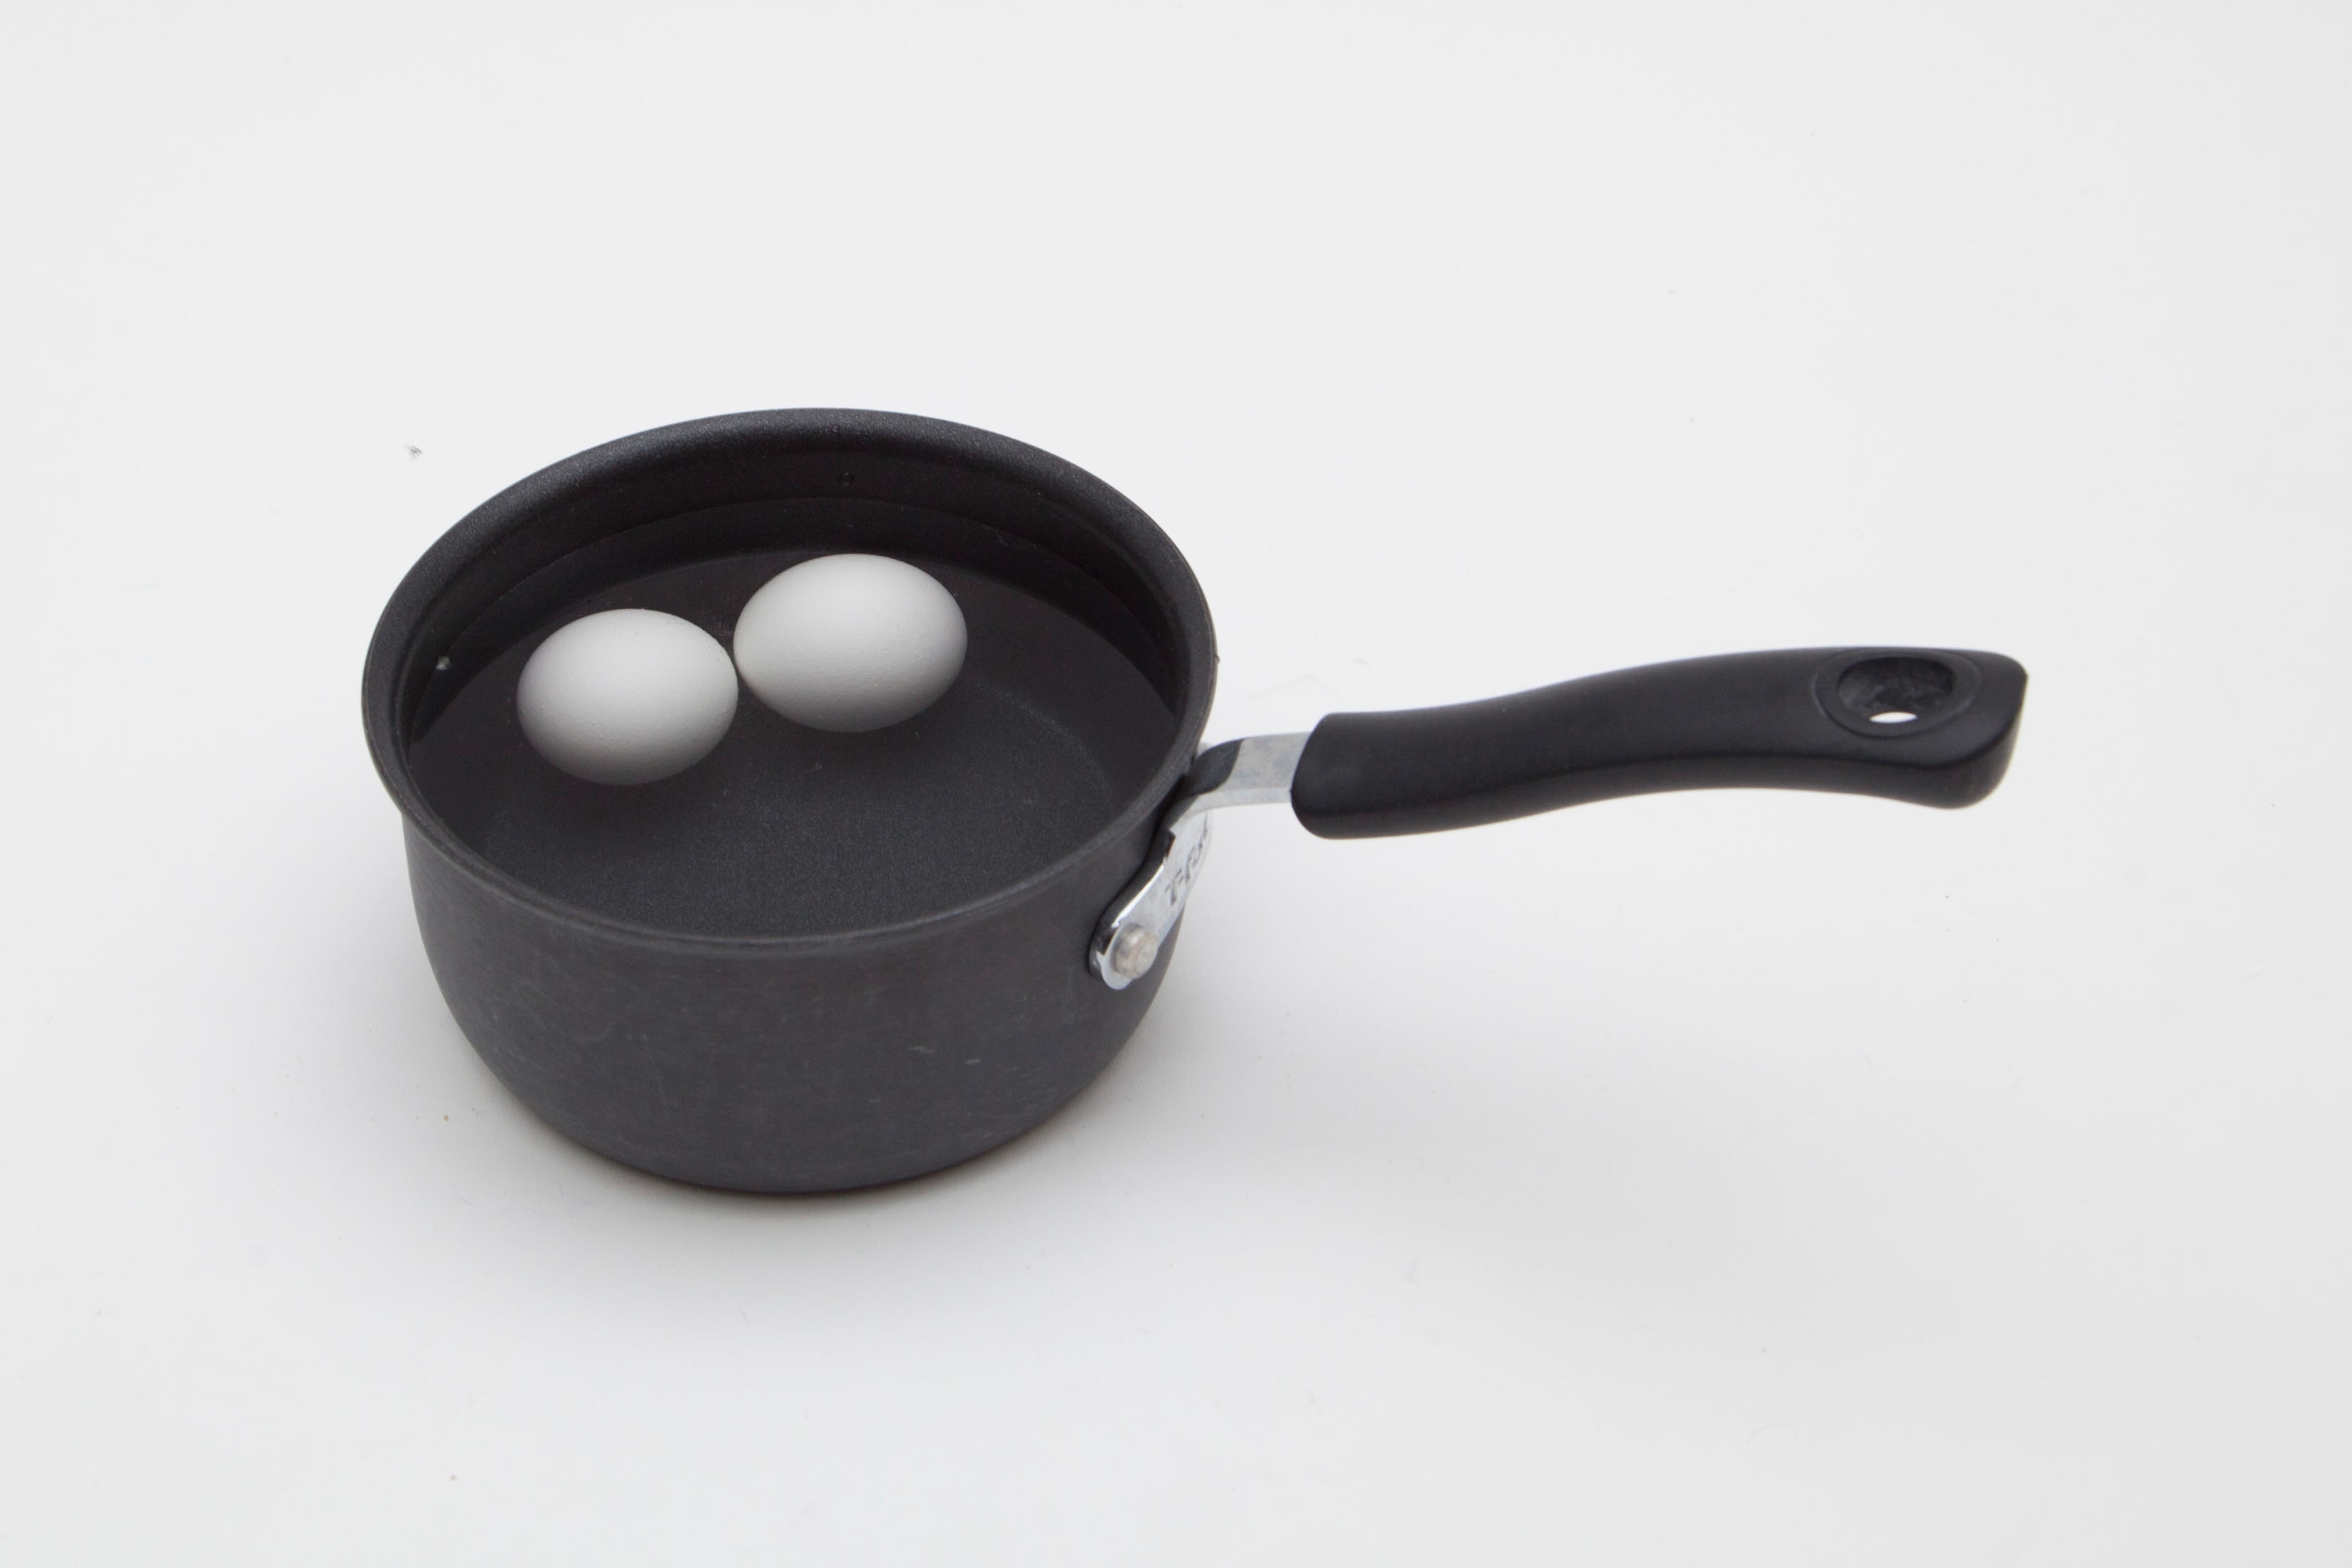
Place two eggs in the bottom of the pot and cover with water. Bring the water to a rolling boil. Continue boiling for 10 minutes. Then, remove from heat. You may need a grown-up to assist you.
Step 4
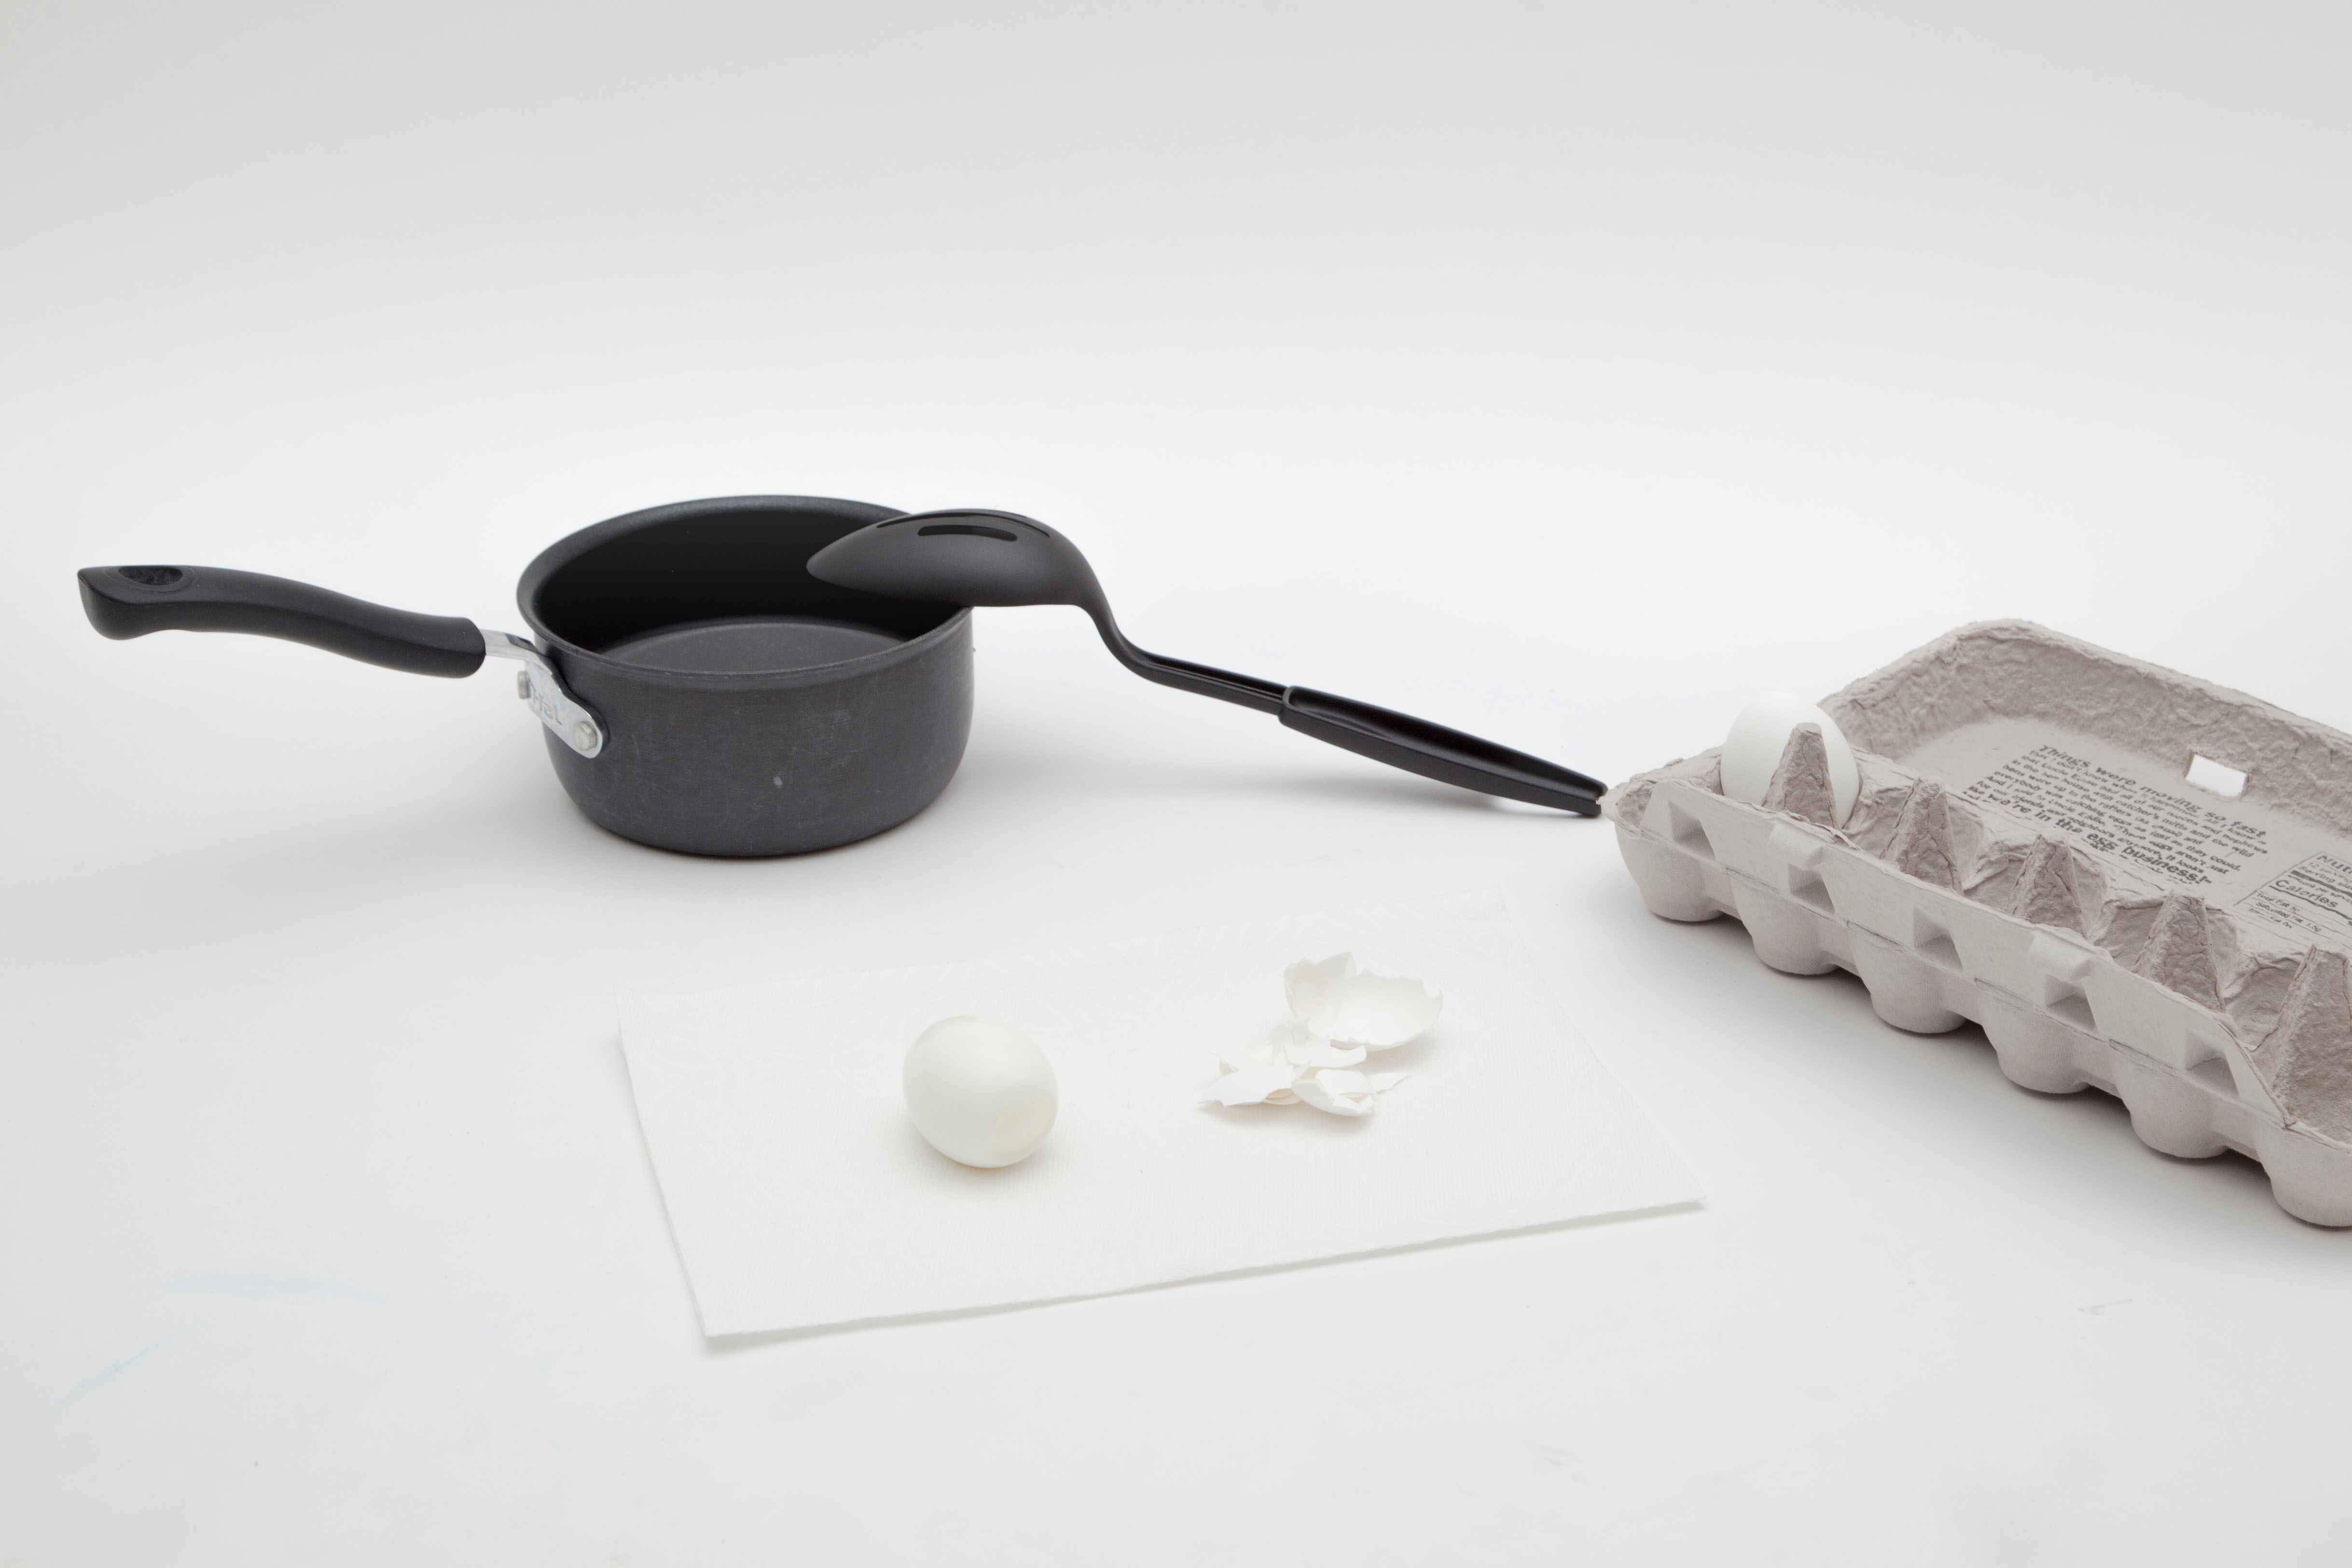
Use the slotted spoon to remove one egg from the pot, and set it aside. Then, remove the second egg and use paper towels to peel it.
Warning
The eggs will be very hot! Be careful when handling them.
Tip
Dip the peeled egg back in the pot to remove any remaining egg shell.
Step 5
Place the peeled egg into the box, pointy end down.
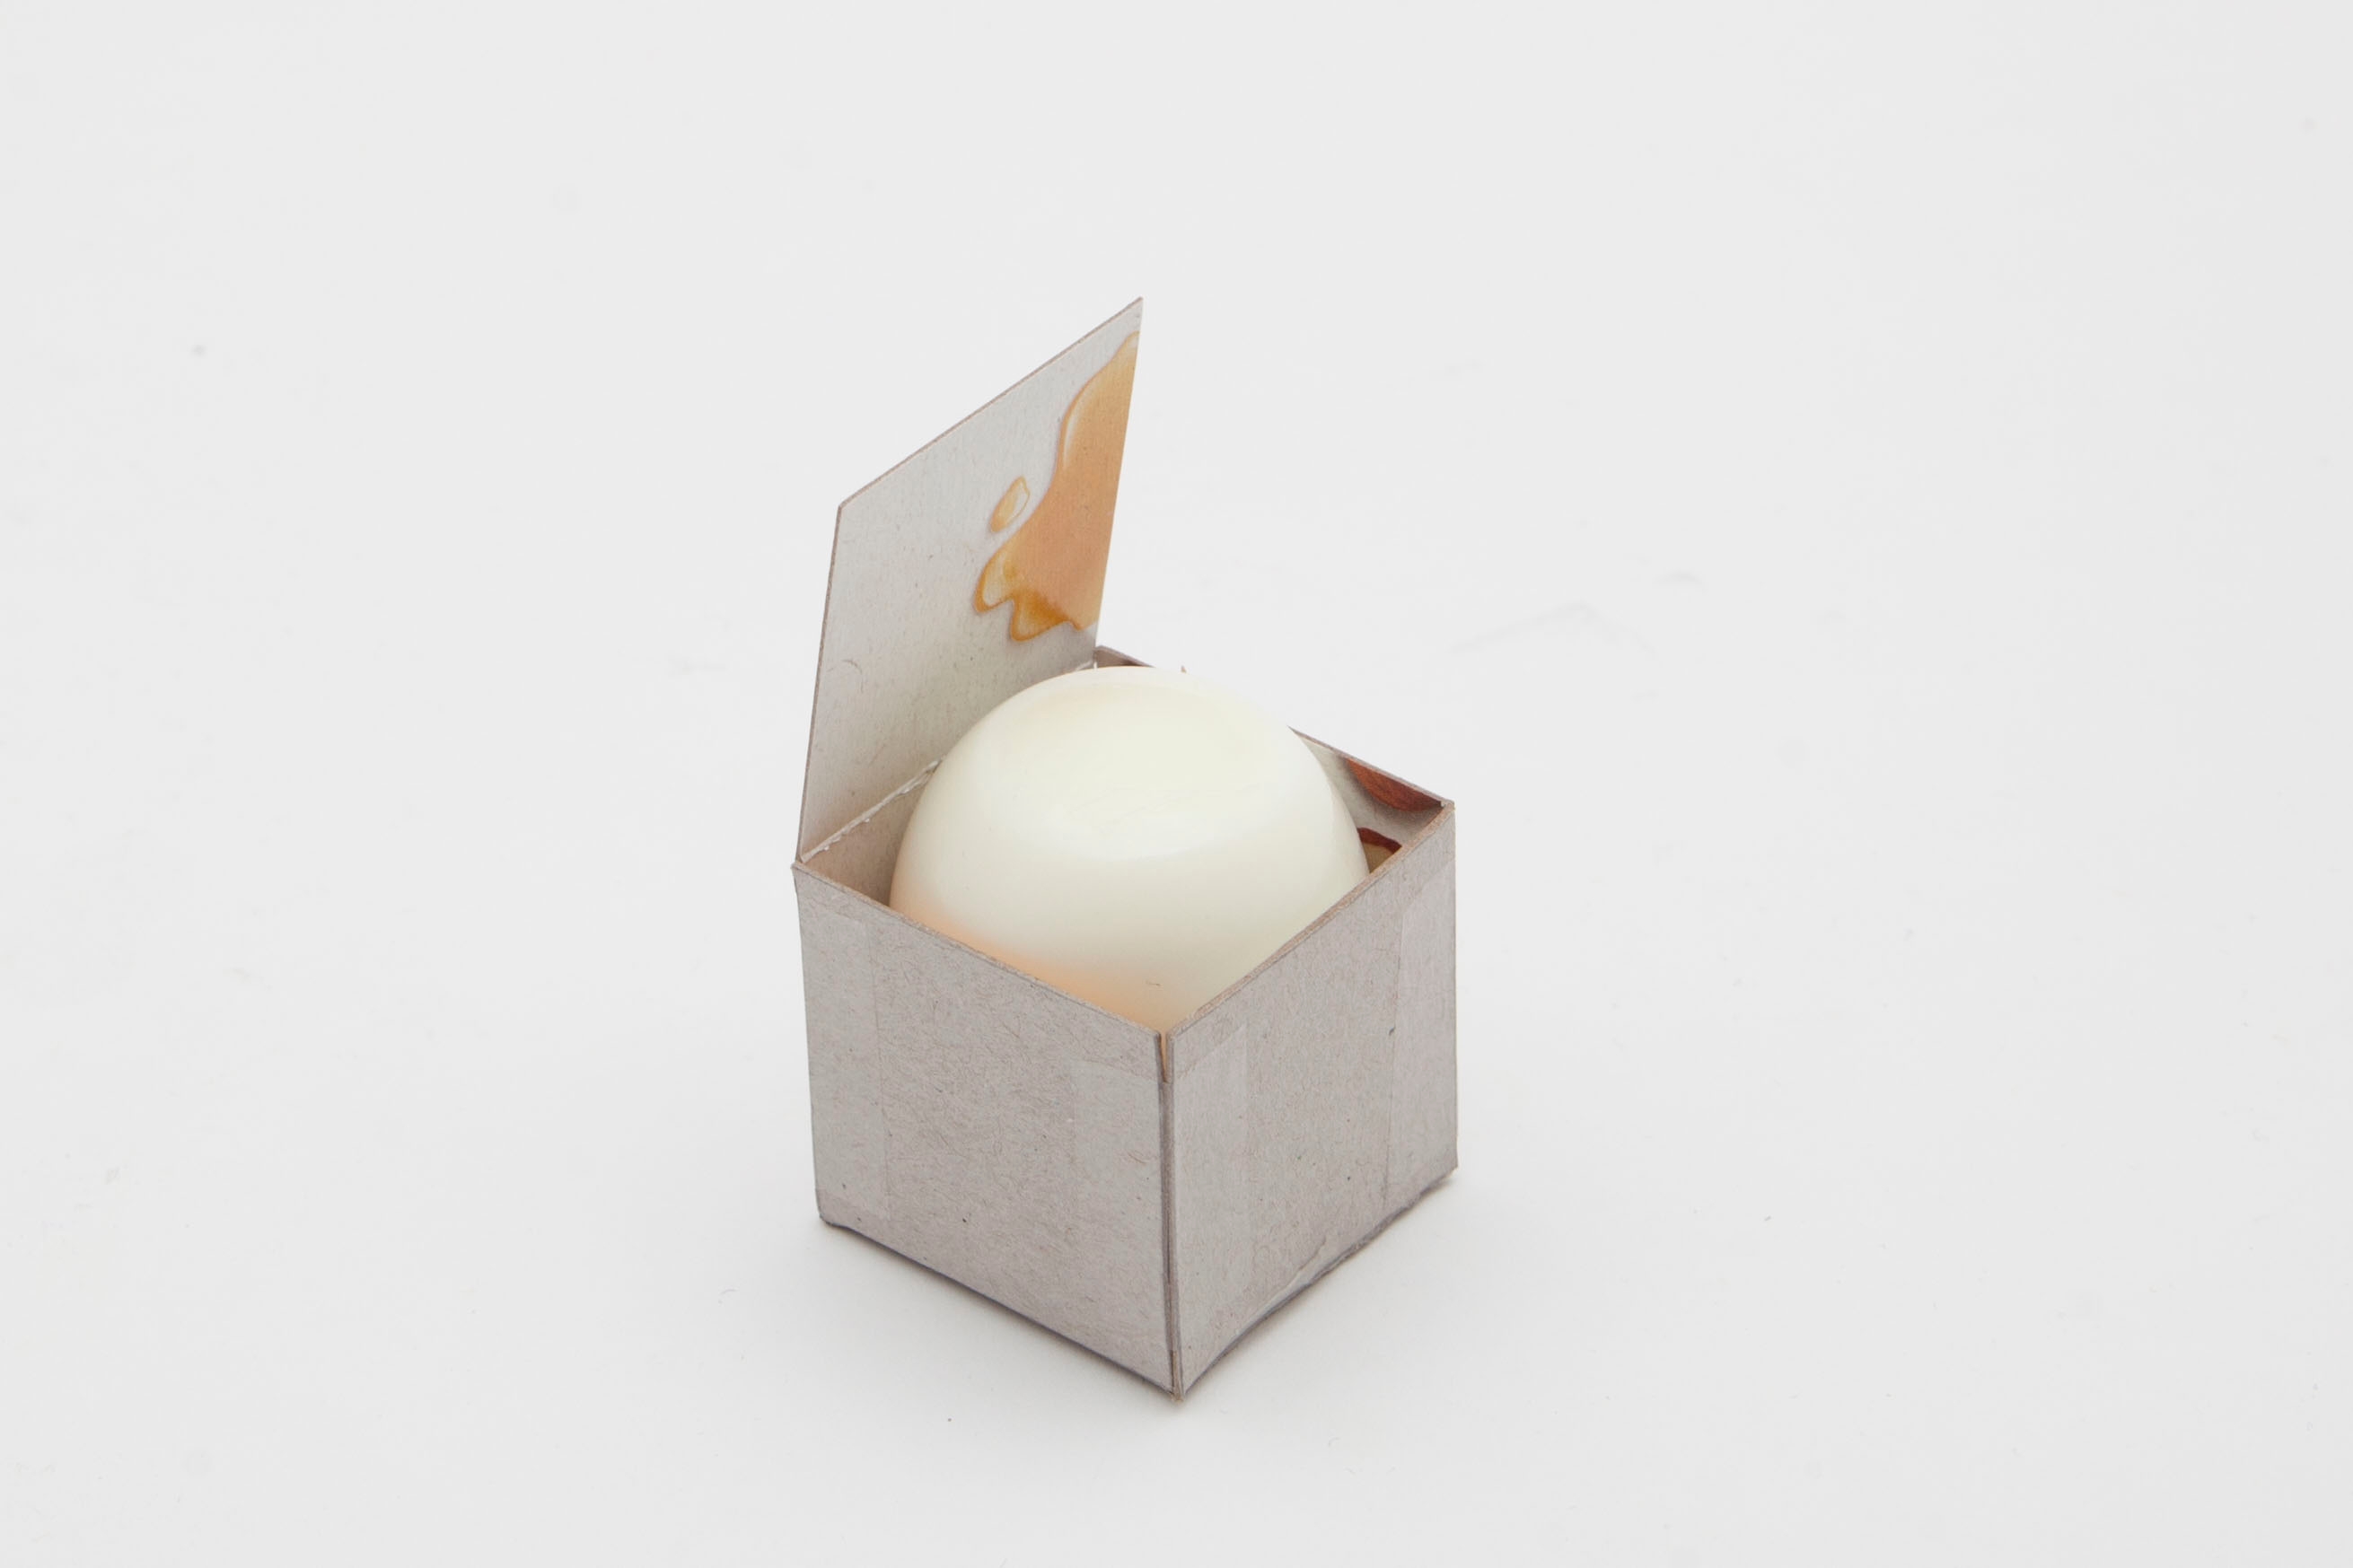
Step 6
Carefully close the box and wrap a rubber band around it. Then, leave the box in the refrigerator for about 2 hours.
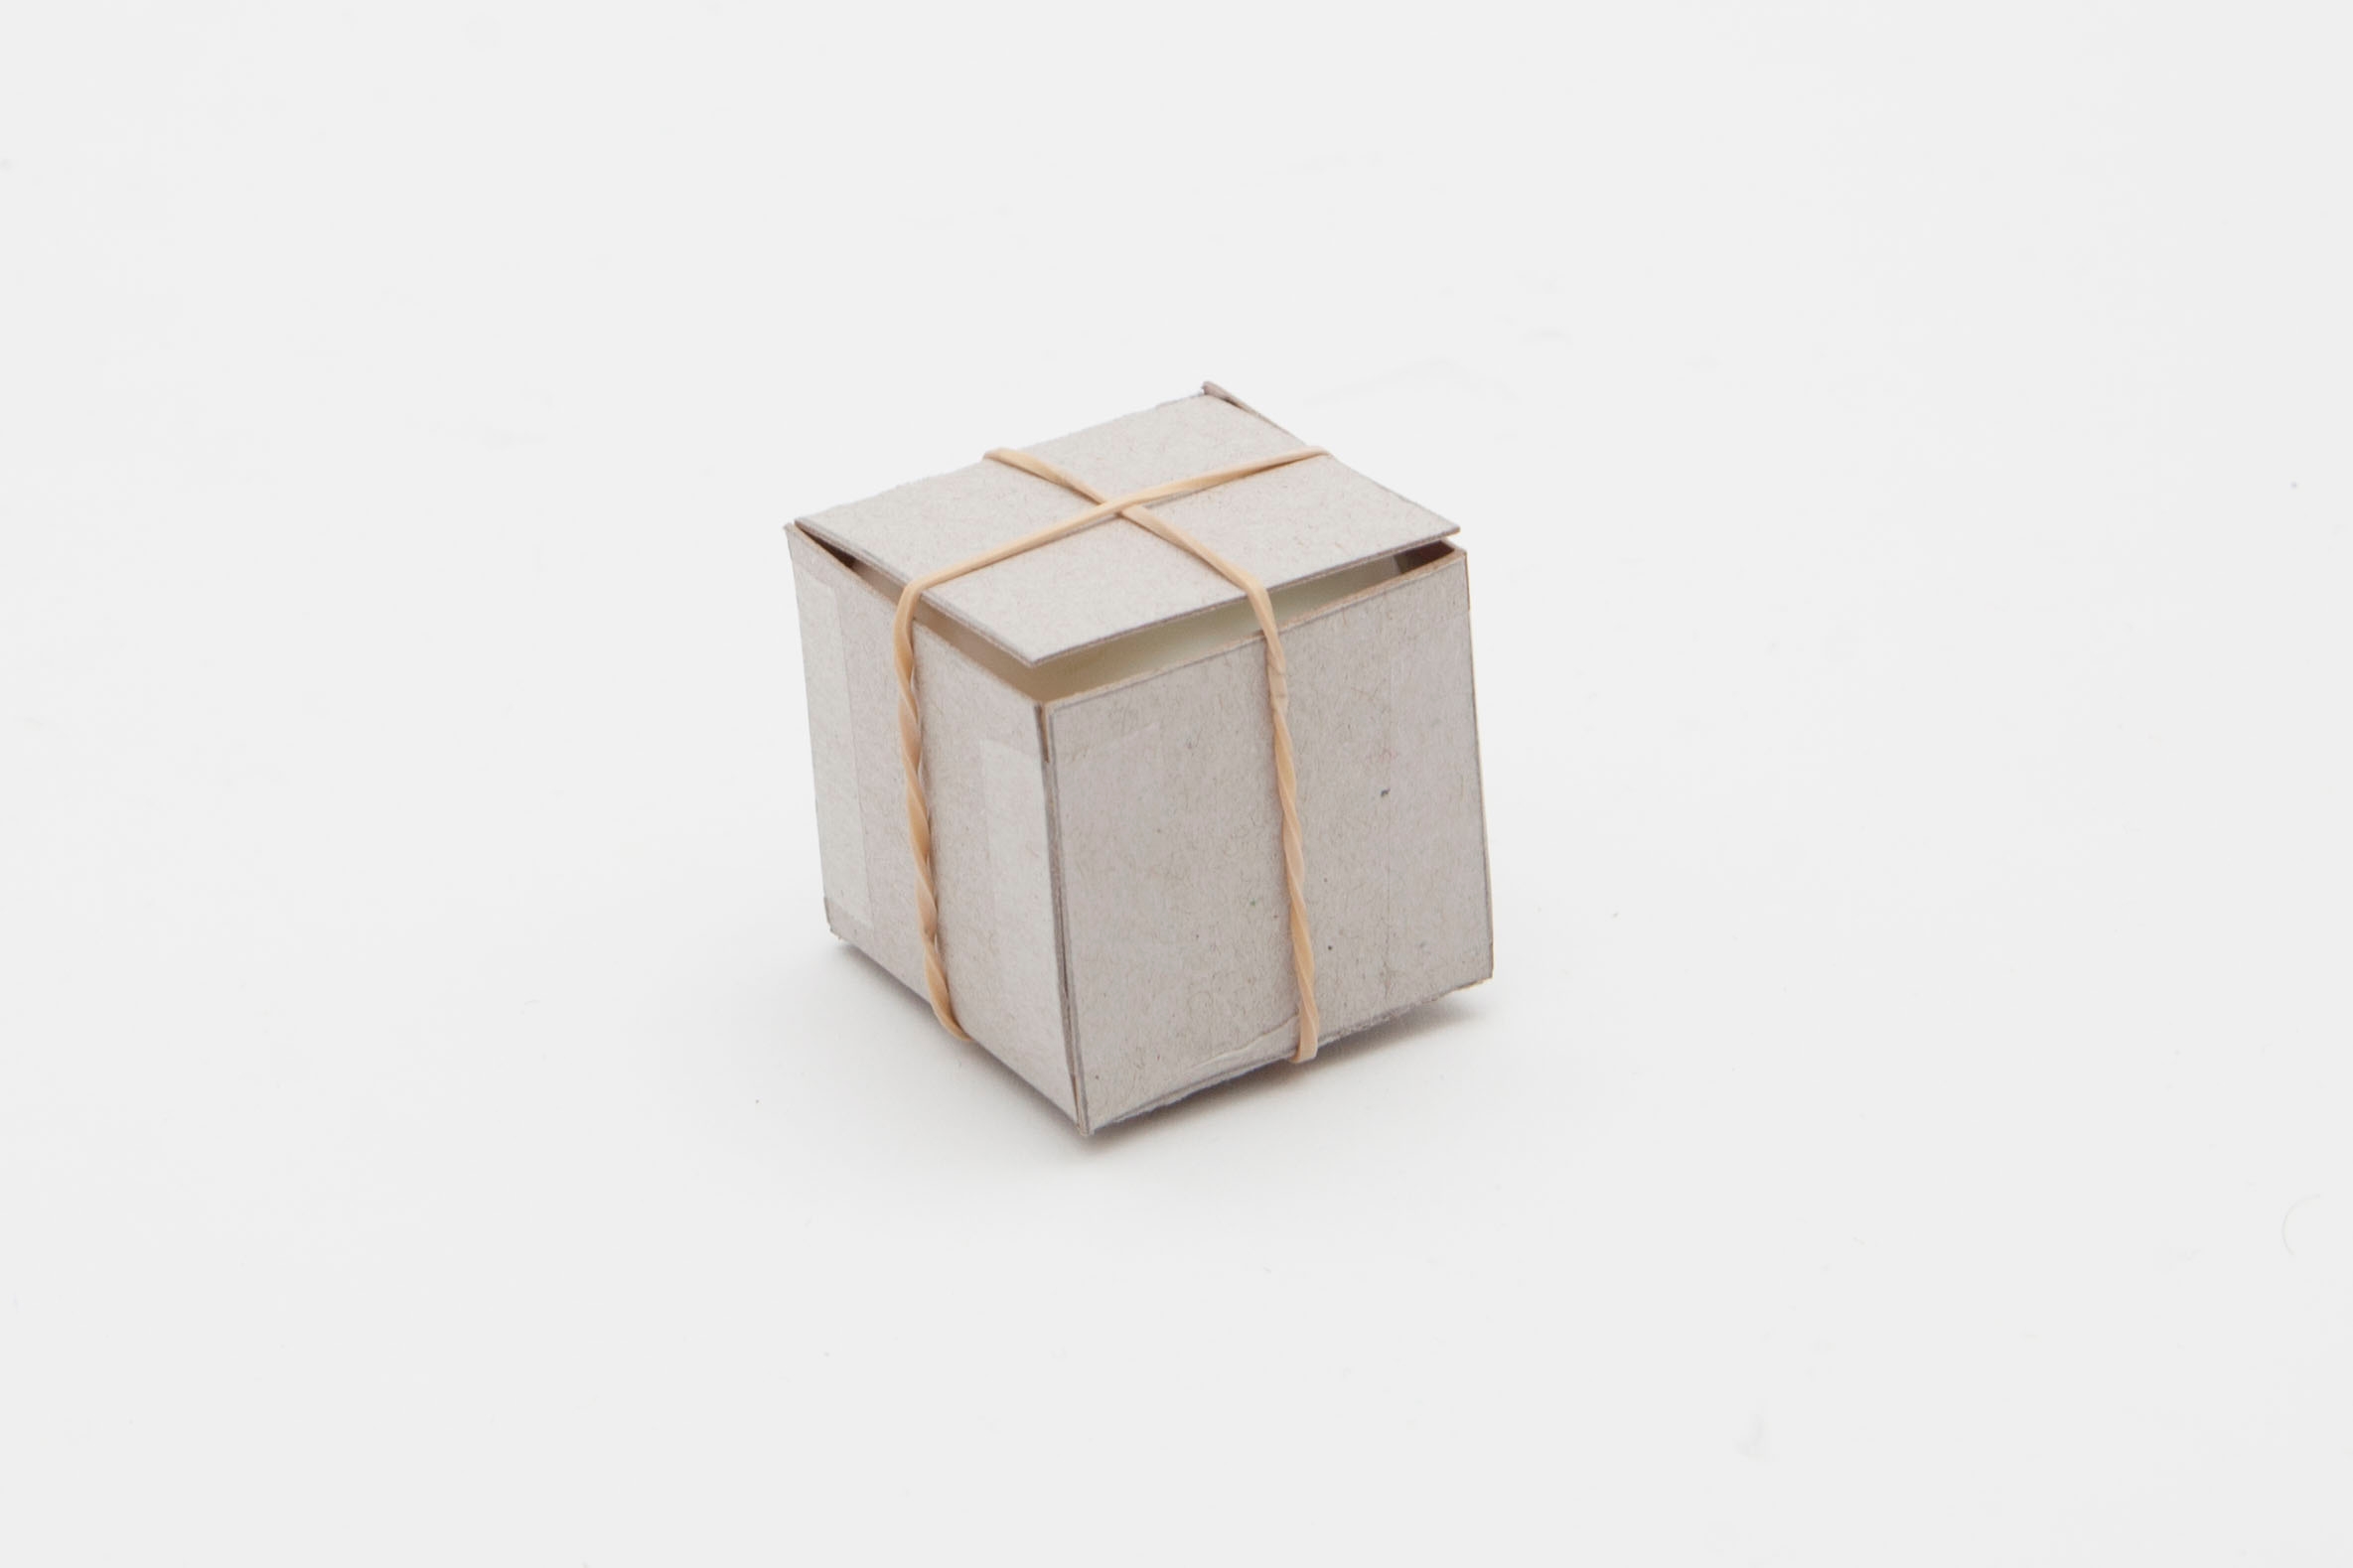
Step 7
After two hours, take the box out of the refrigerator. Remove the rubber band, and take out the egg.
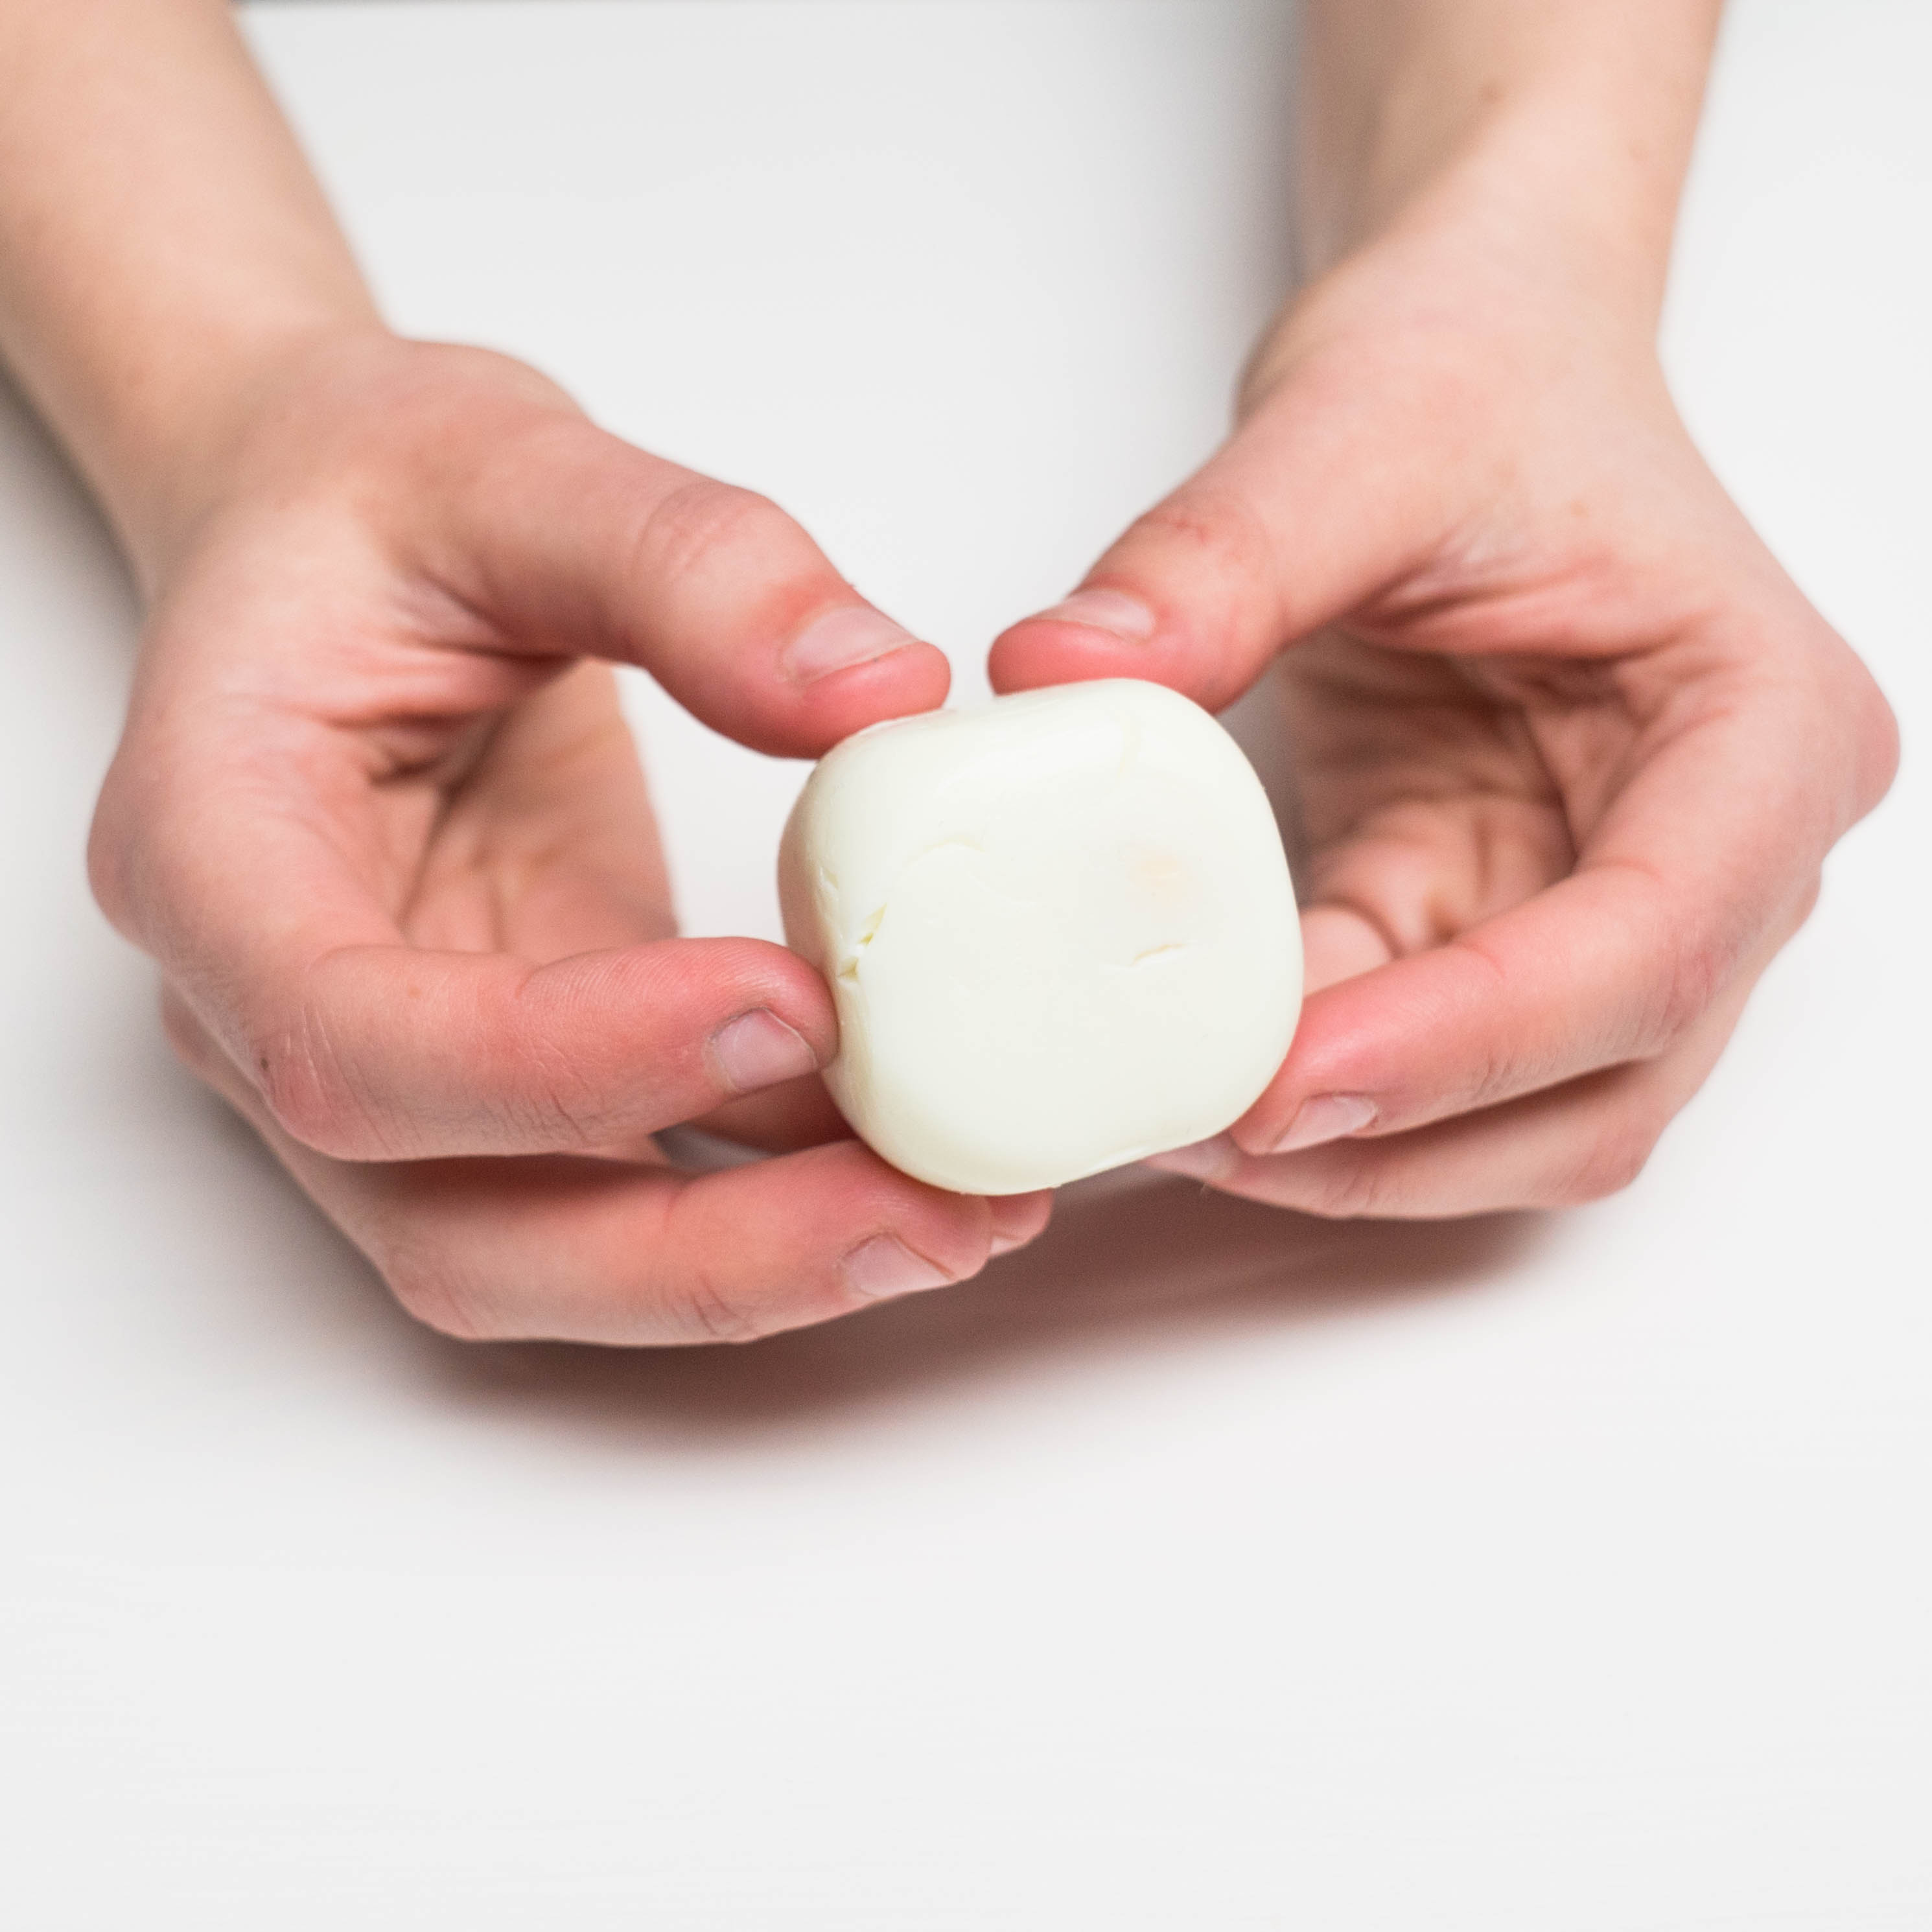
Step 8
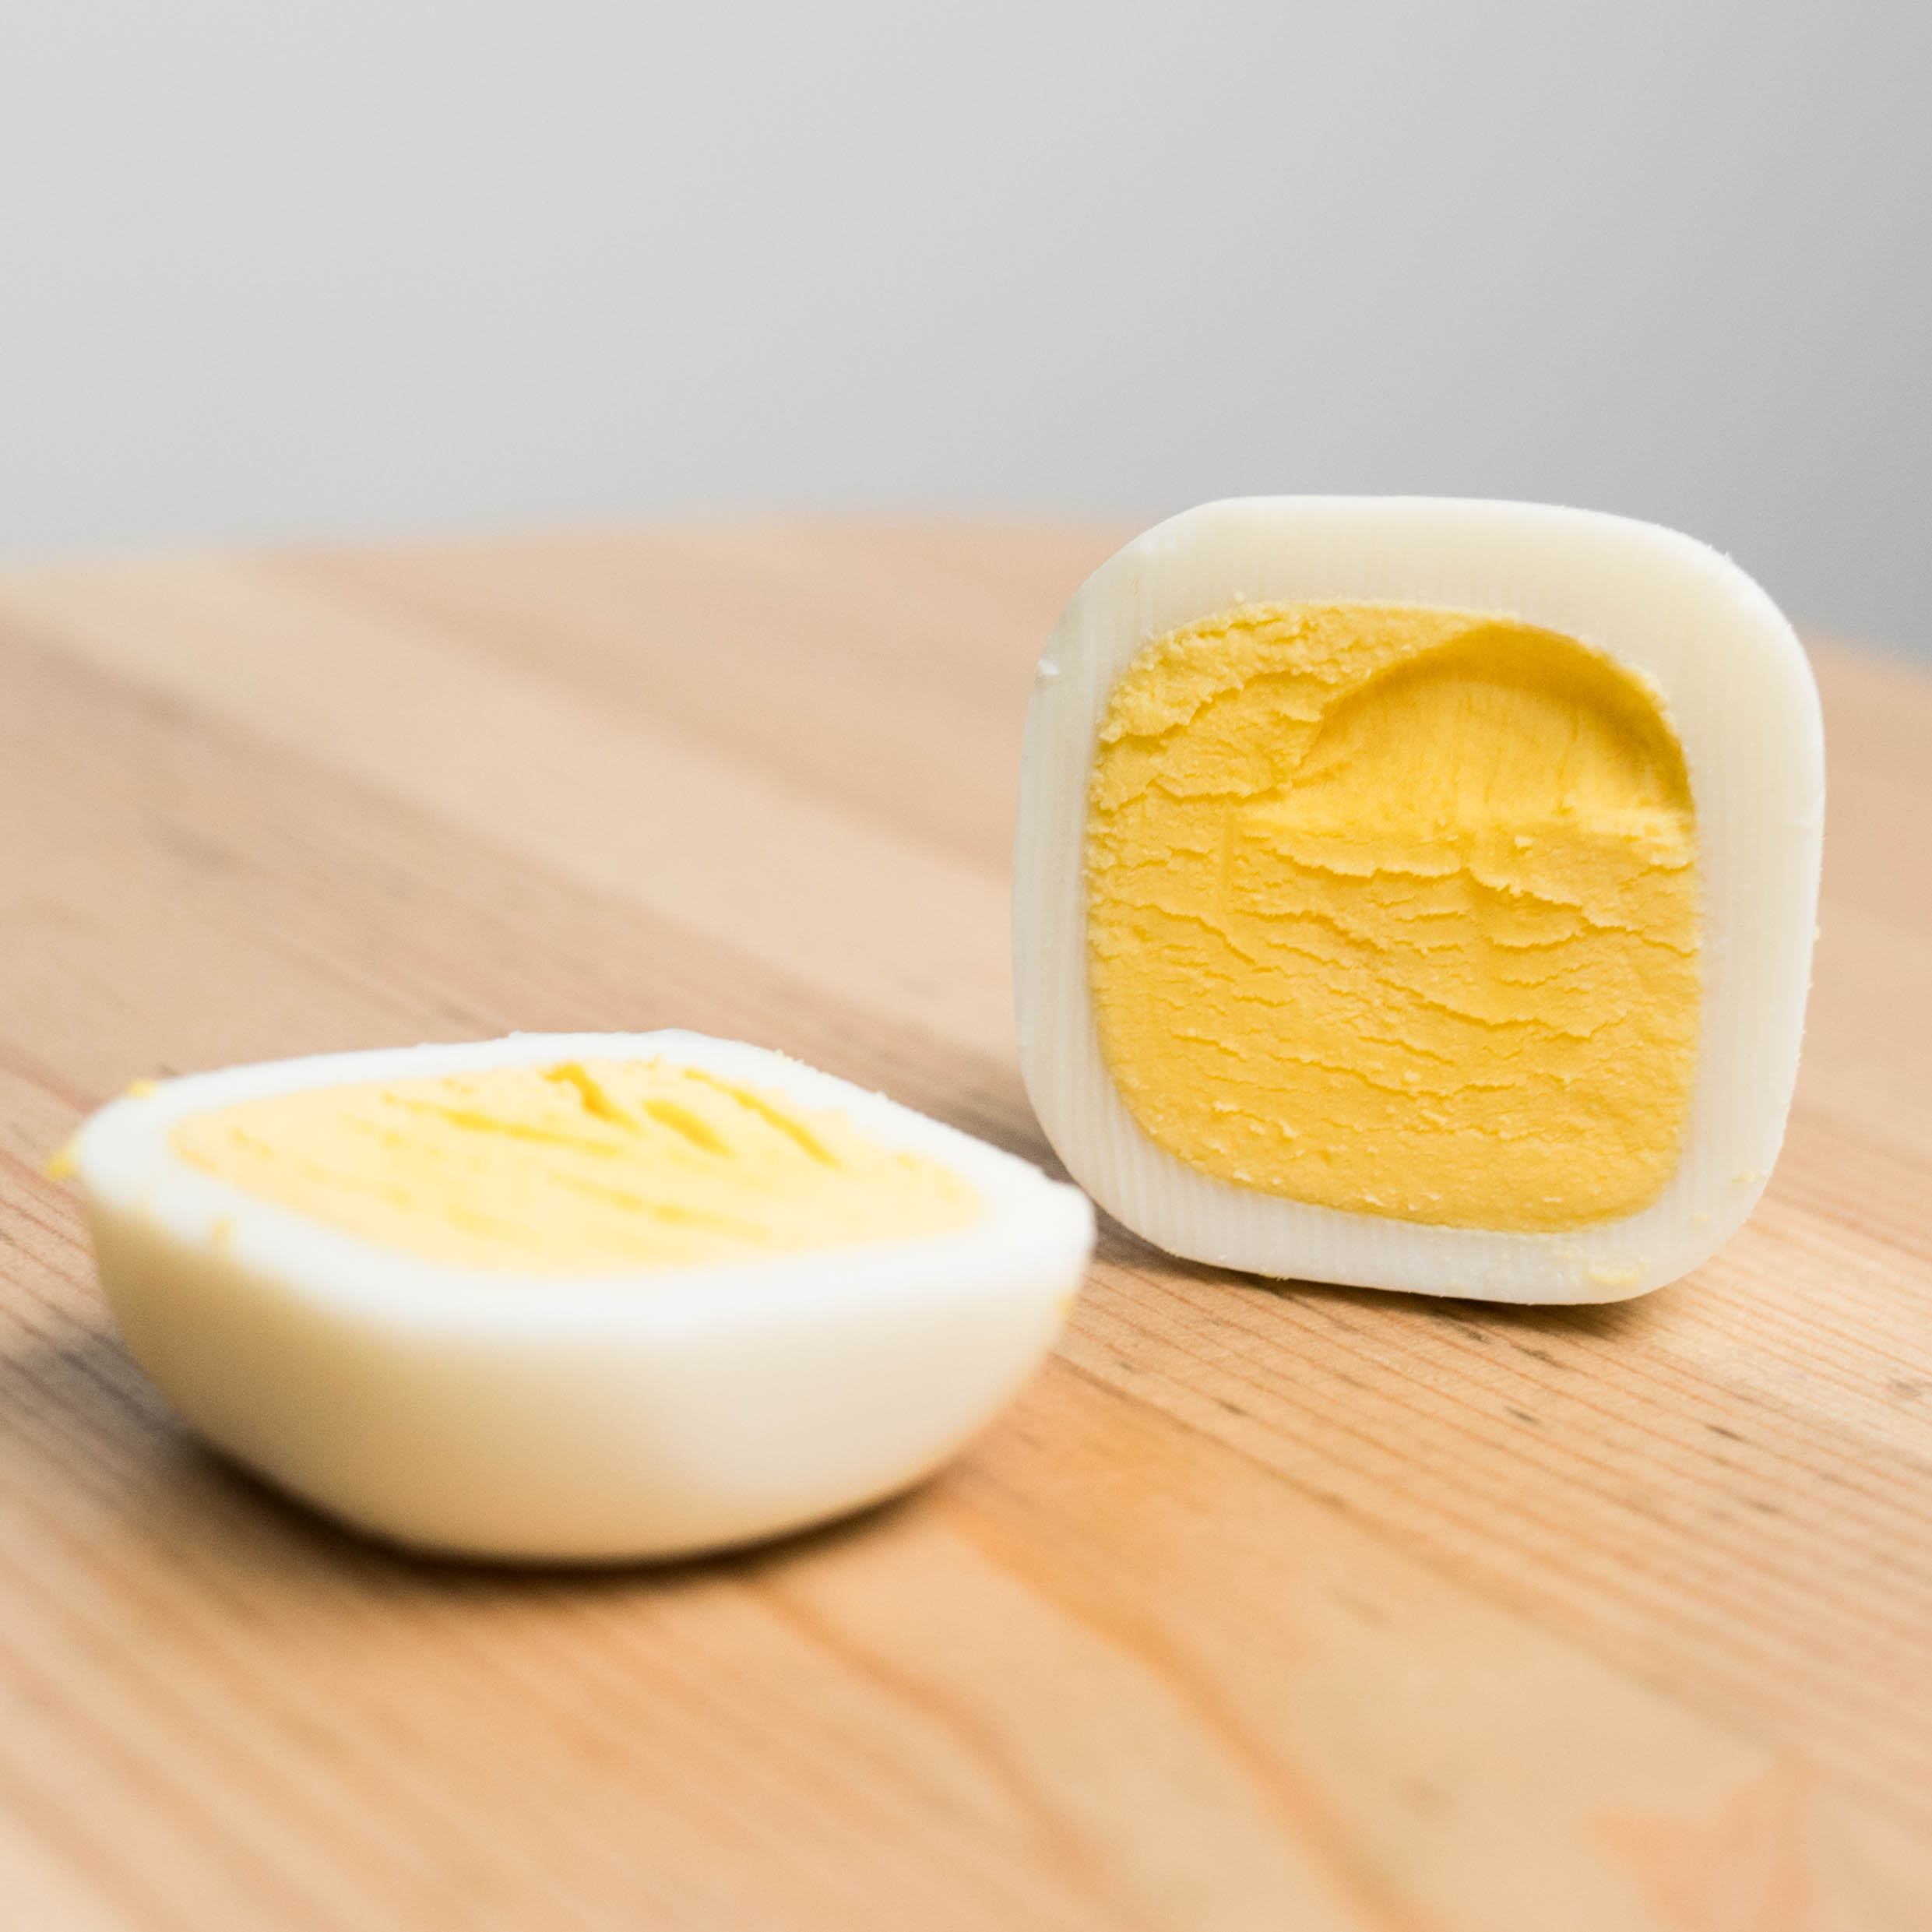
Peel the first egg. Then, cut into both eggs and compare them! What other shapes can you make?
Learn more
There are lots of other egg-citing projects you can do with eggs! See what happens when you leave an egg in vinegar, or search “egg” above for more ideas!


