Step-by-step tutorial
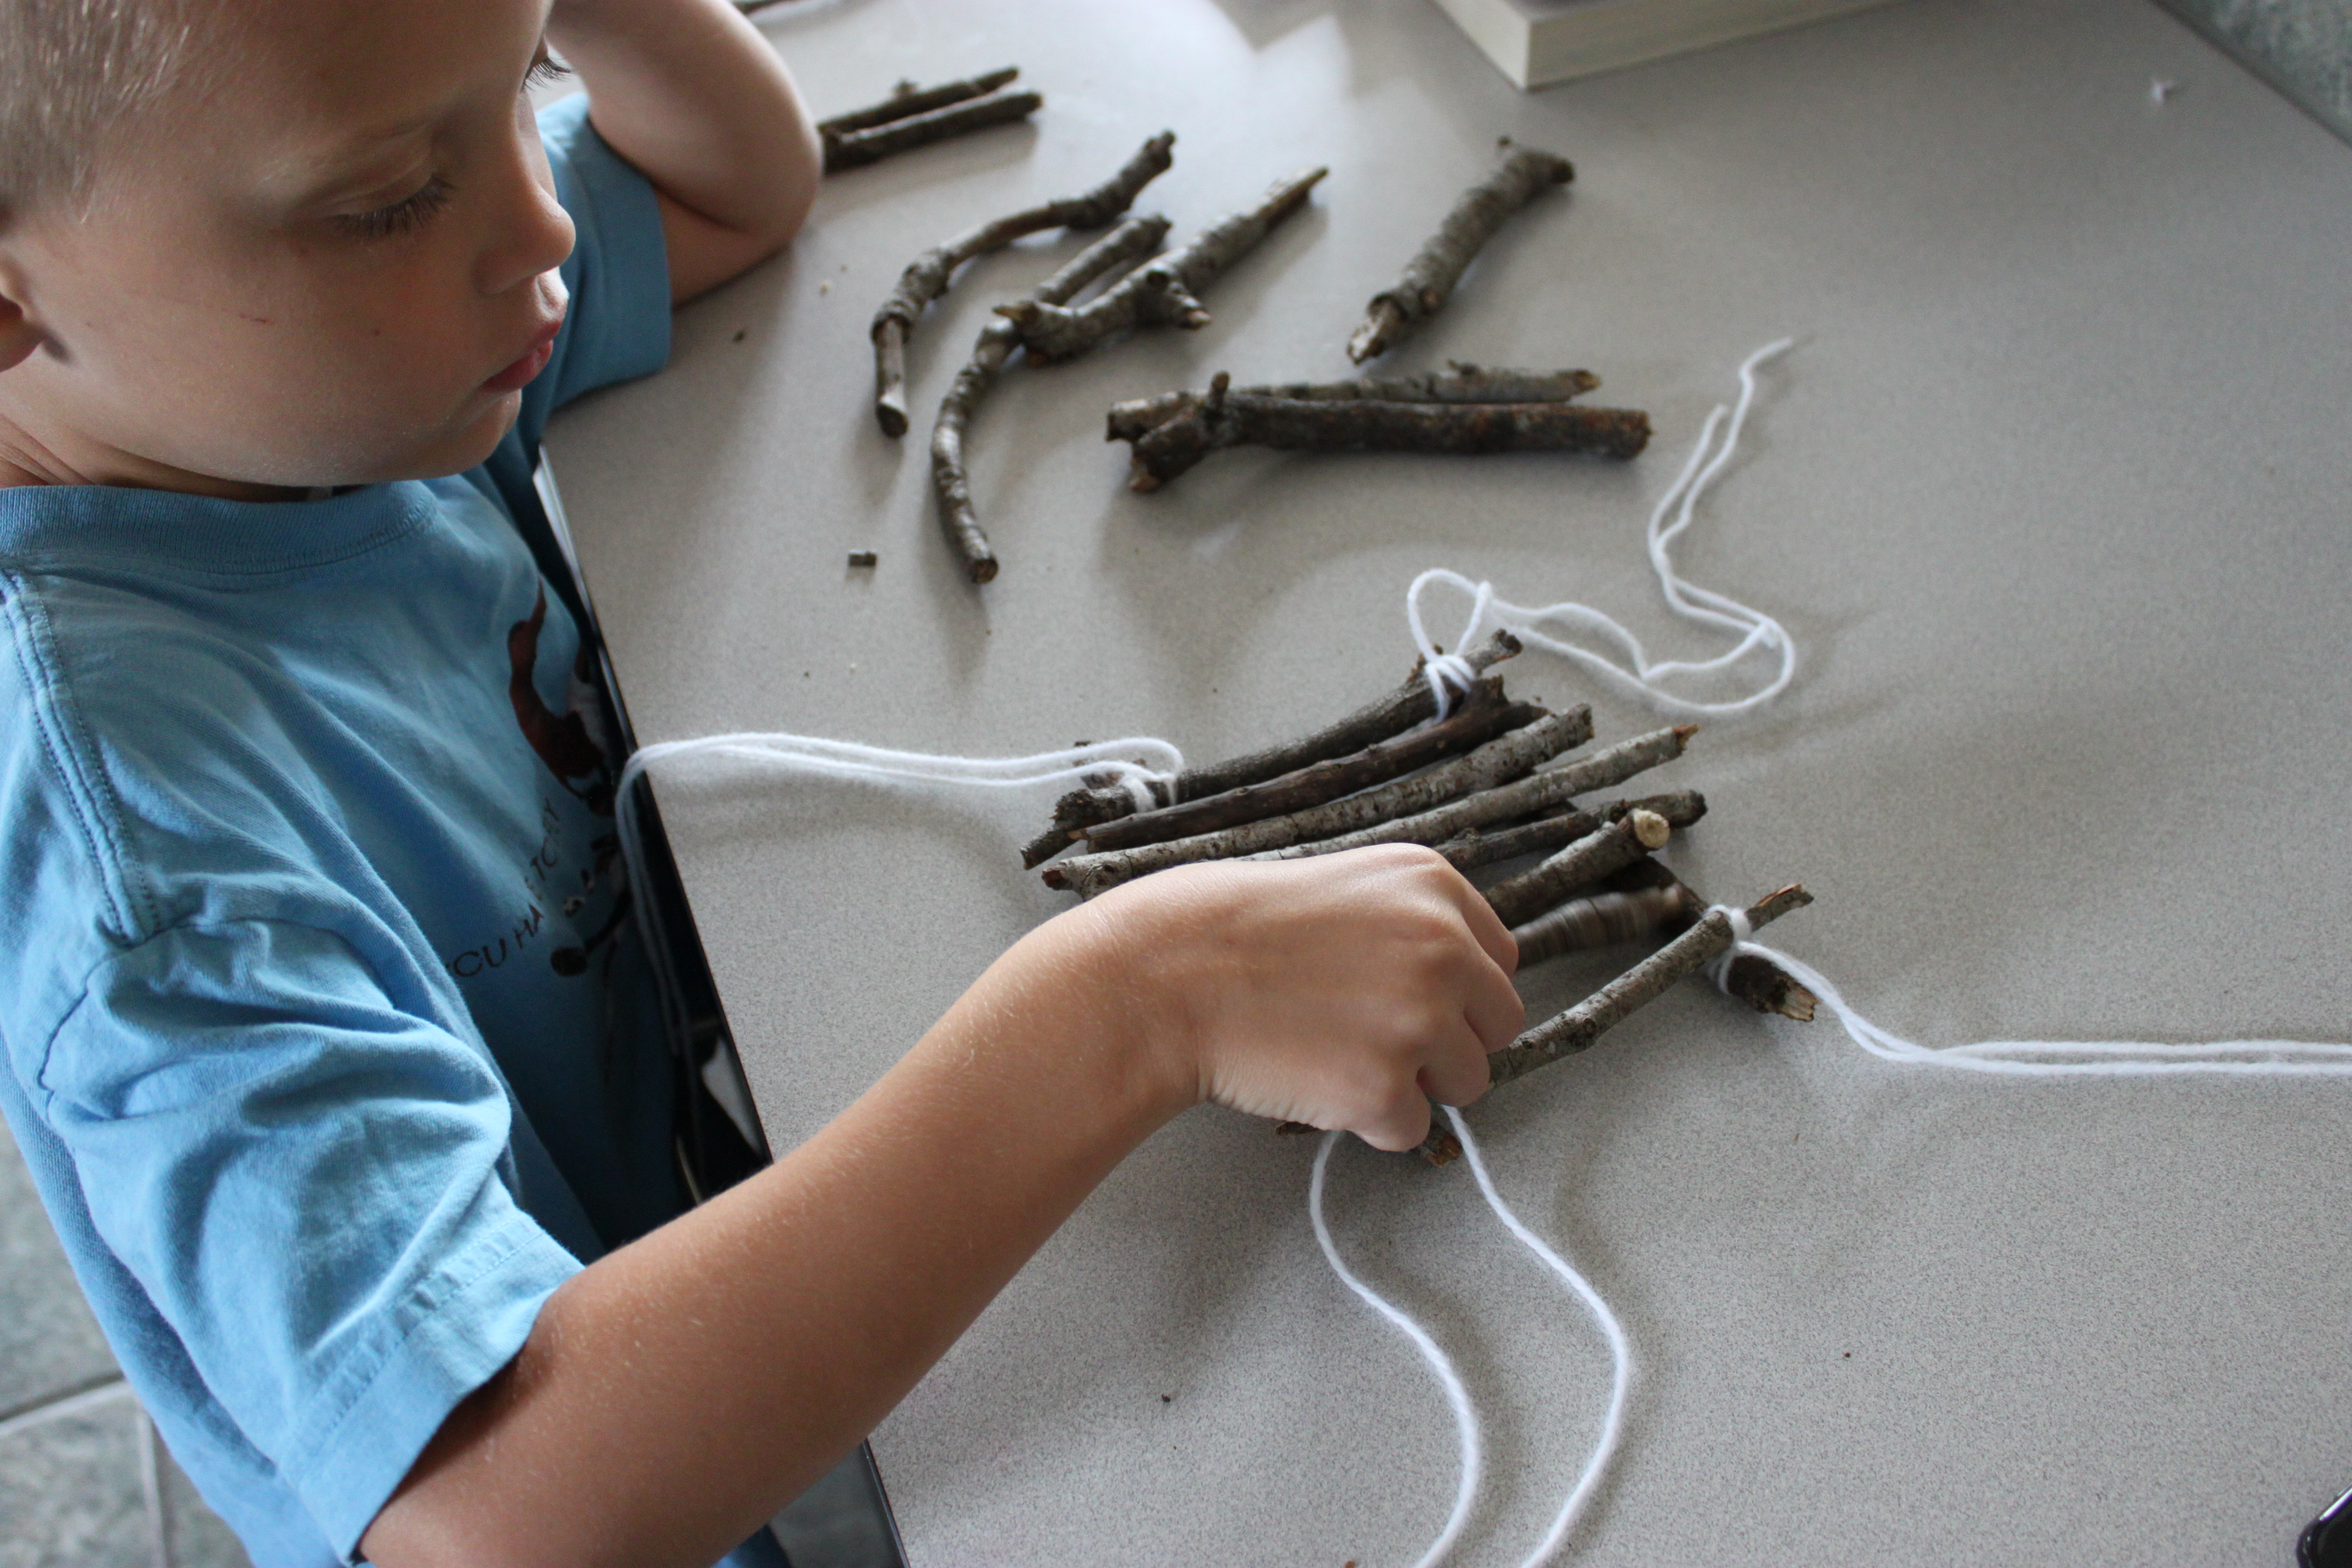
Step 1
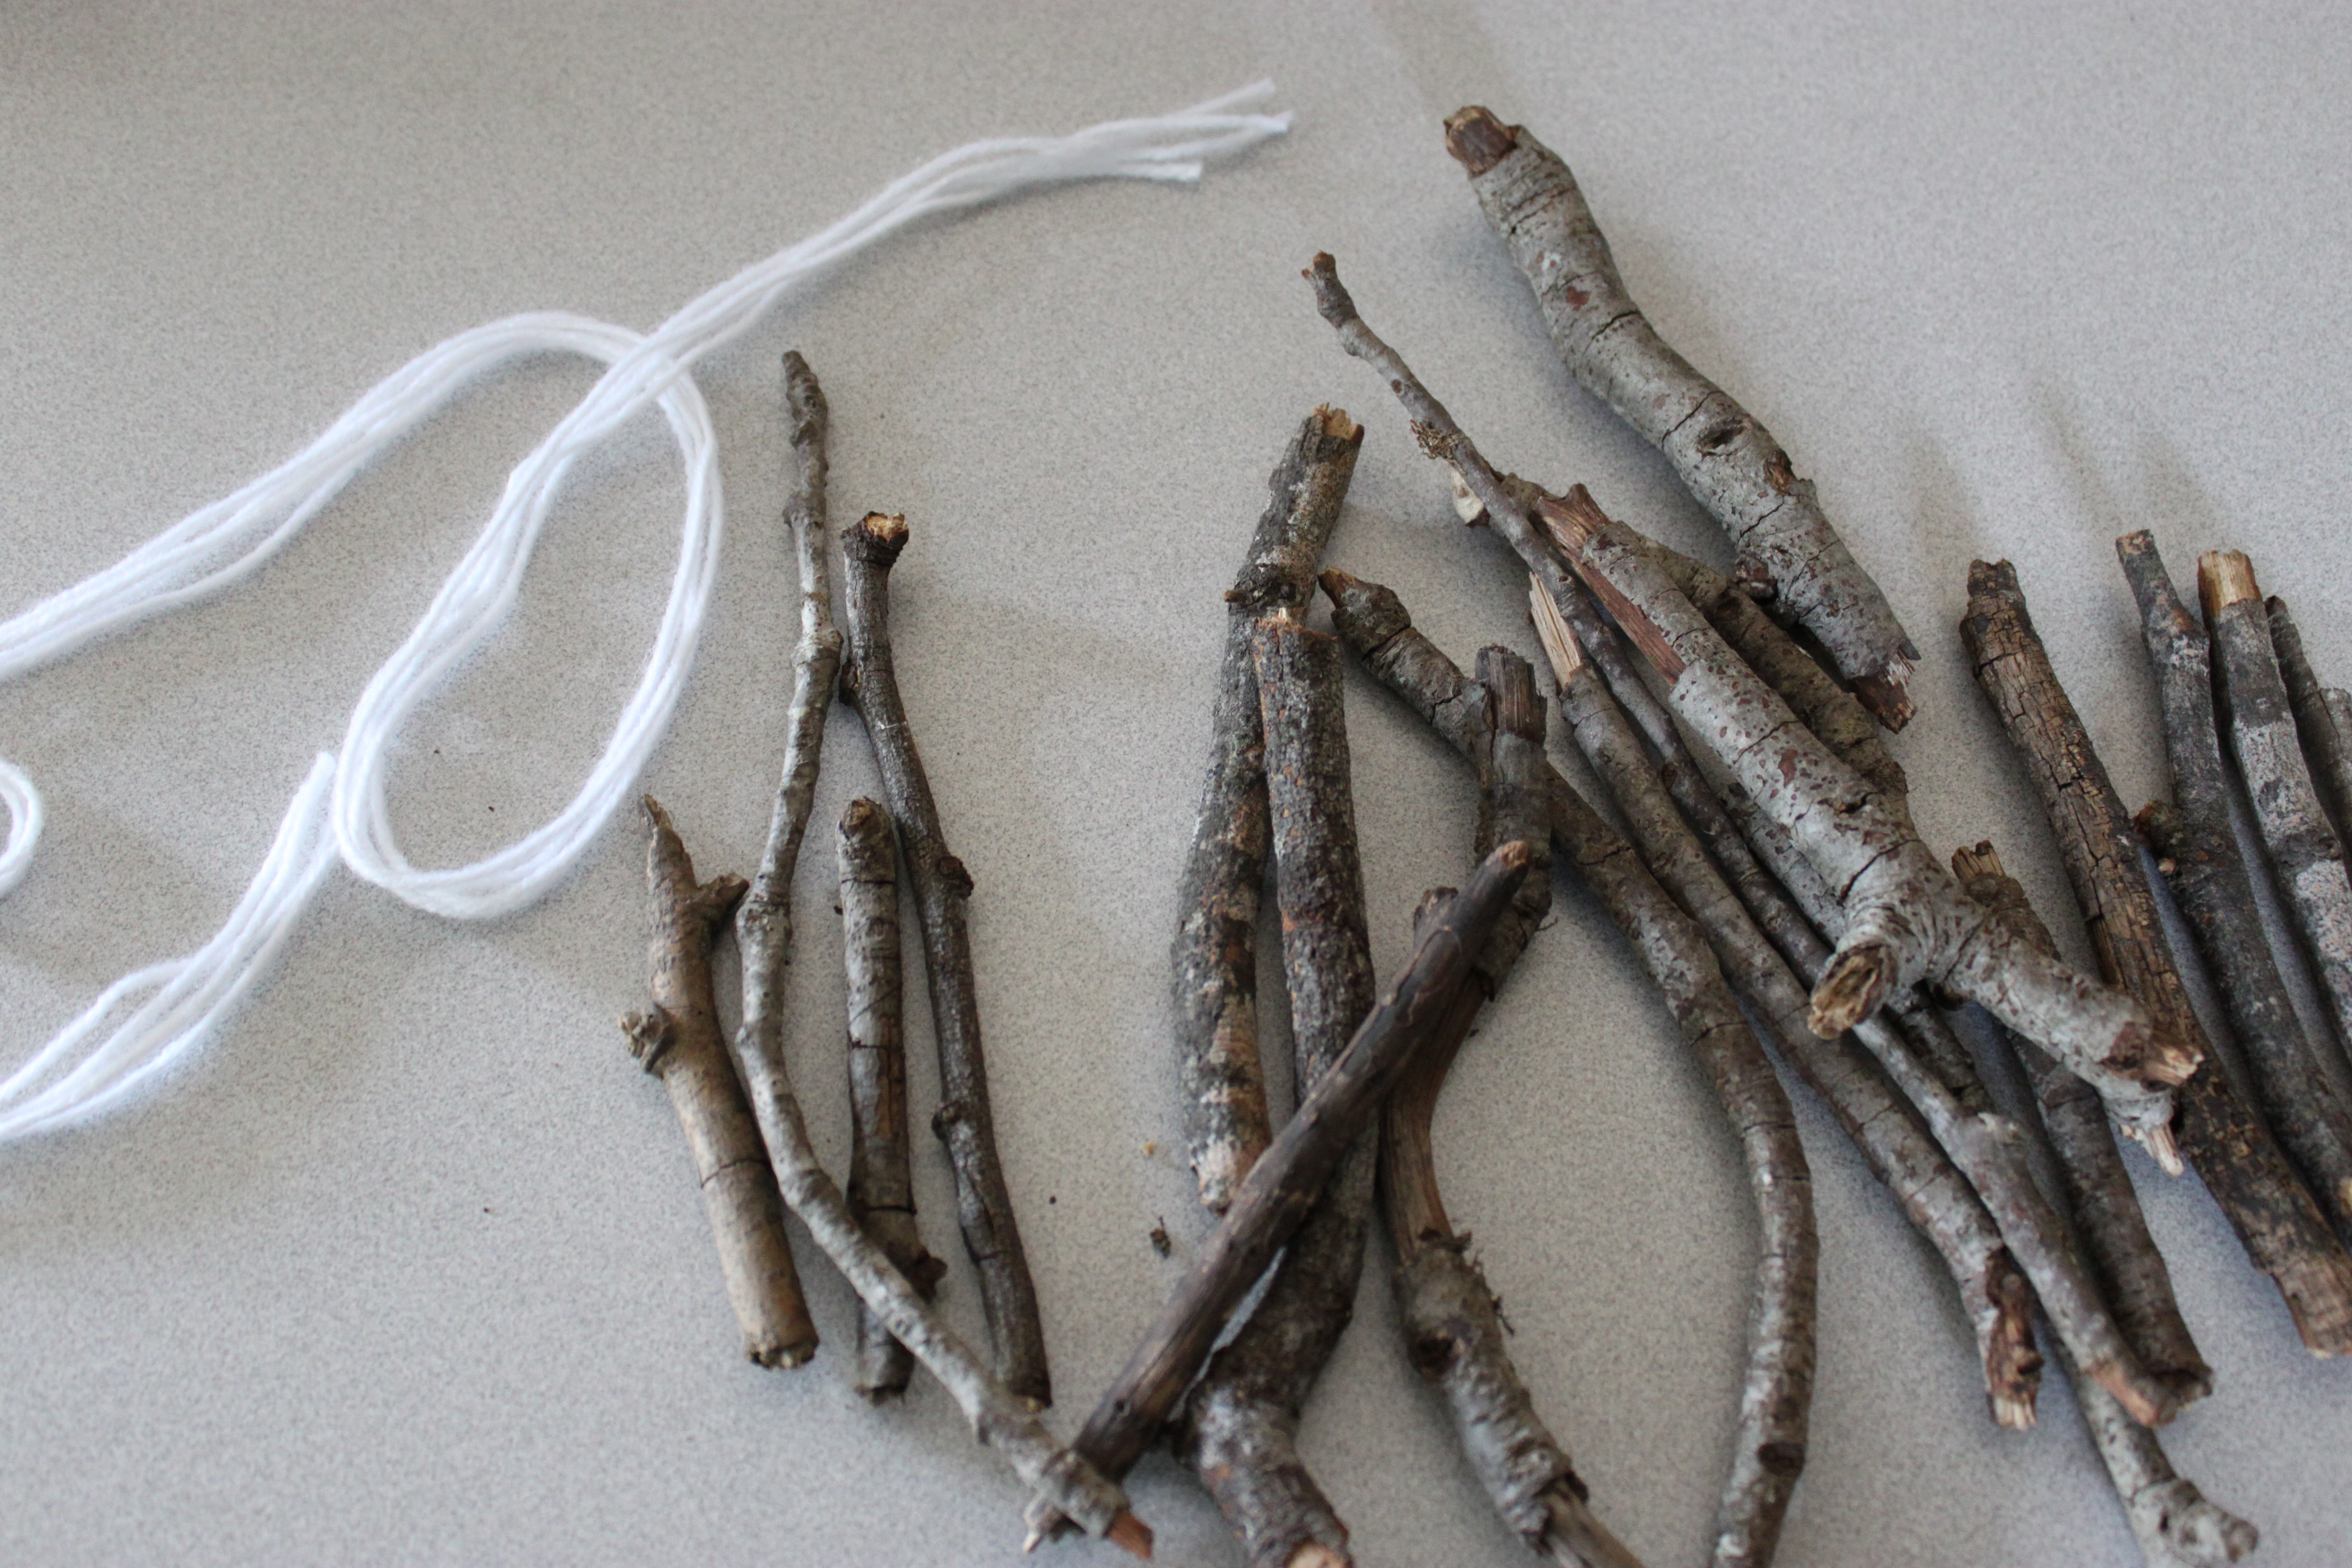
Collect sticks that are all about the same length and thickness. The number you will need depends on how high you want to build your basket, but start with 25-30 sticks. Cut 6 3-foot (.9 meters) long pieces of twine or string or yarn. Whatever you have on hand will work (we used yarn), but I think twine is the strongest and looks the most natural.

Step 2
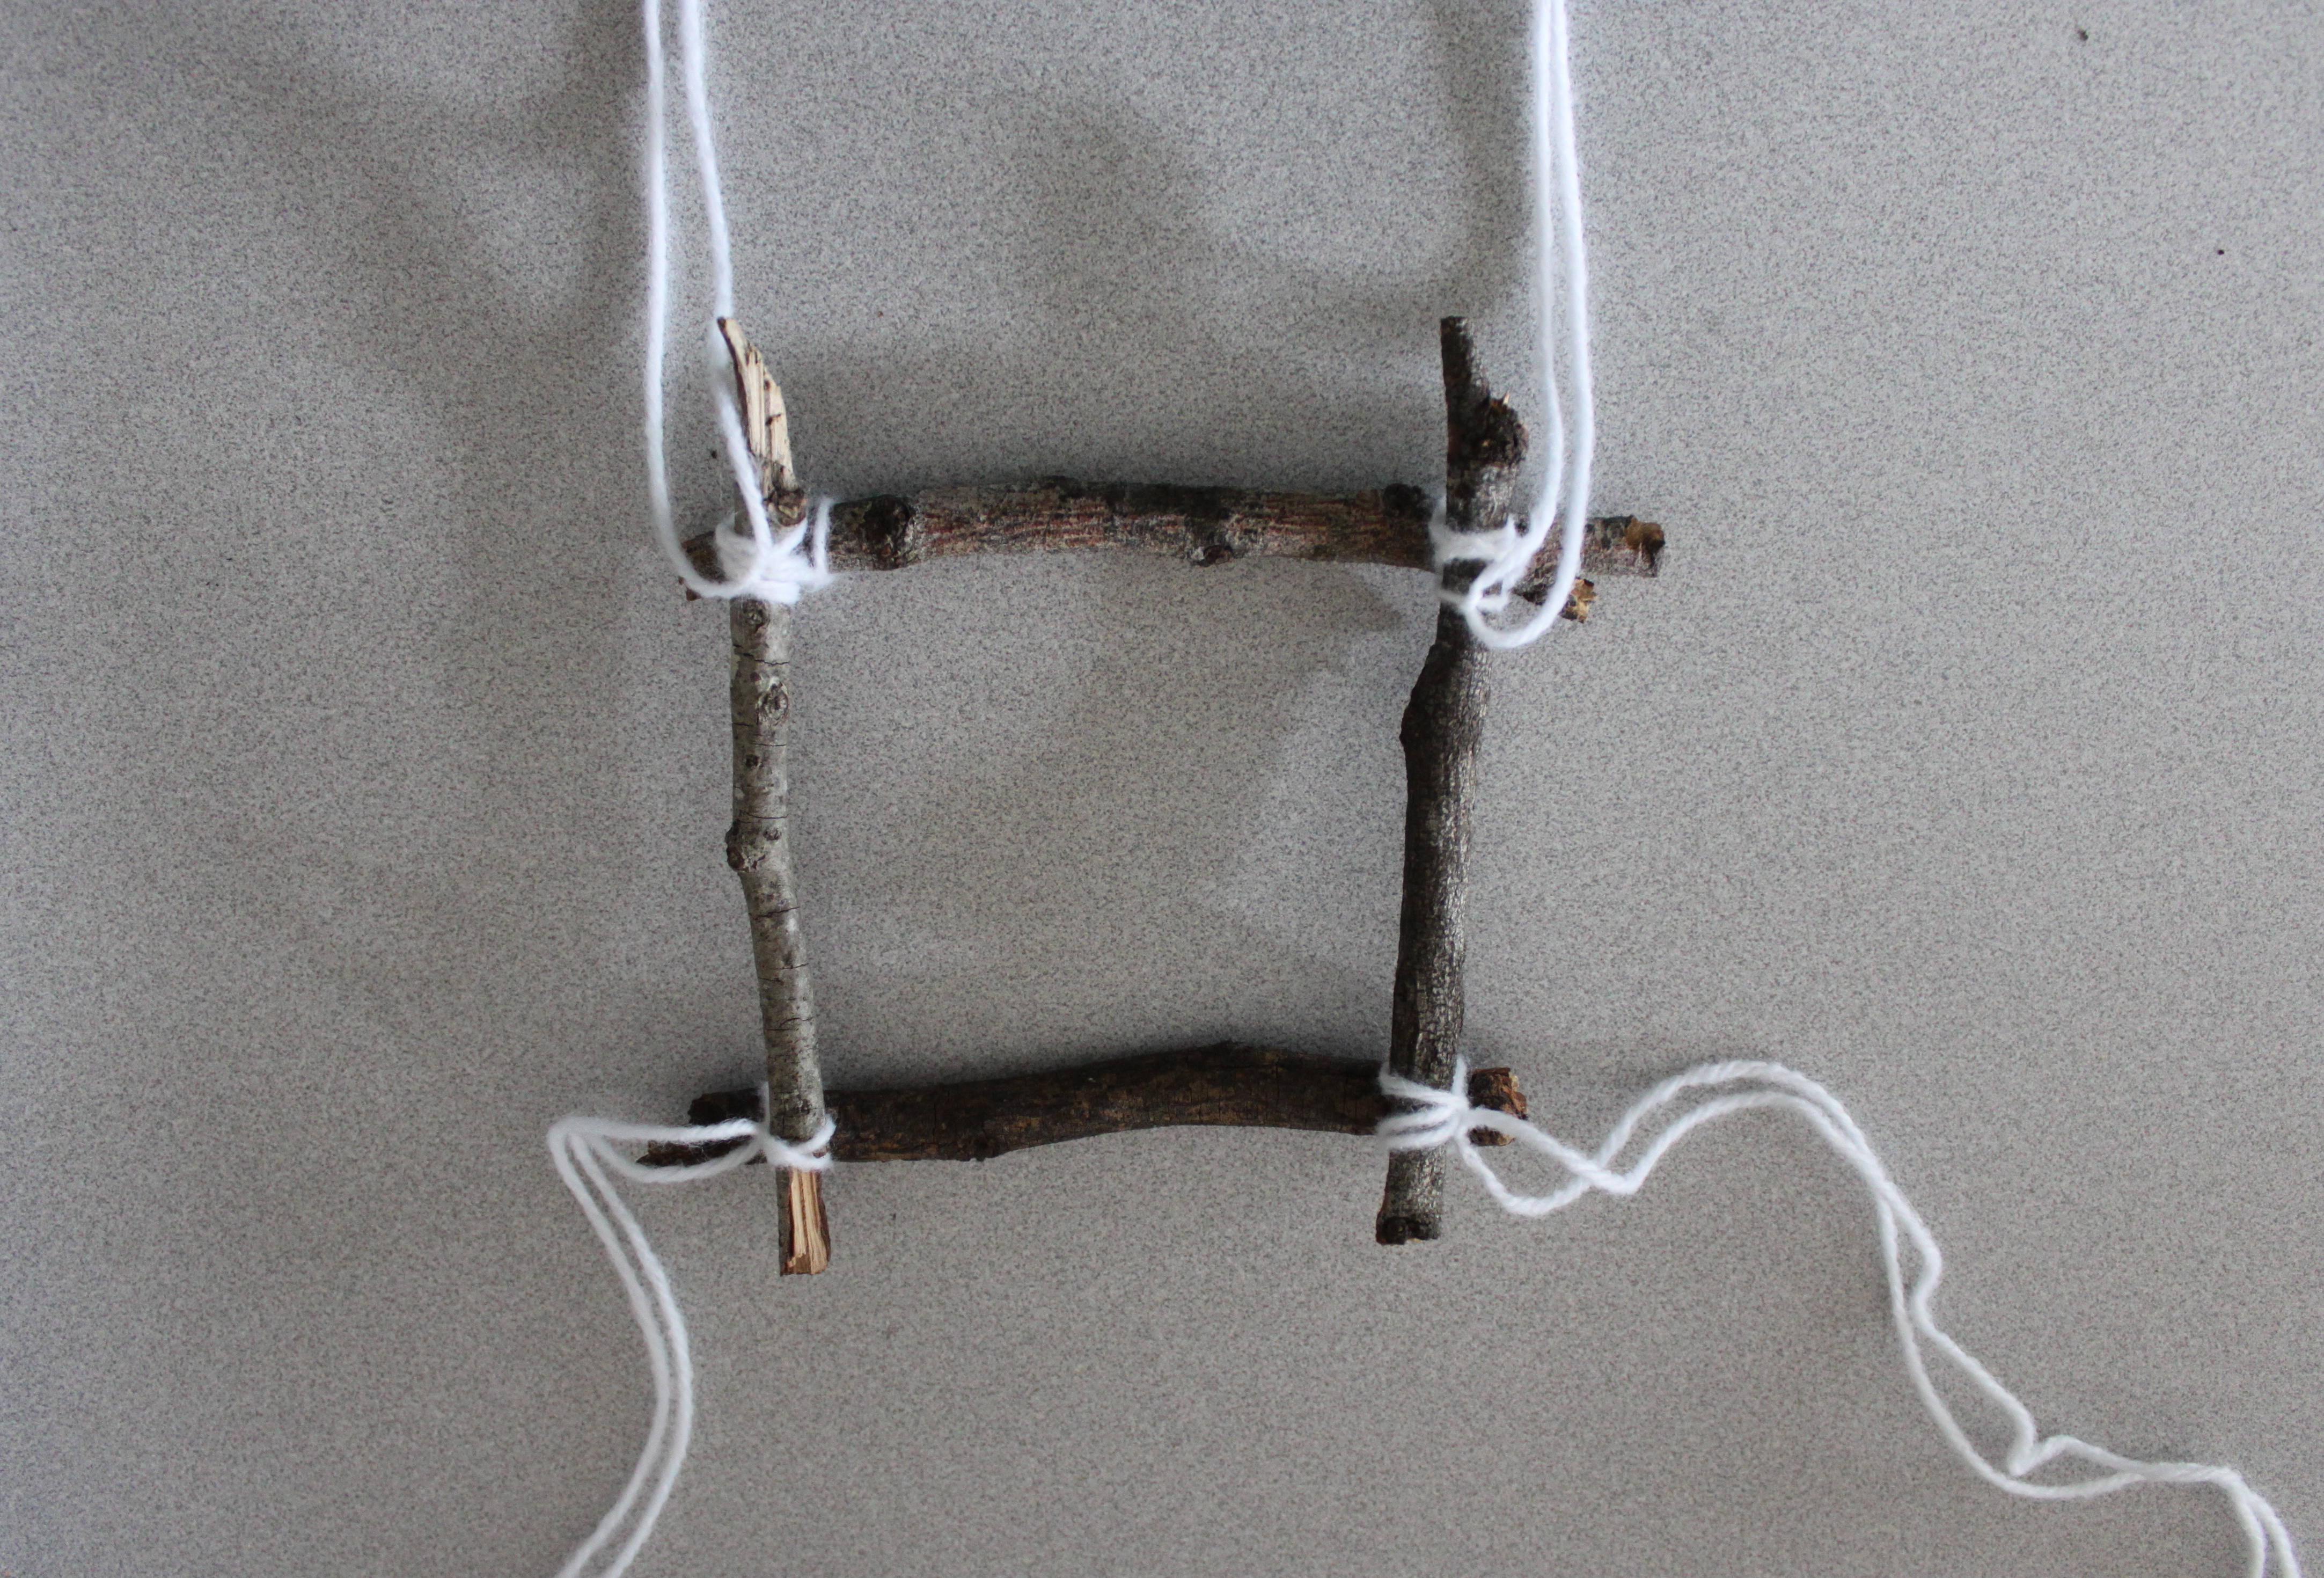
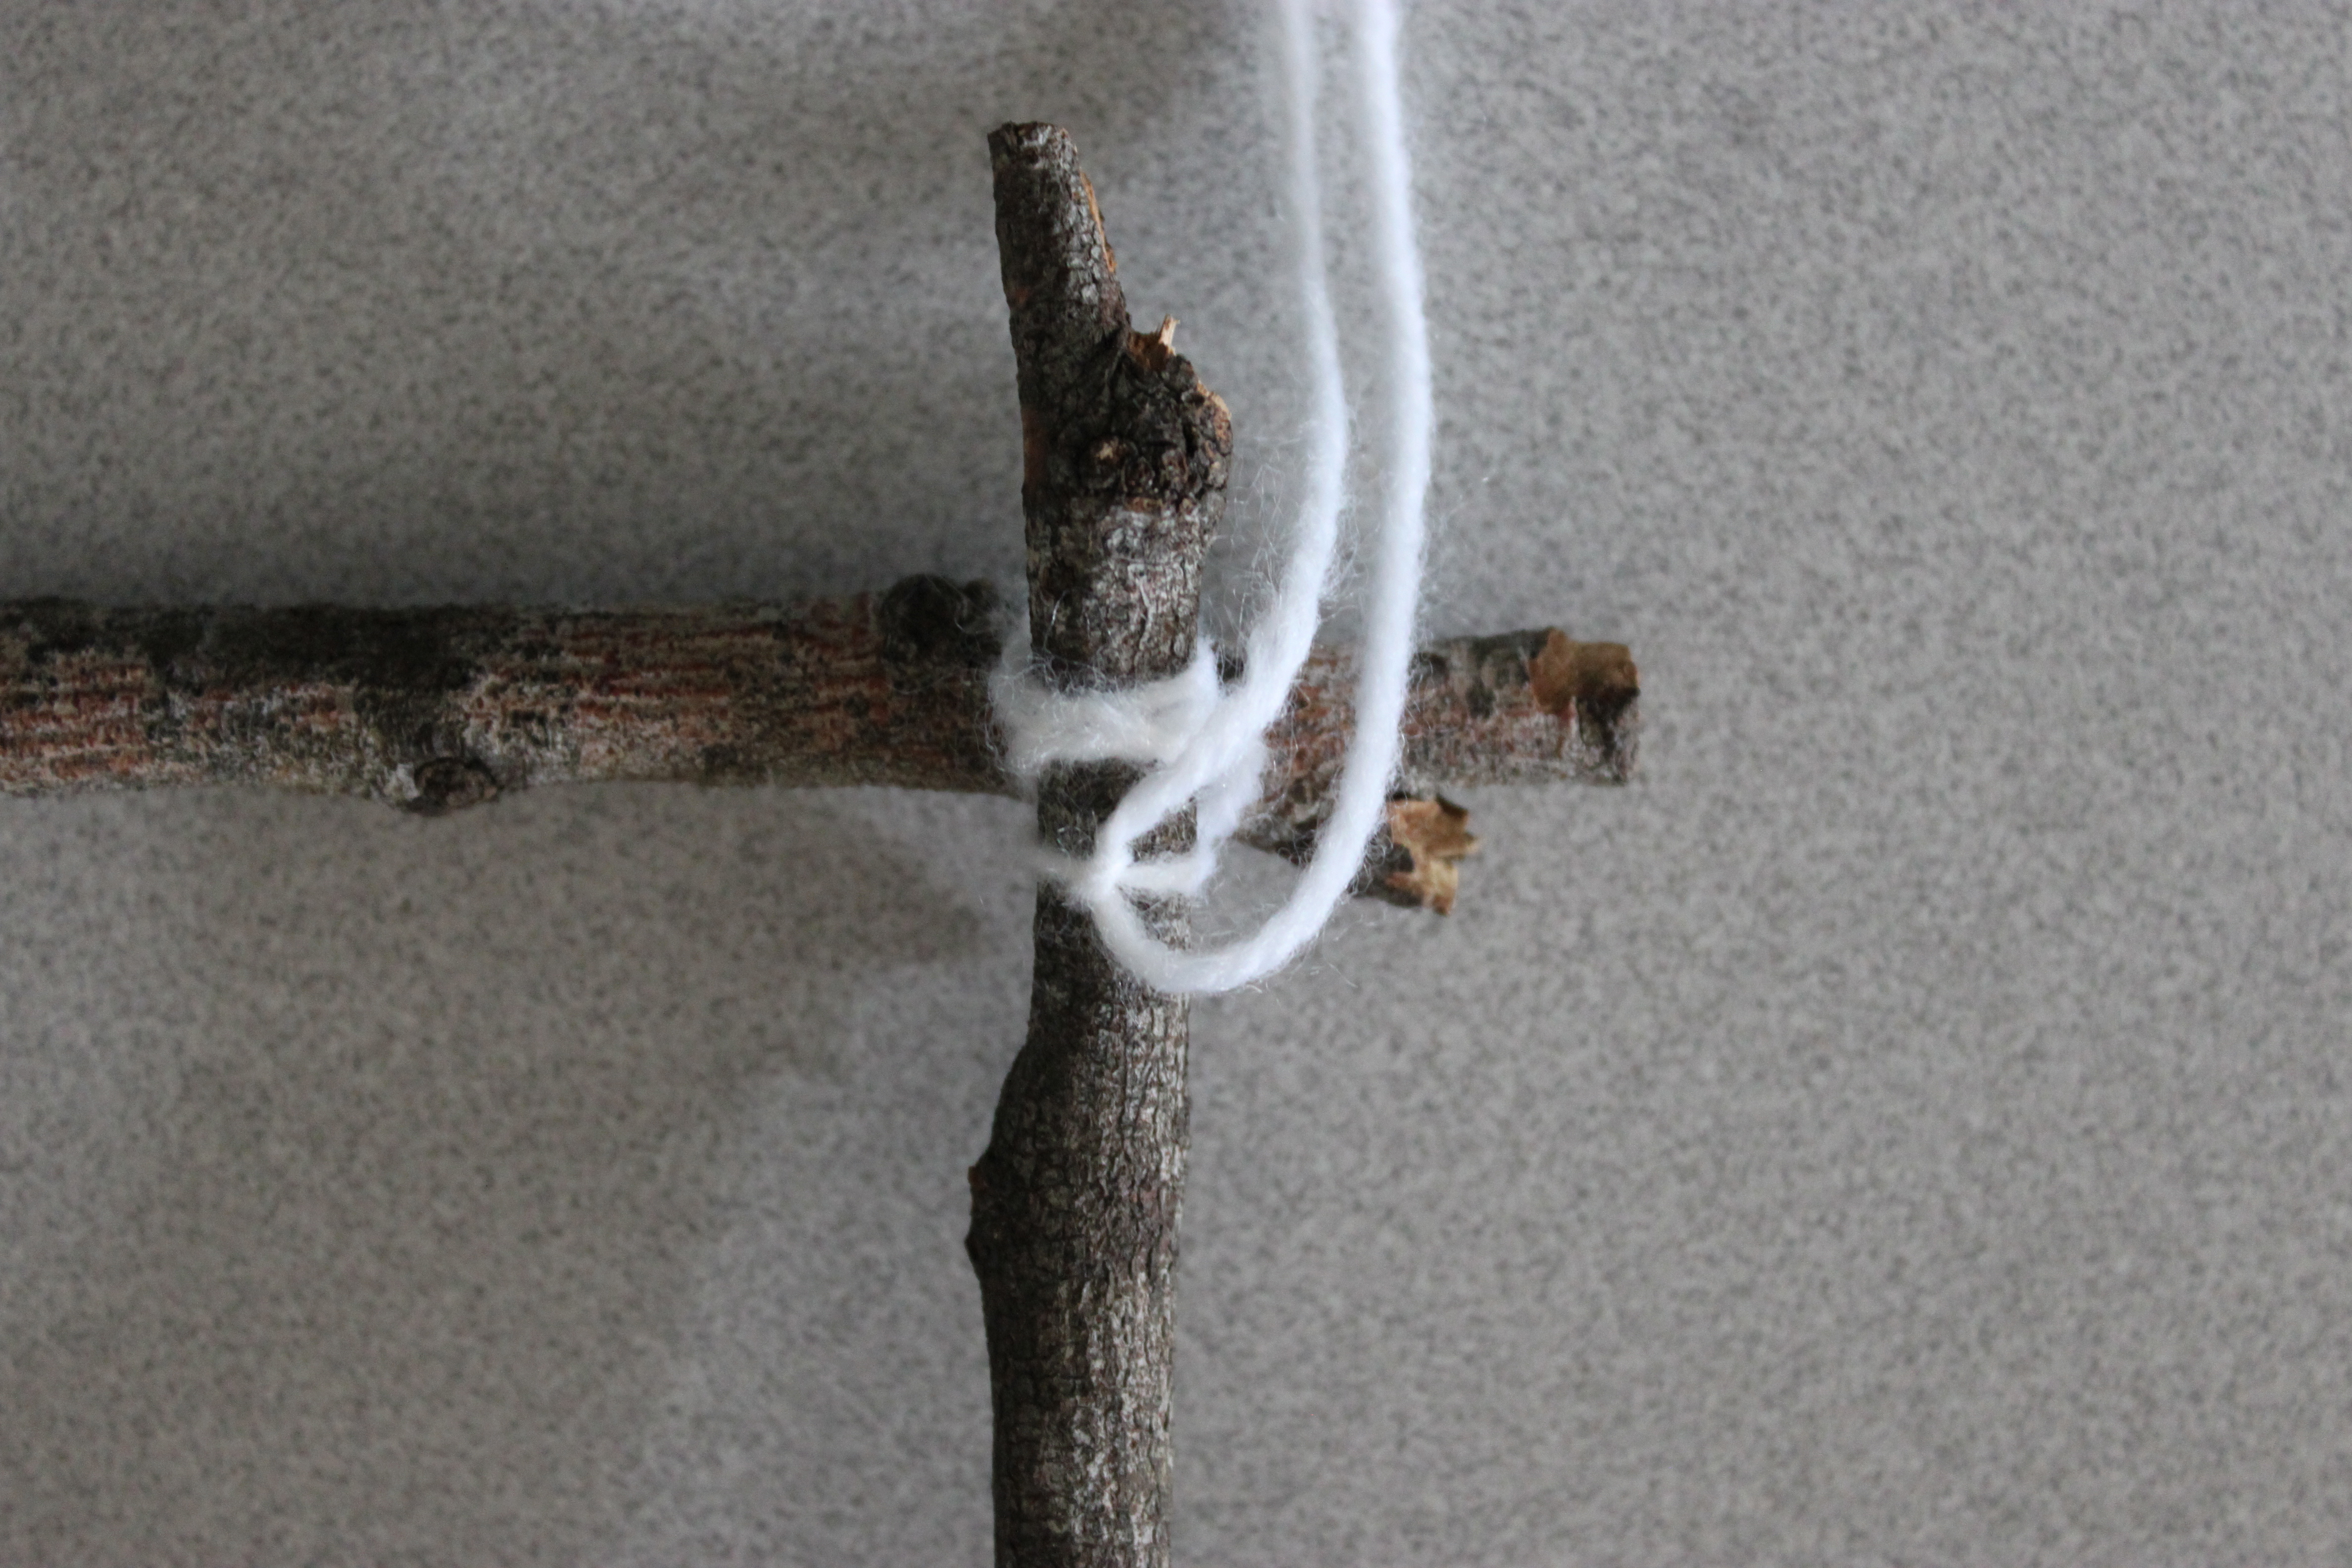
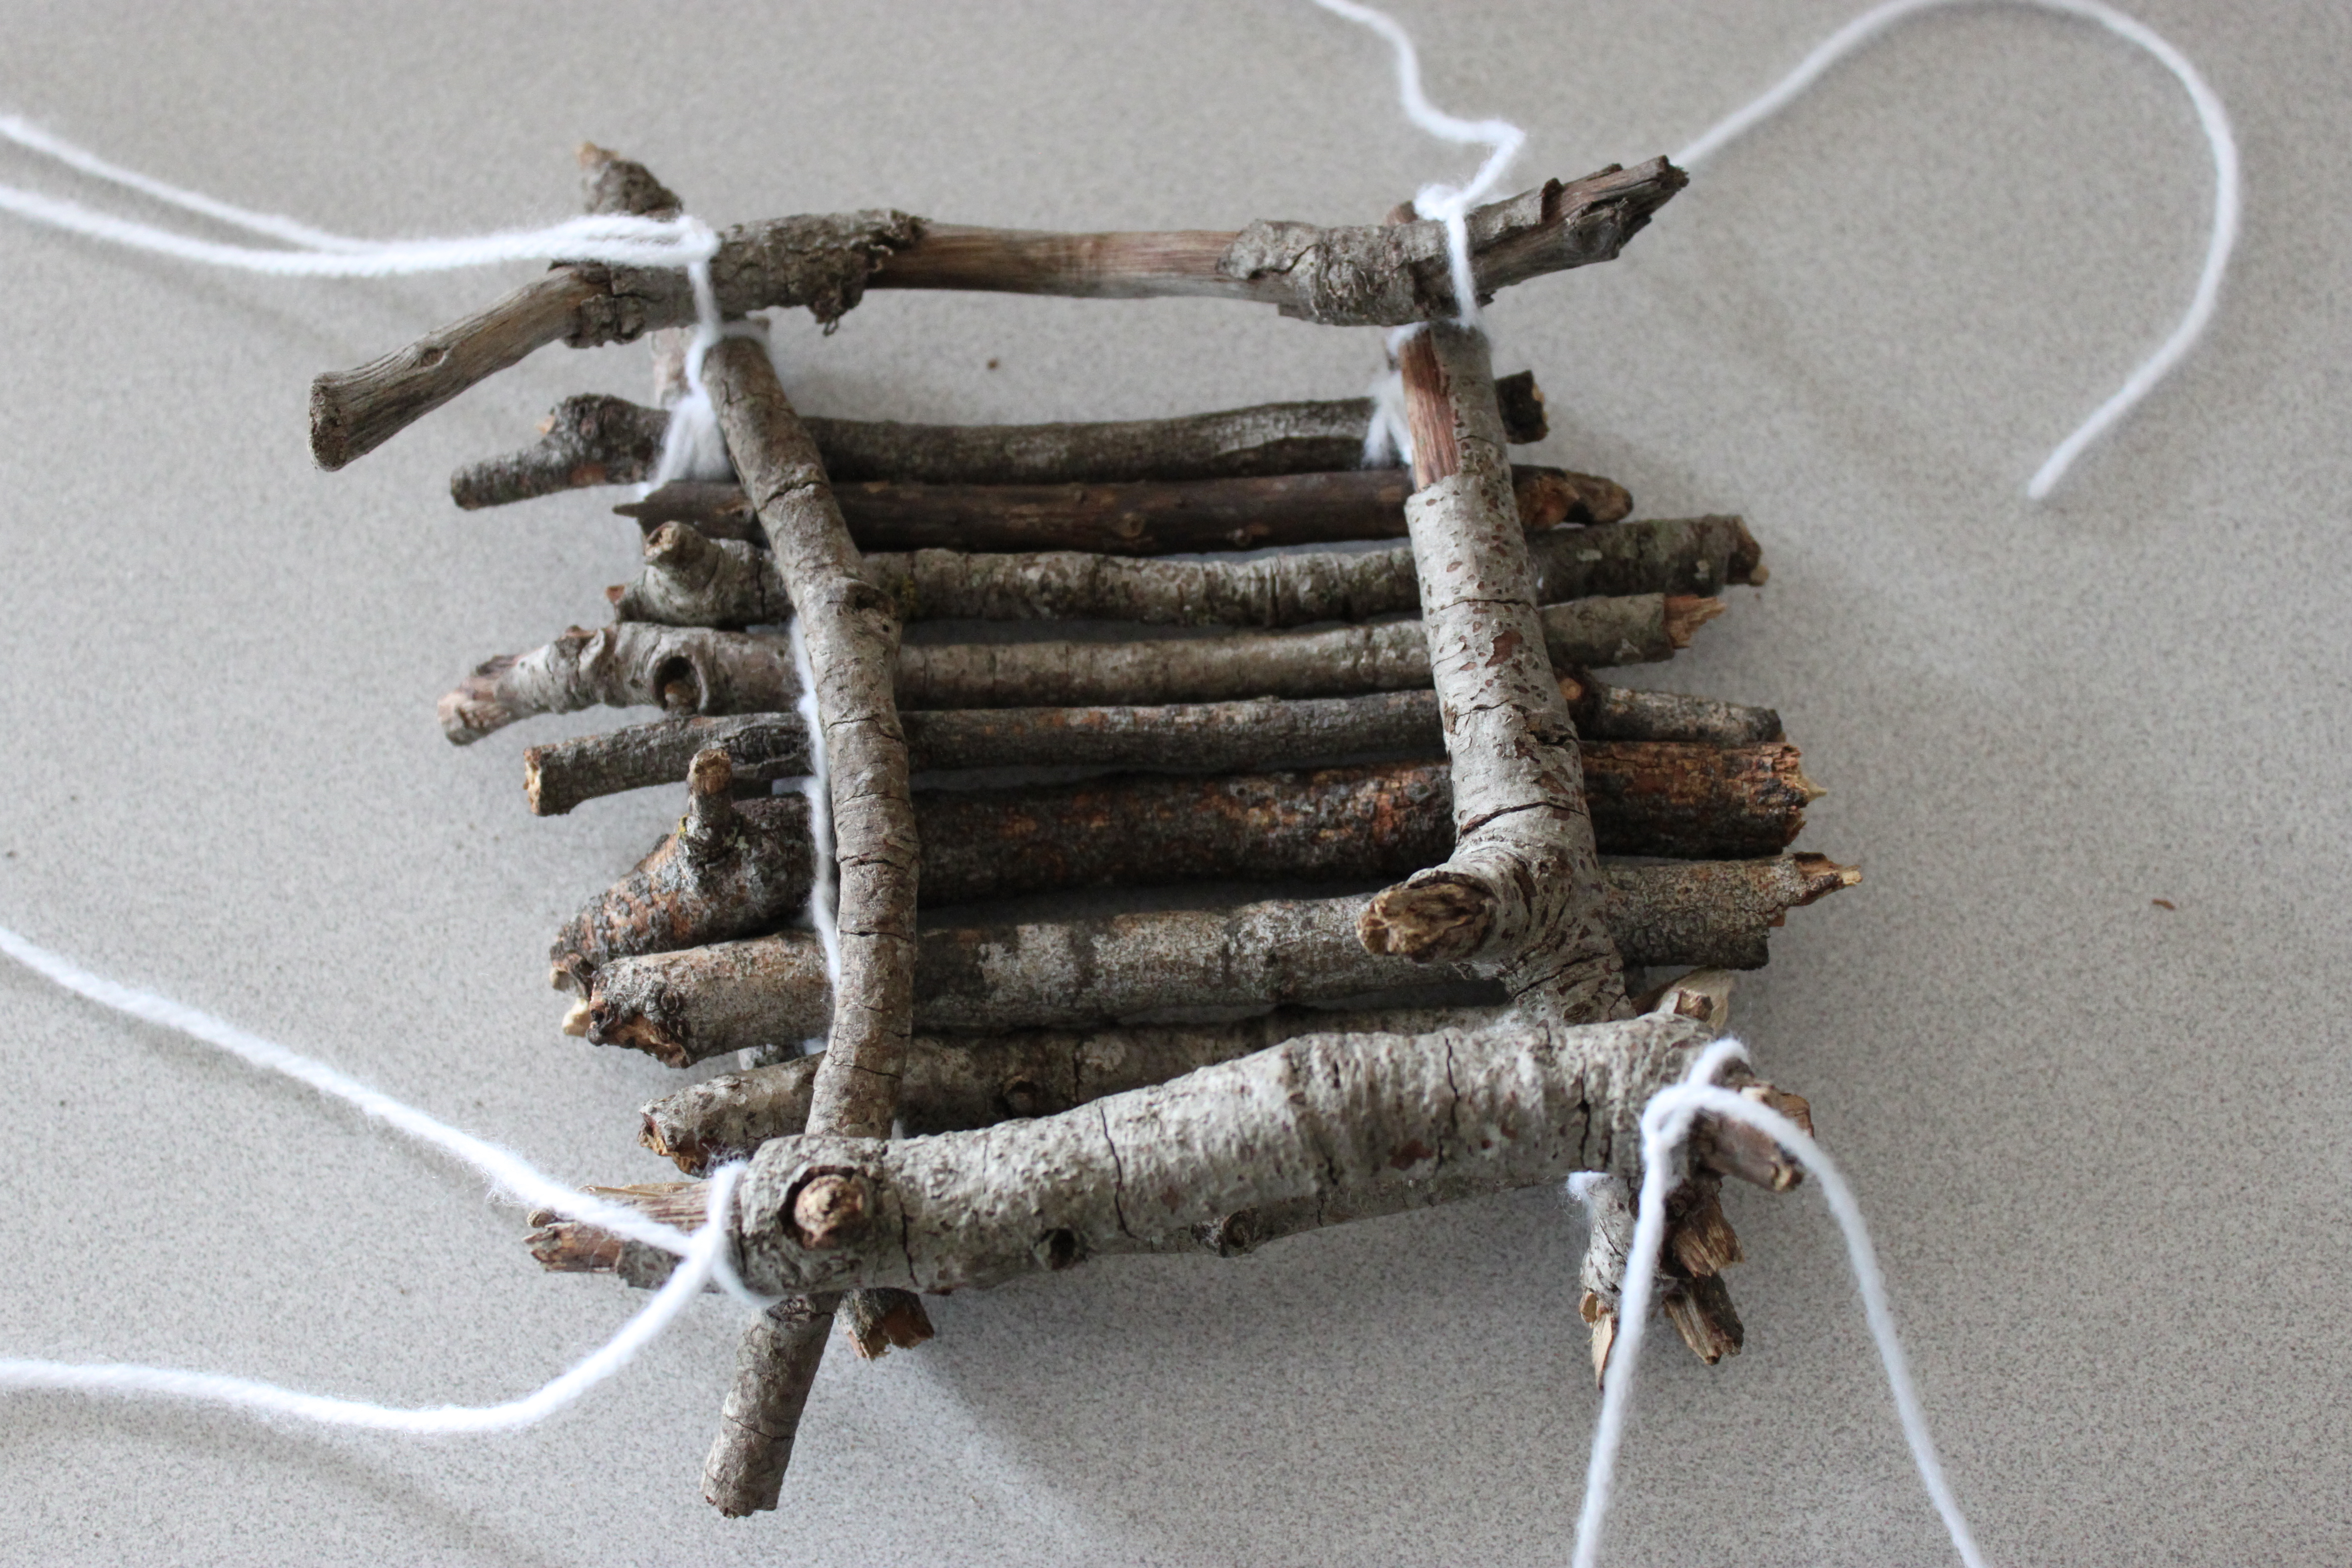
Start with 4 sticks: 2 parallel sticks on the bottom and 2 parallel sticks on the top. Wrap the string around each of the corners to secure the sticks together and tie it in a knot.
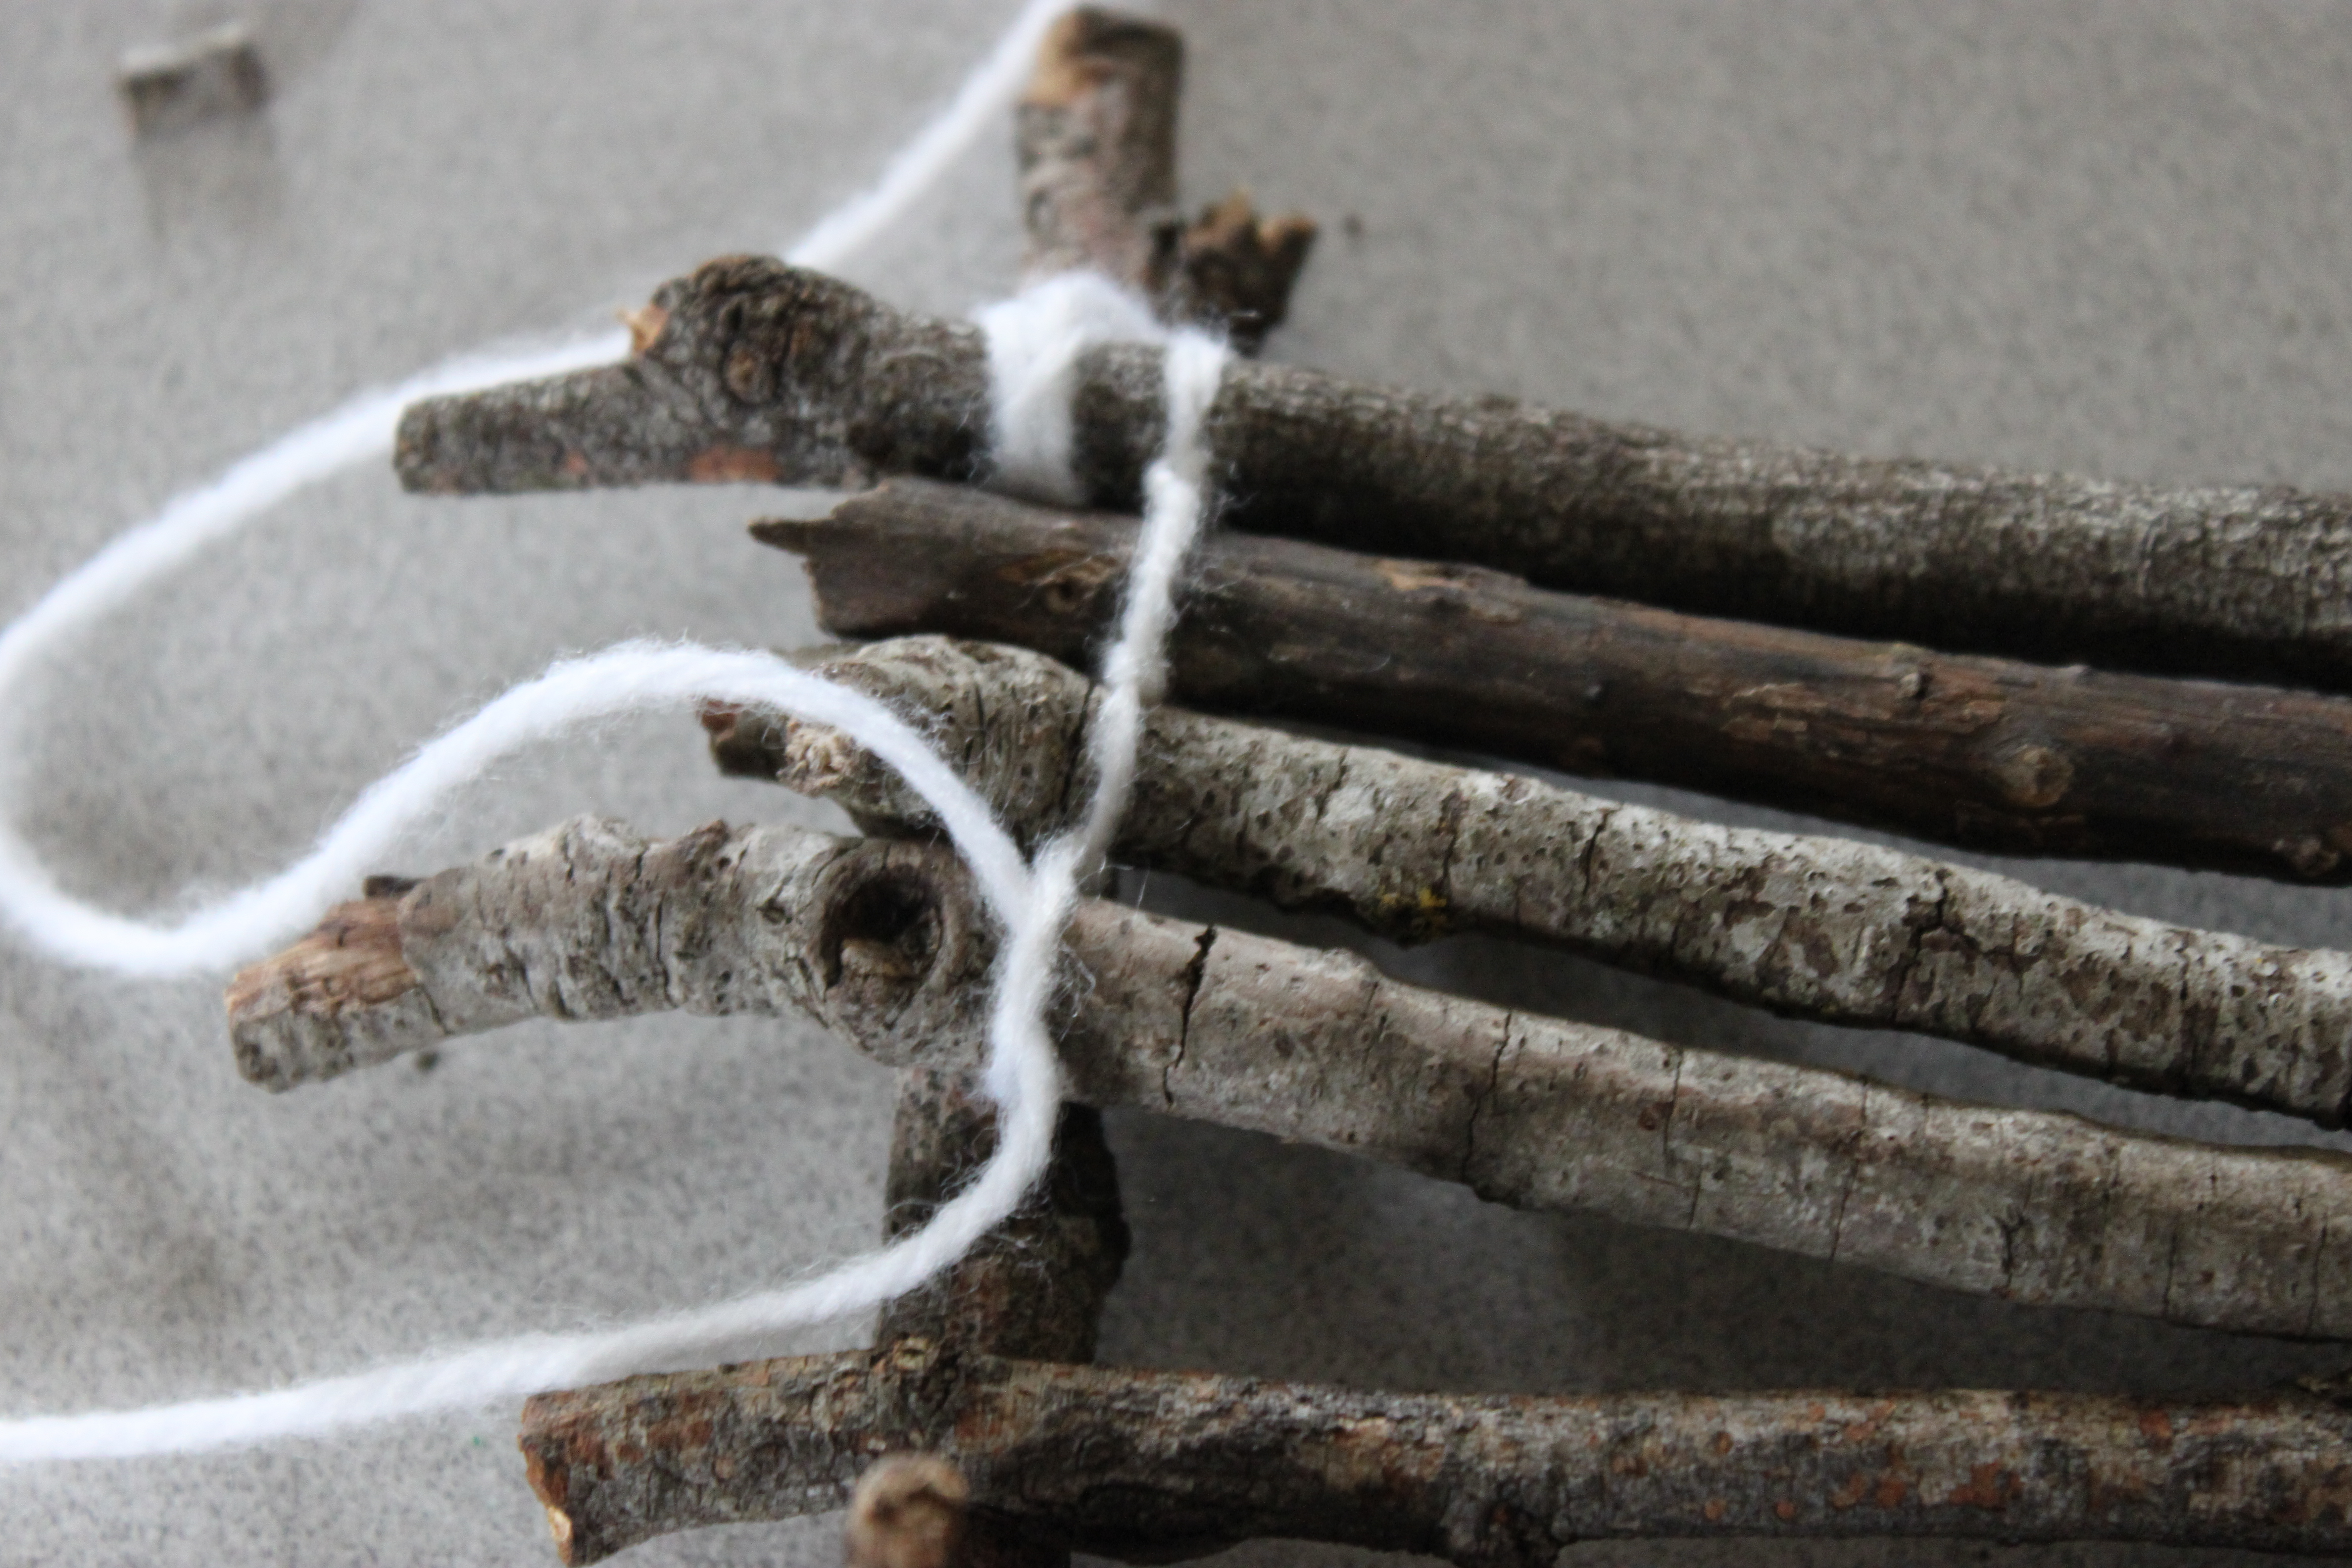
Step 3
After tying the knots, leave the excess string. It will be used later.
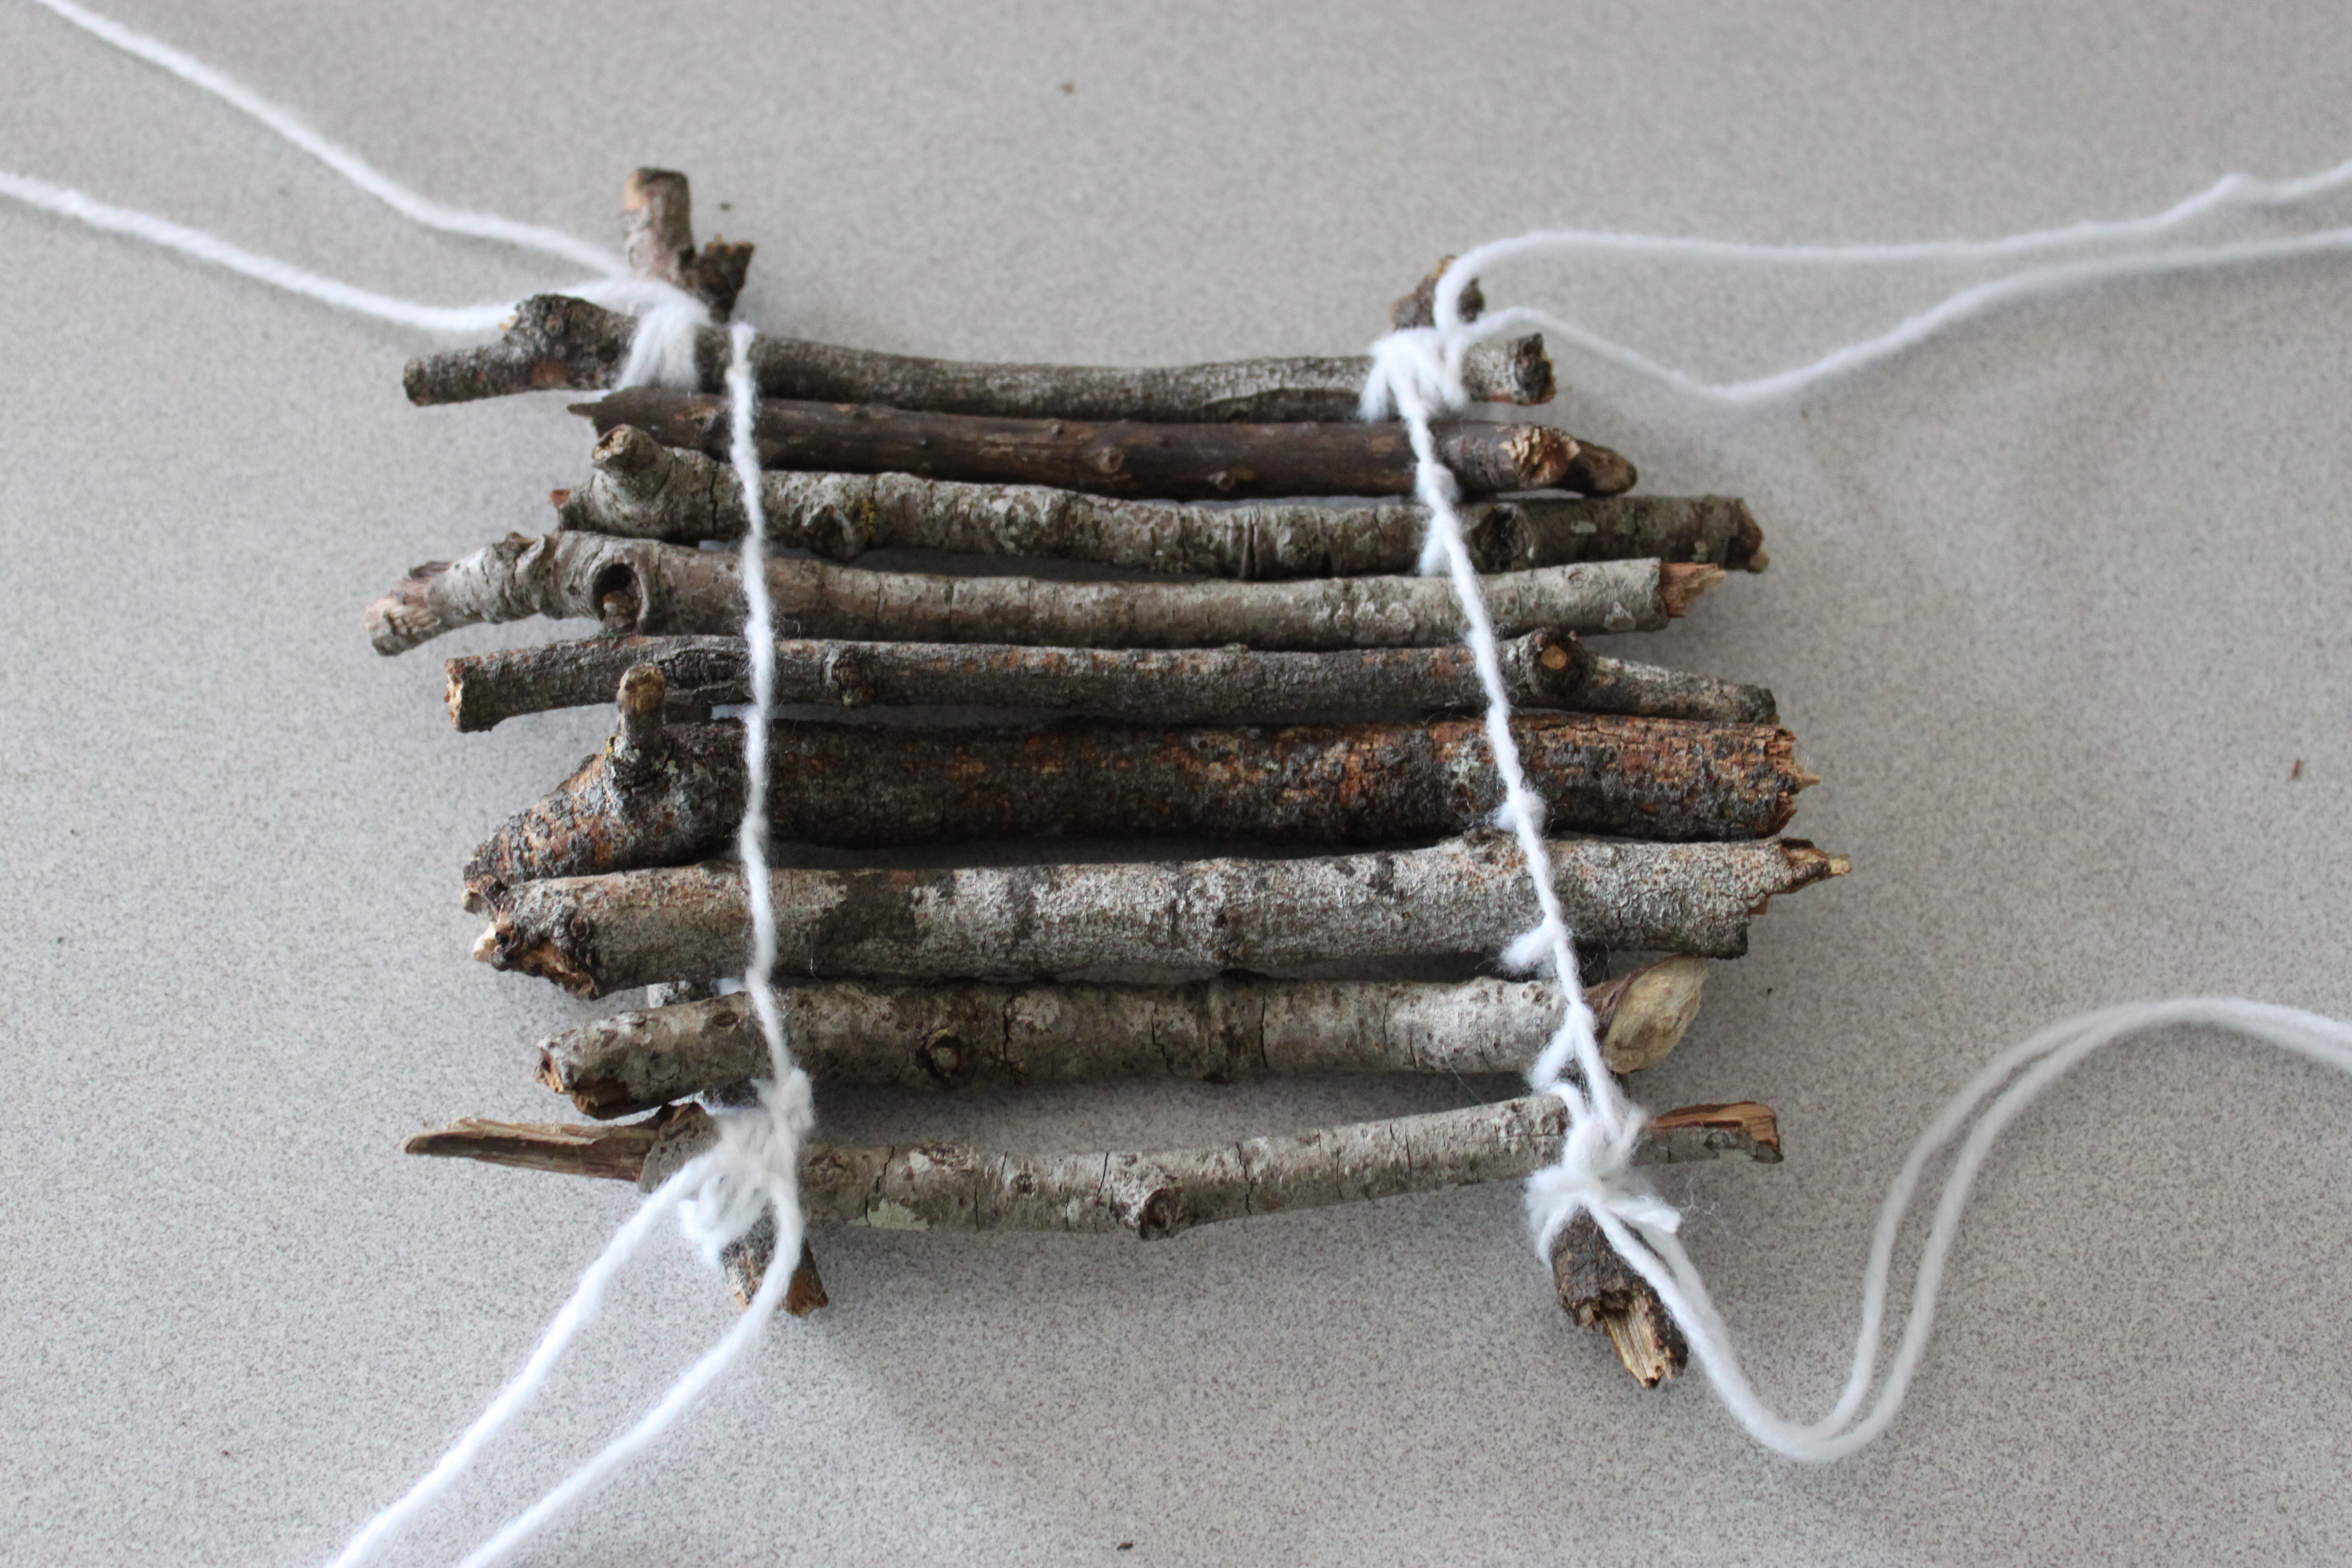
Step 4
Now lay sticks across your base to make the bottom of the basket.
Step 5
Use a piece of string (one that is not tied on the corners already) to tie the sticks together. Wrap the string around the corner and knot it to secure it. Then, start wrapping it around one stick at a time and knotting it. Each time you put a knot around a stick it will tighten them to each other.
Step 6
When you have tied all of the sticks together on each side, wrap the end of that string around the corner sticks and double knot it. Cut the extra parts of that string off and put a little bit of glue (optional) on the knot. You are done with the base of the basket.
Step 7
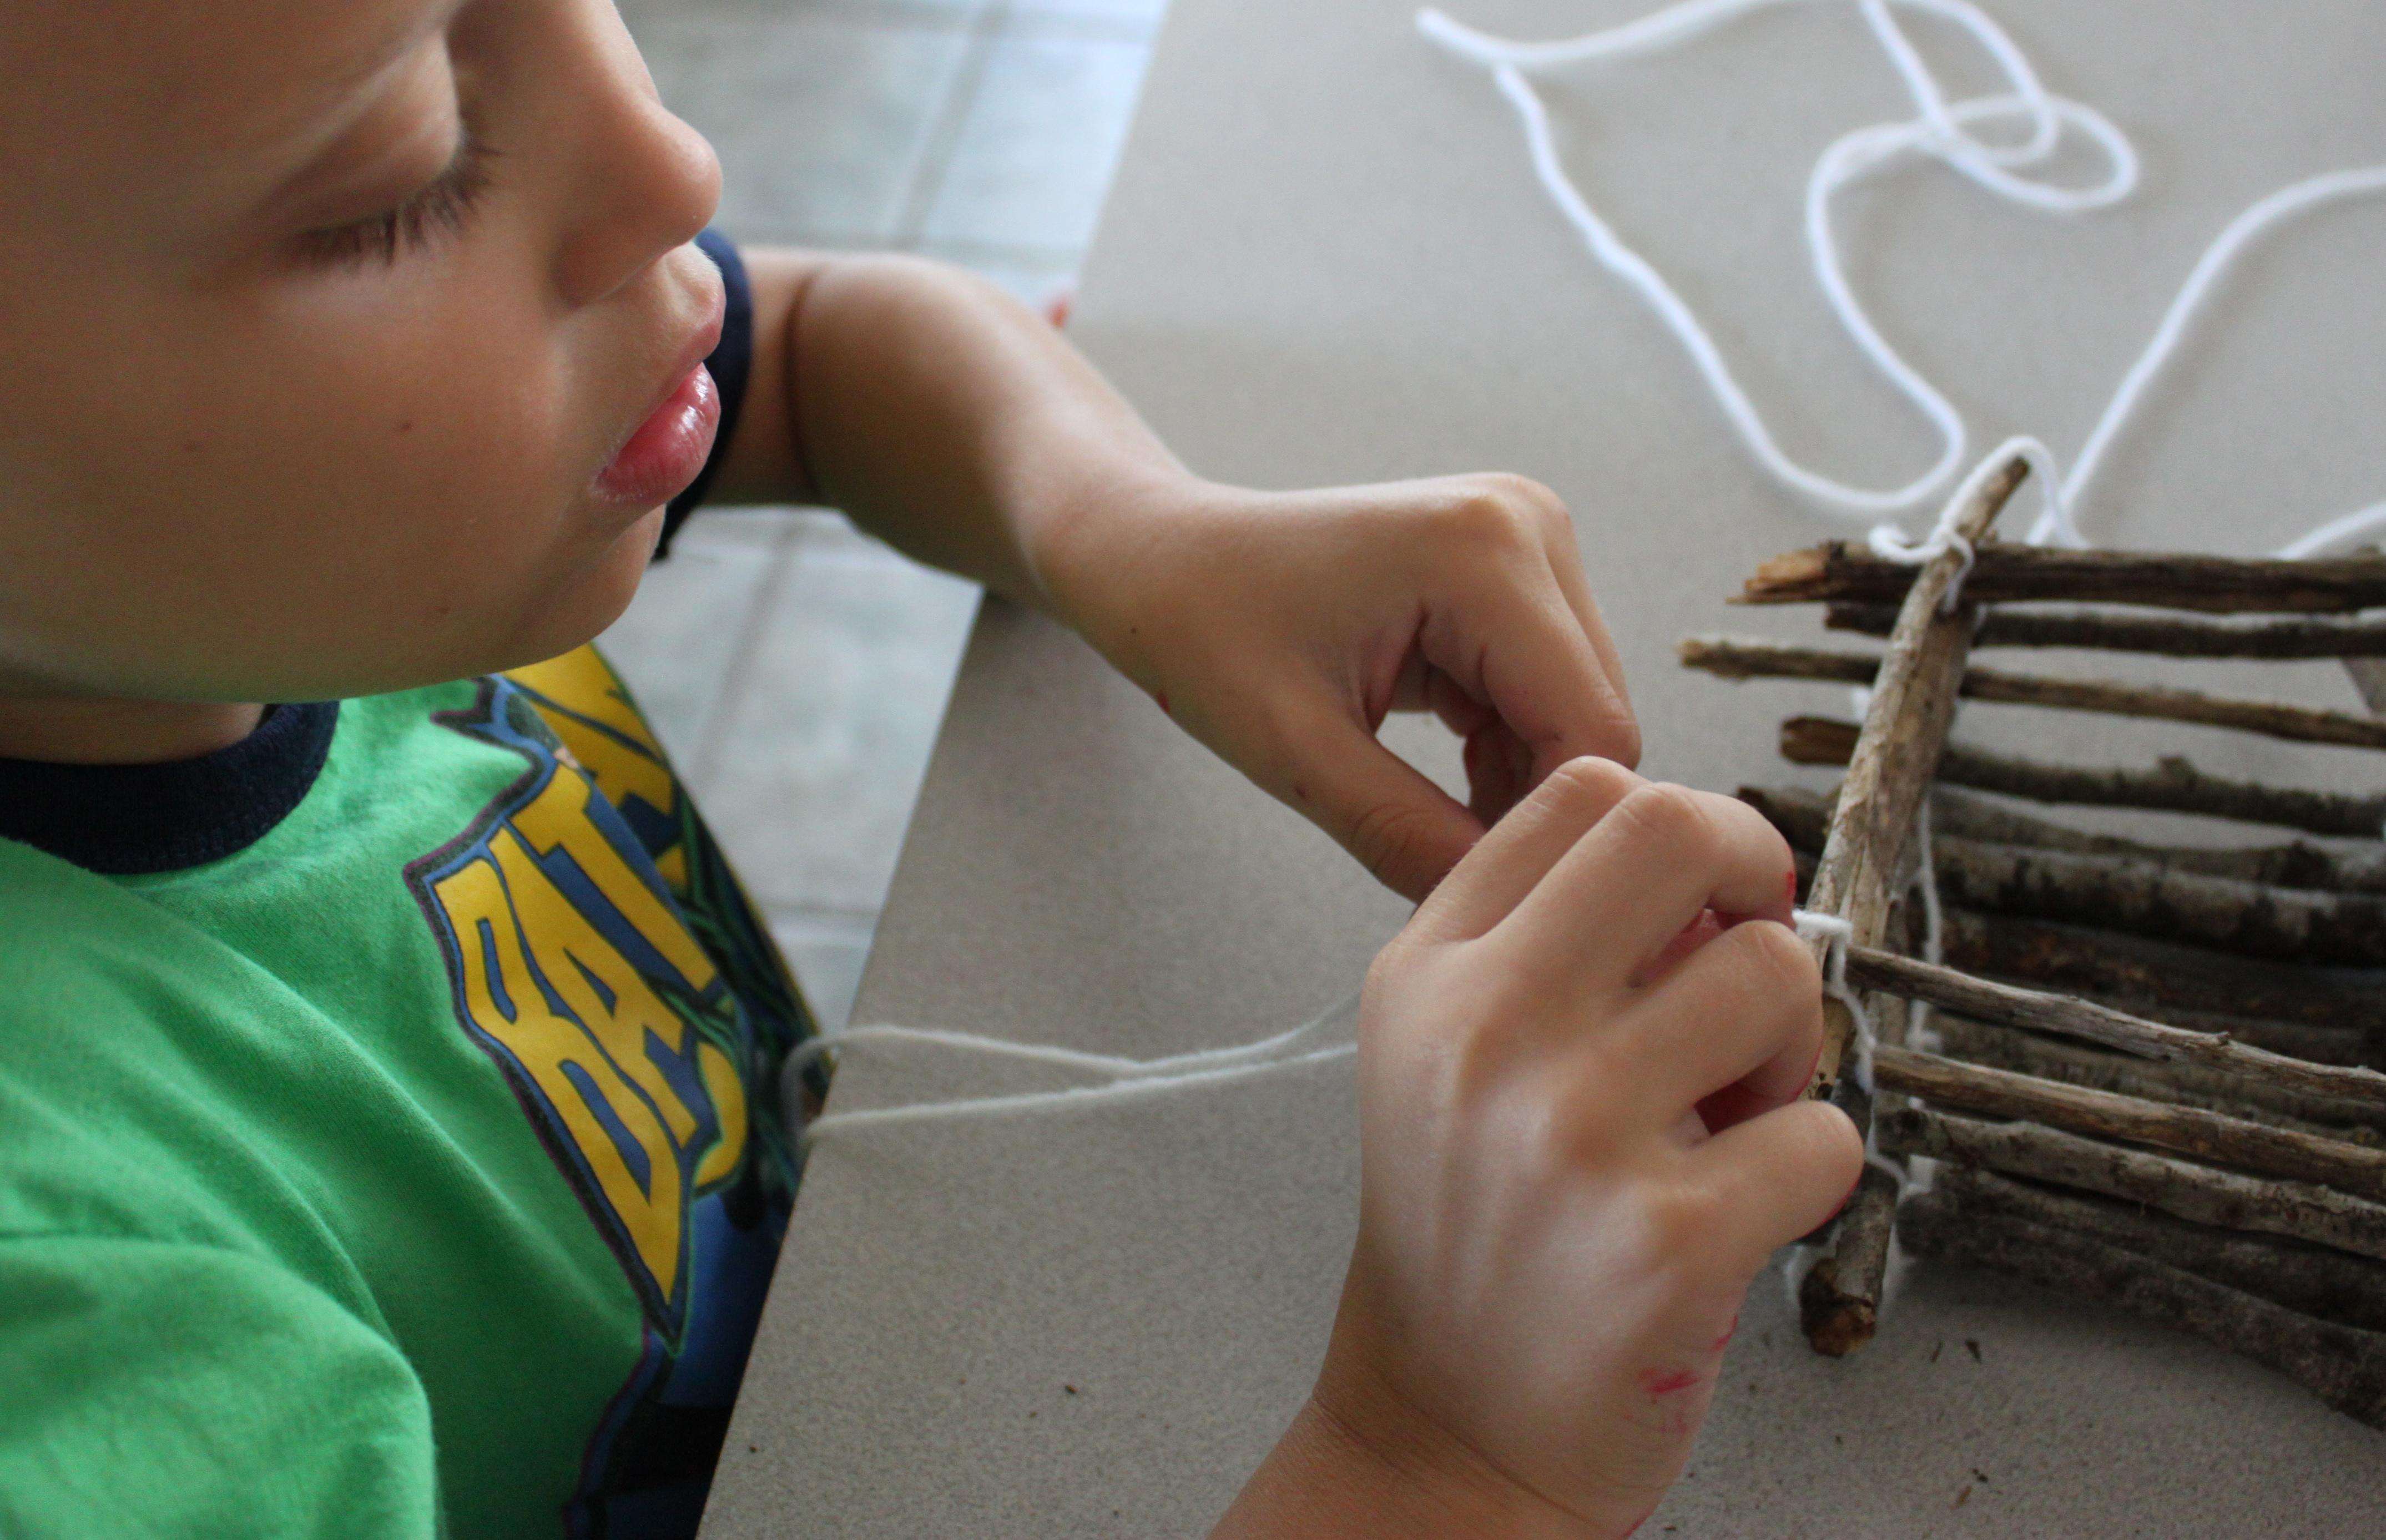
Begin to build the sides of your basket. Put 2 parallel sticks on the base of your basket. Use the long strings that are already tied on the corners. Wrap each string around the corner of the new stick and knot it.
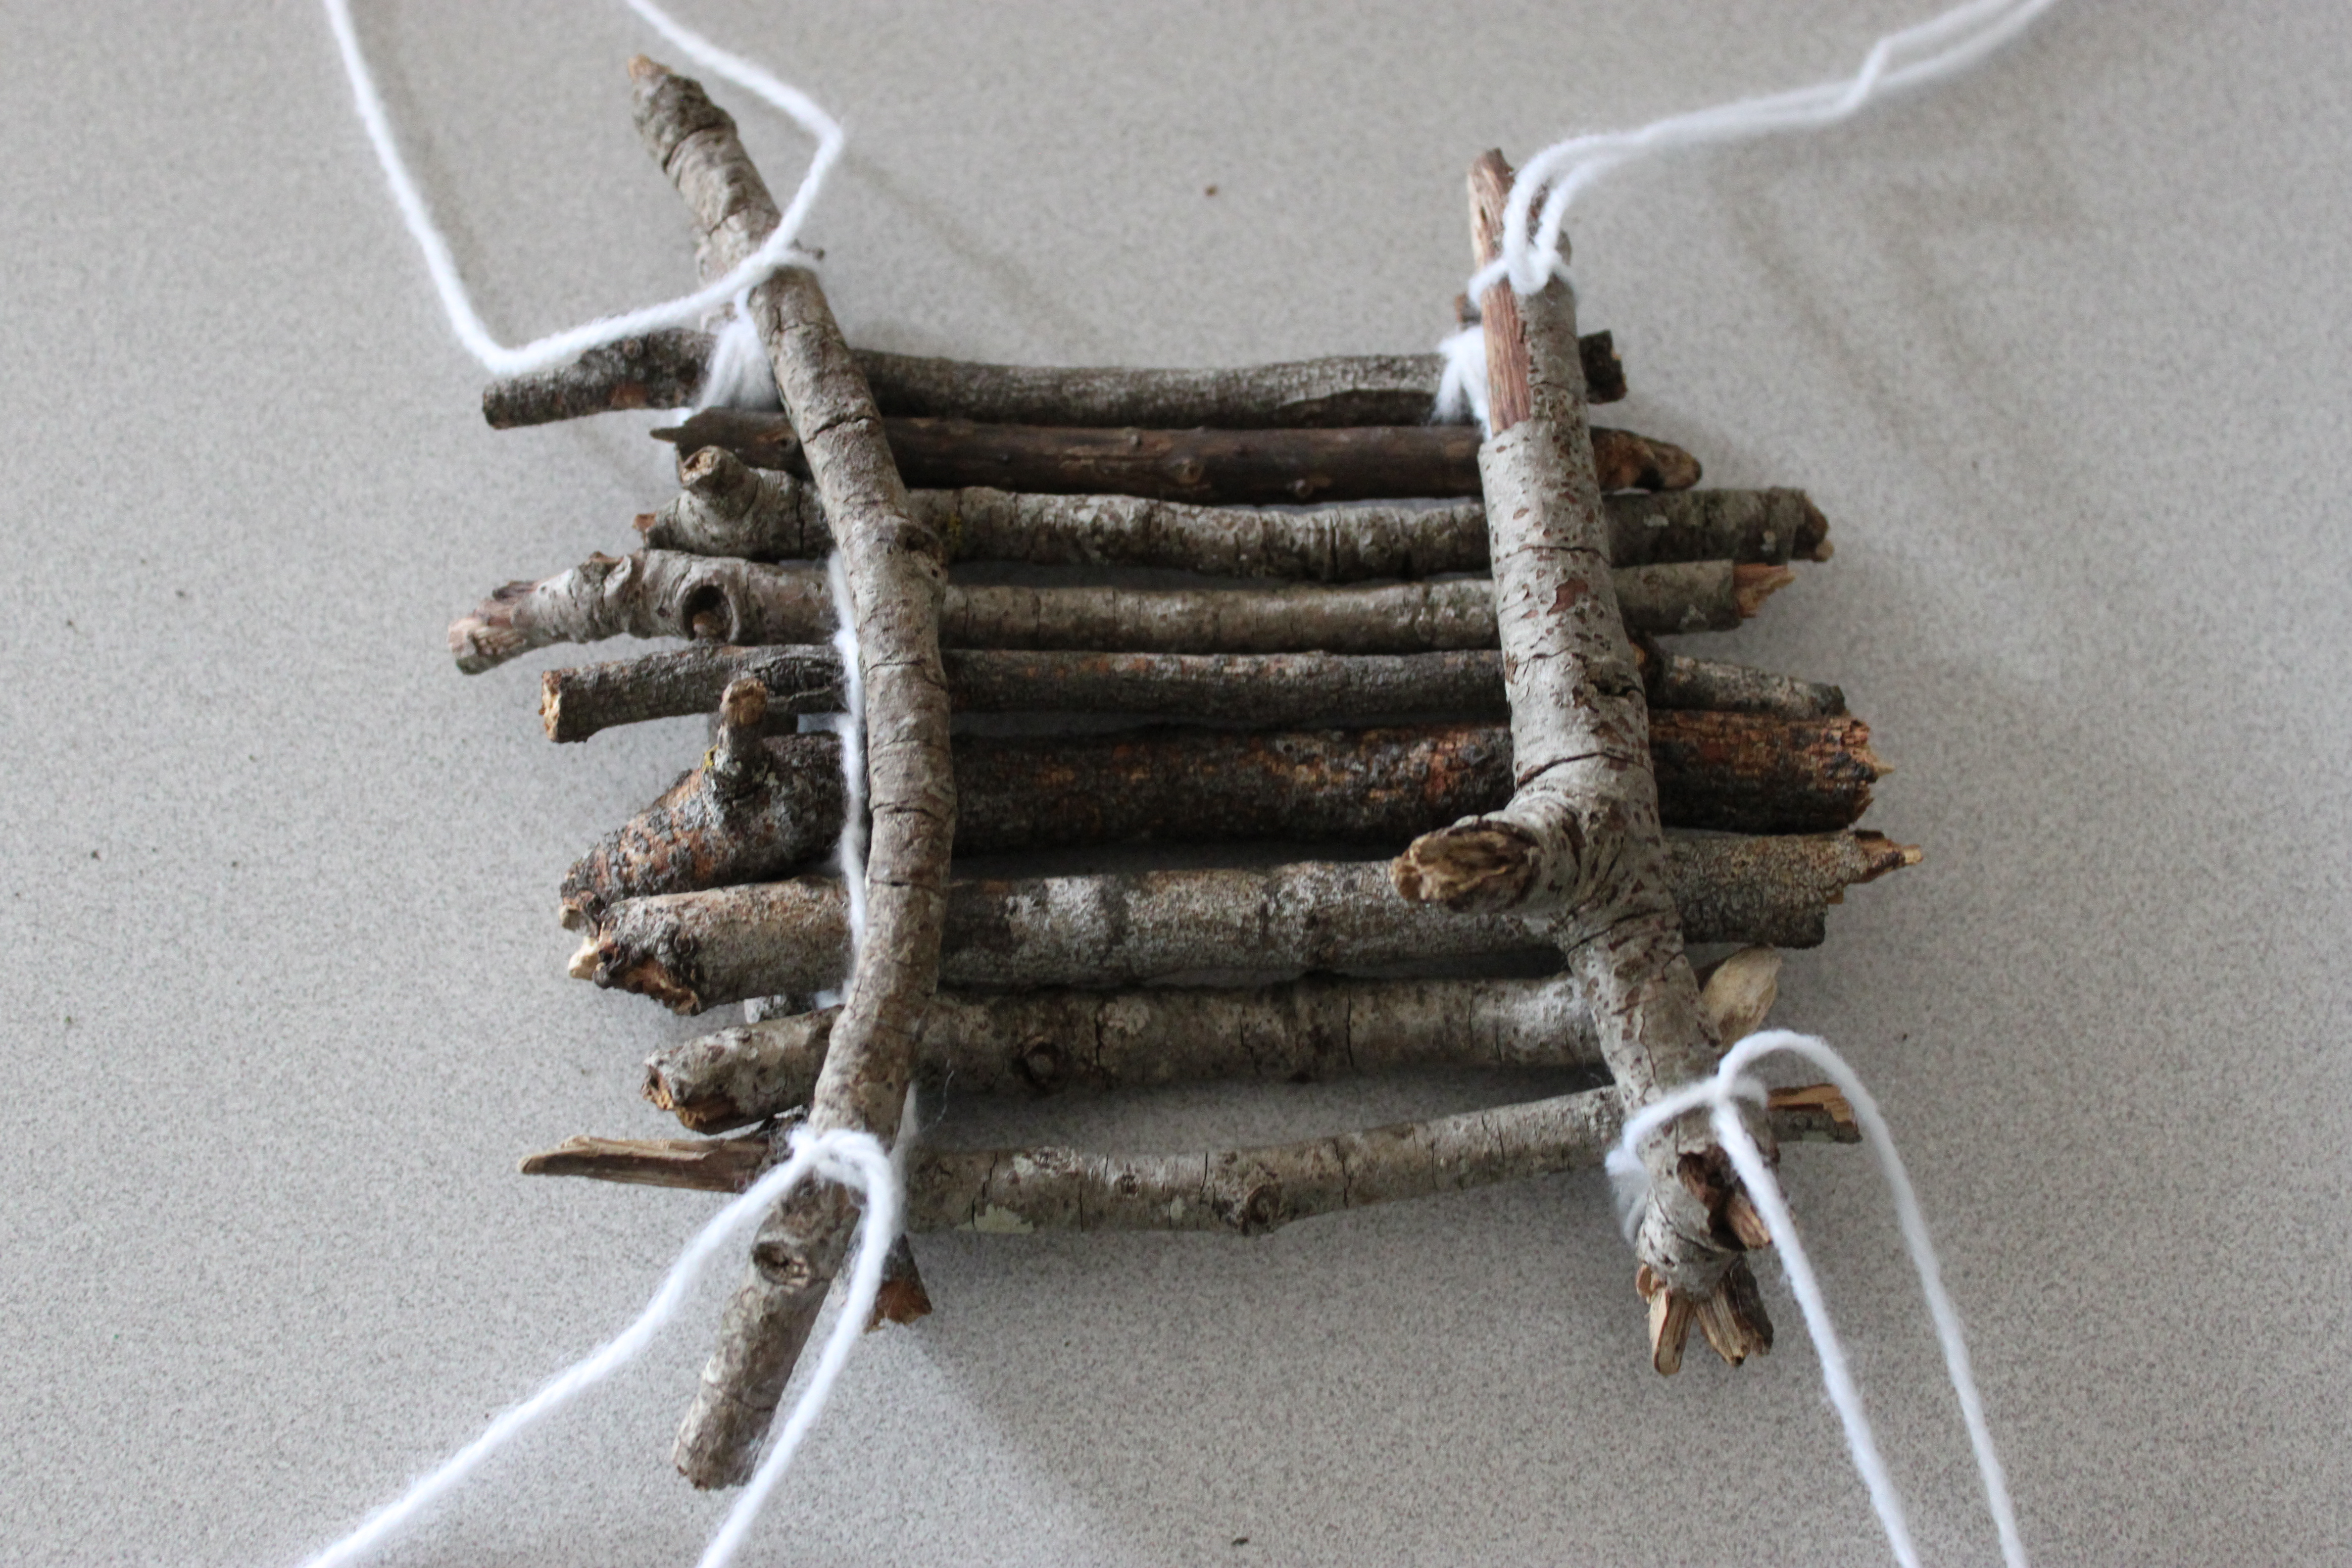
Step 8
Put 2 more parallel sticks on top. Use the long corner strings to wrap around and knot the ends of the sticks.
Step 9
Continue to lay 2 sticks on at a time and tie knots around them to secure them into place. Keep adding sticks to build your walls higher until it is the height that you want it.
Step 10
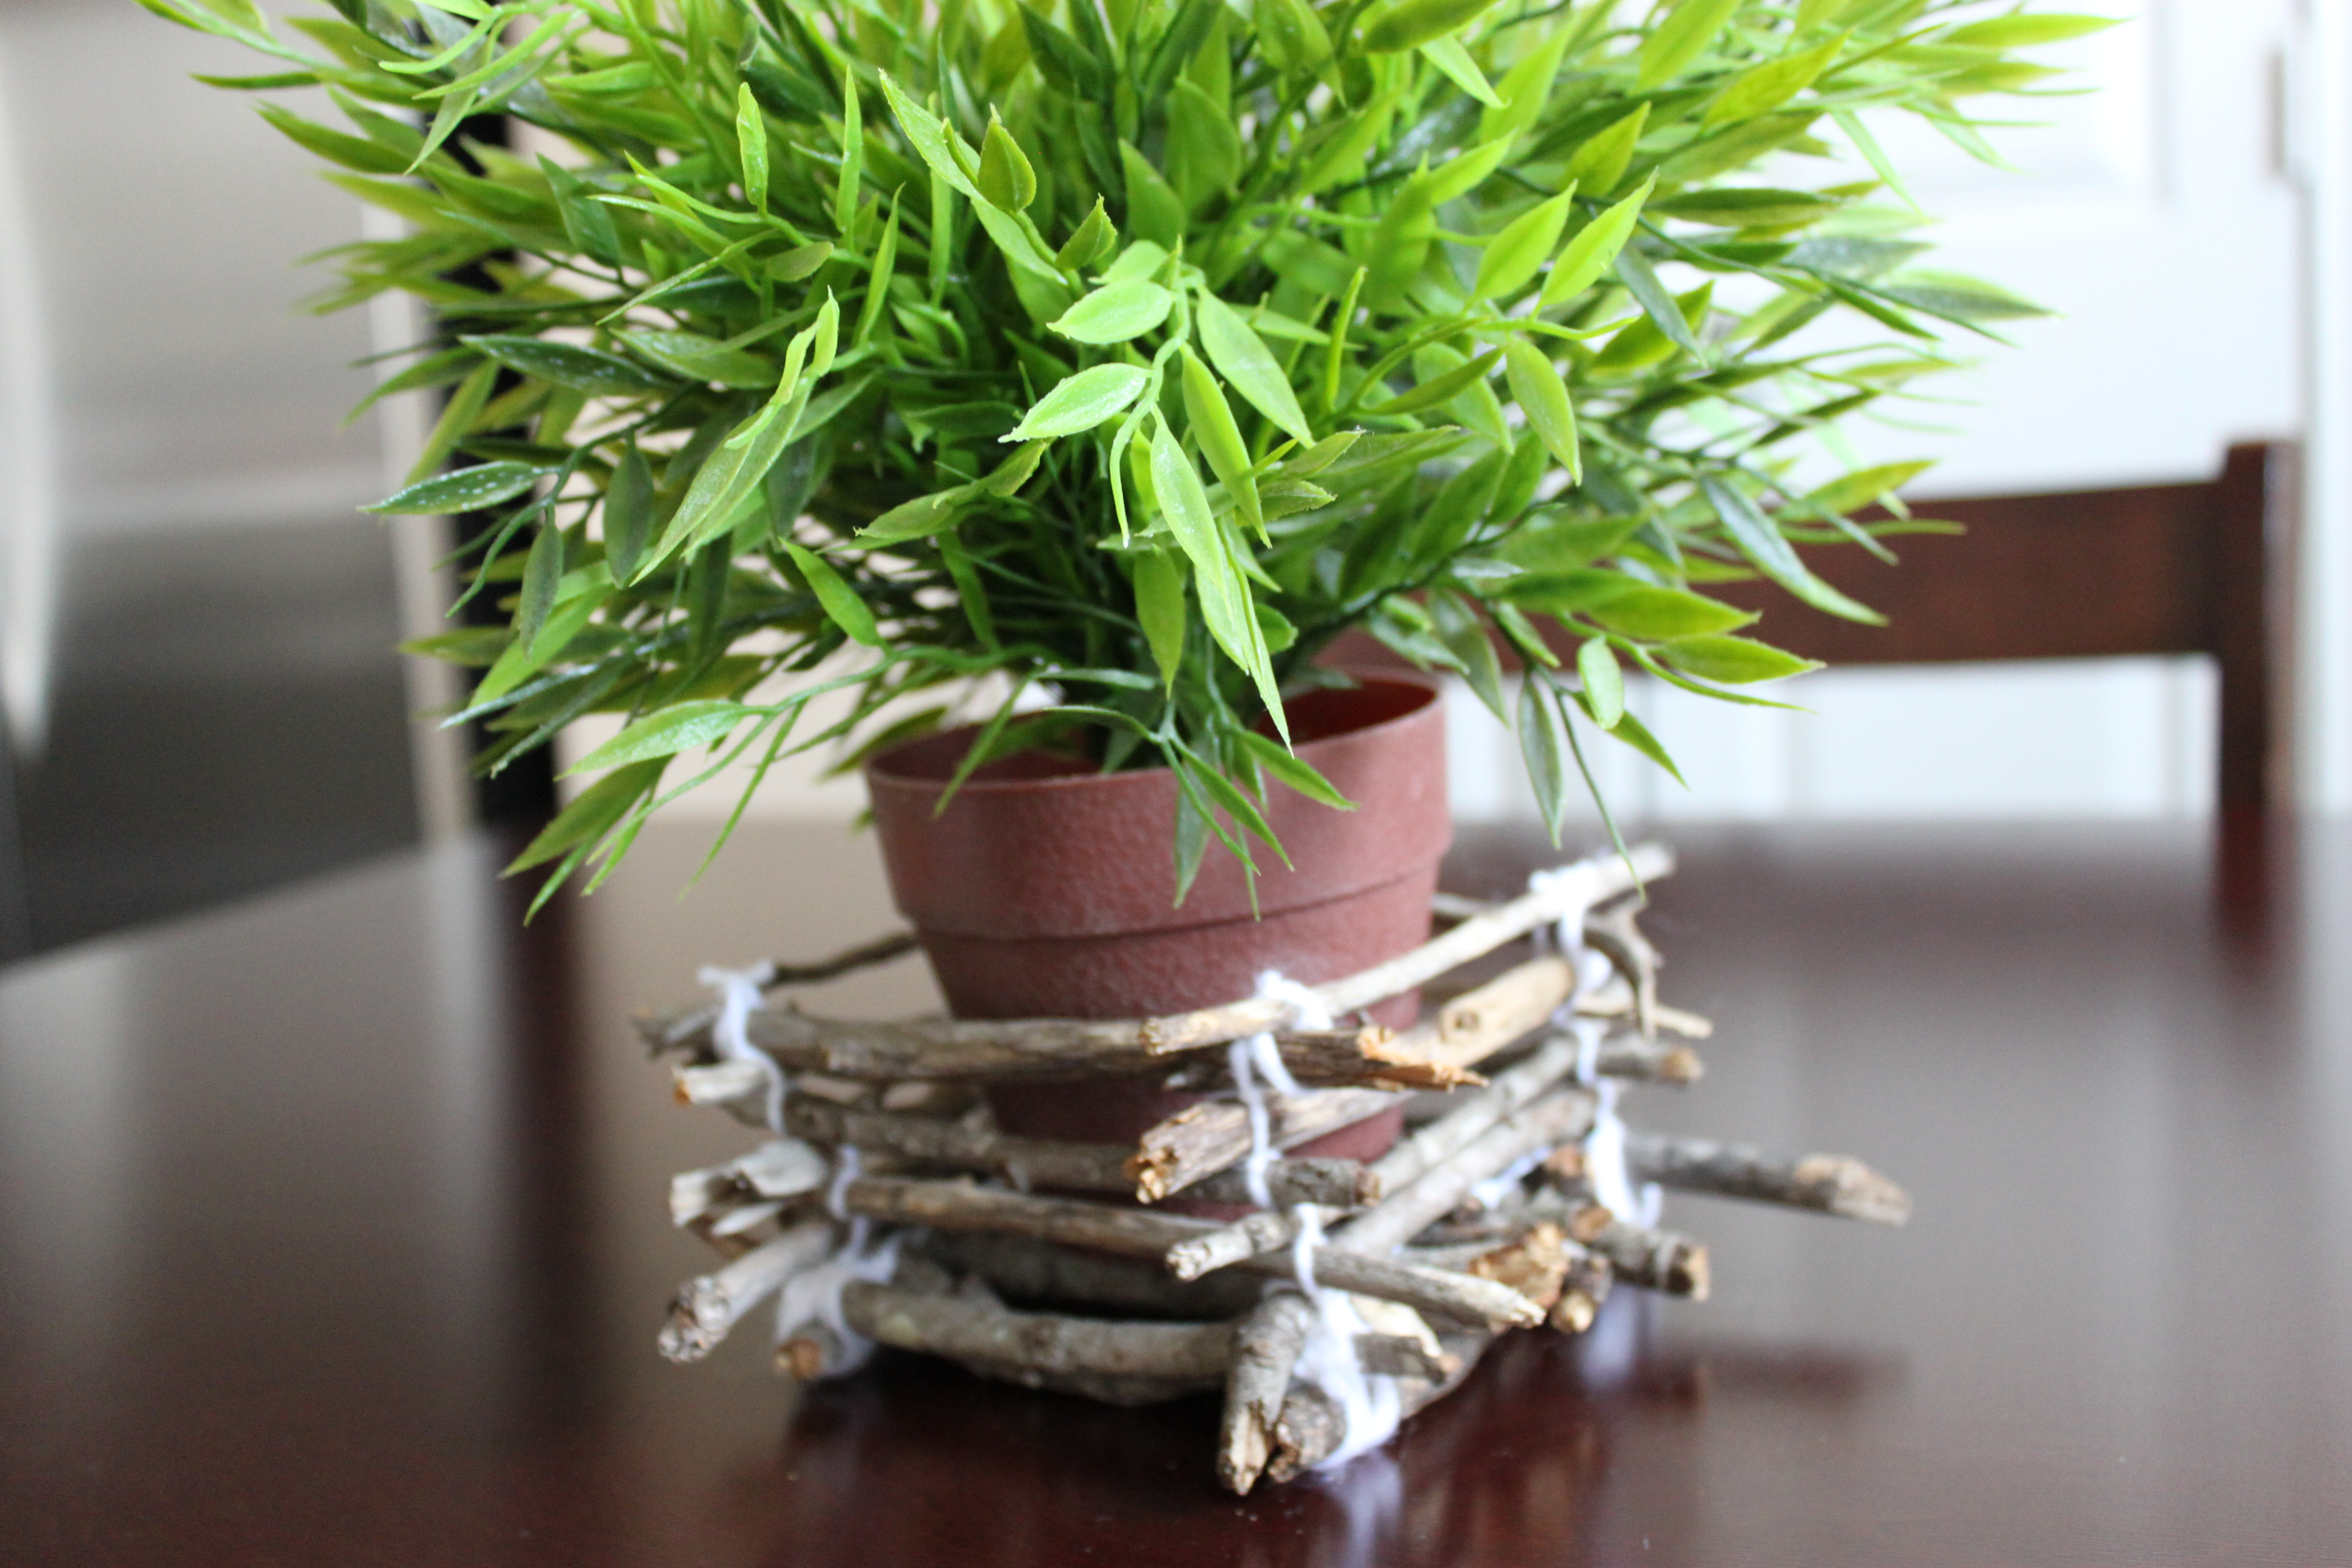
Double knot the string when you are finished. Cut the extra string off at the top and put a dot of glue on each knot (optional).
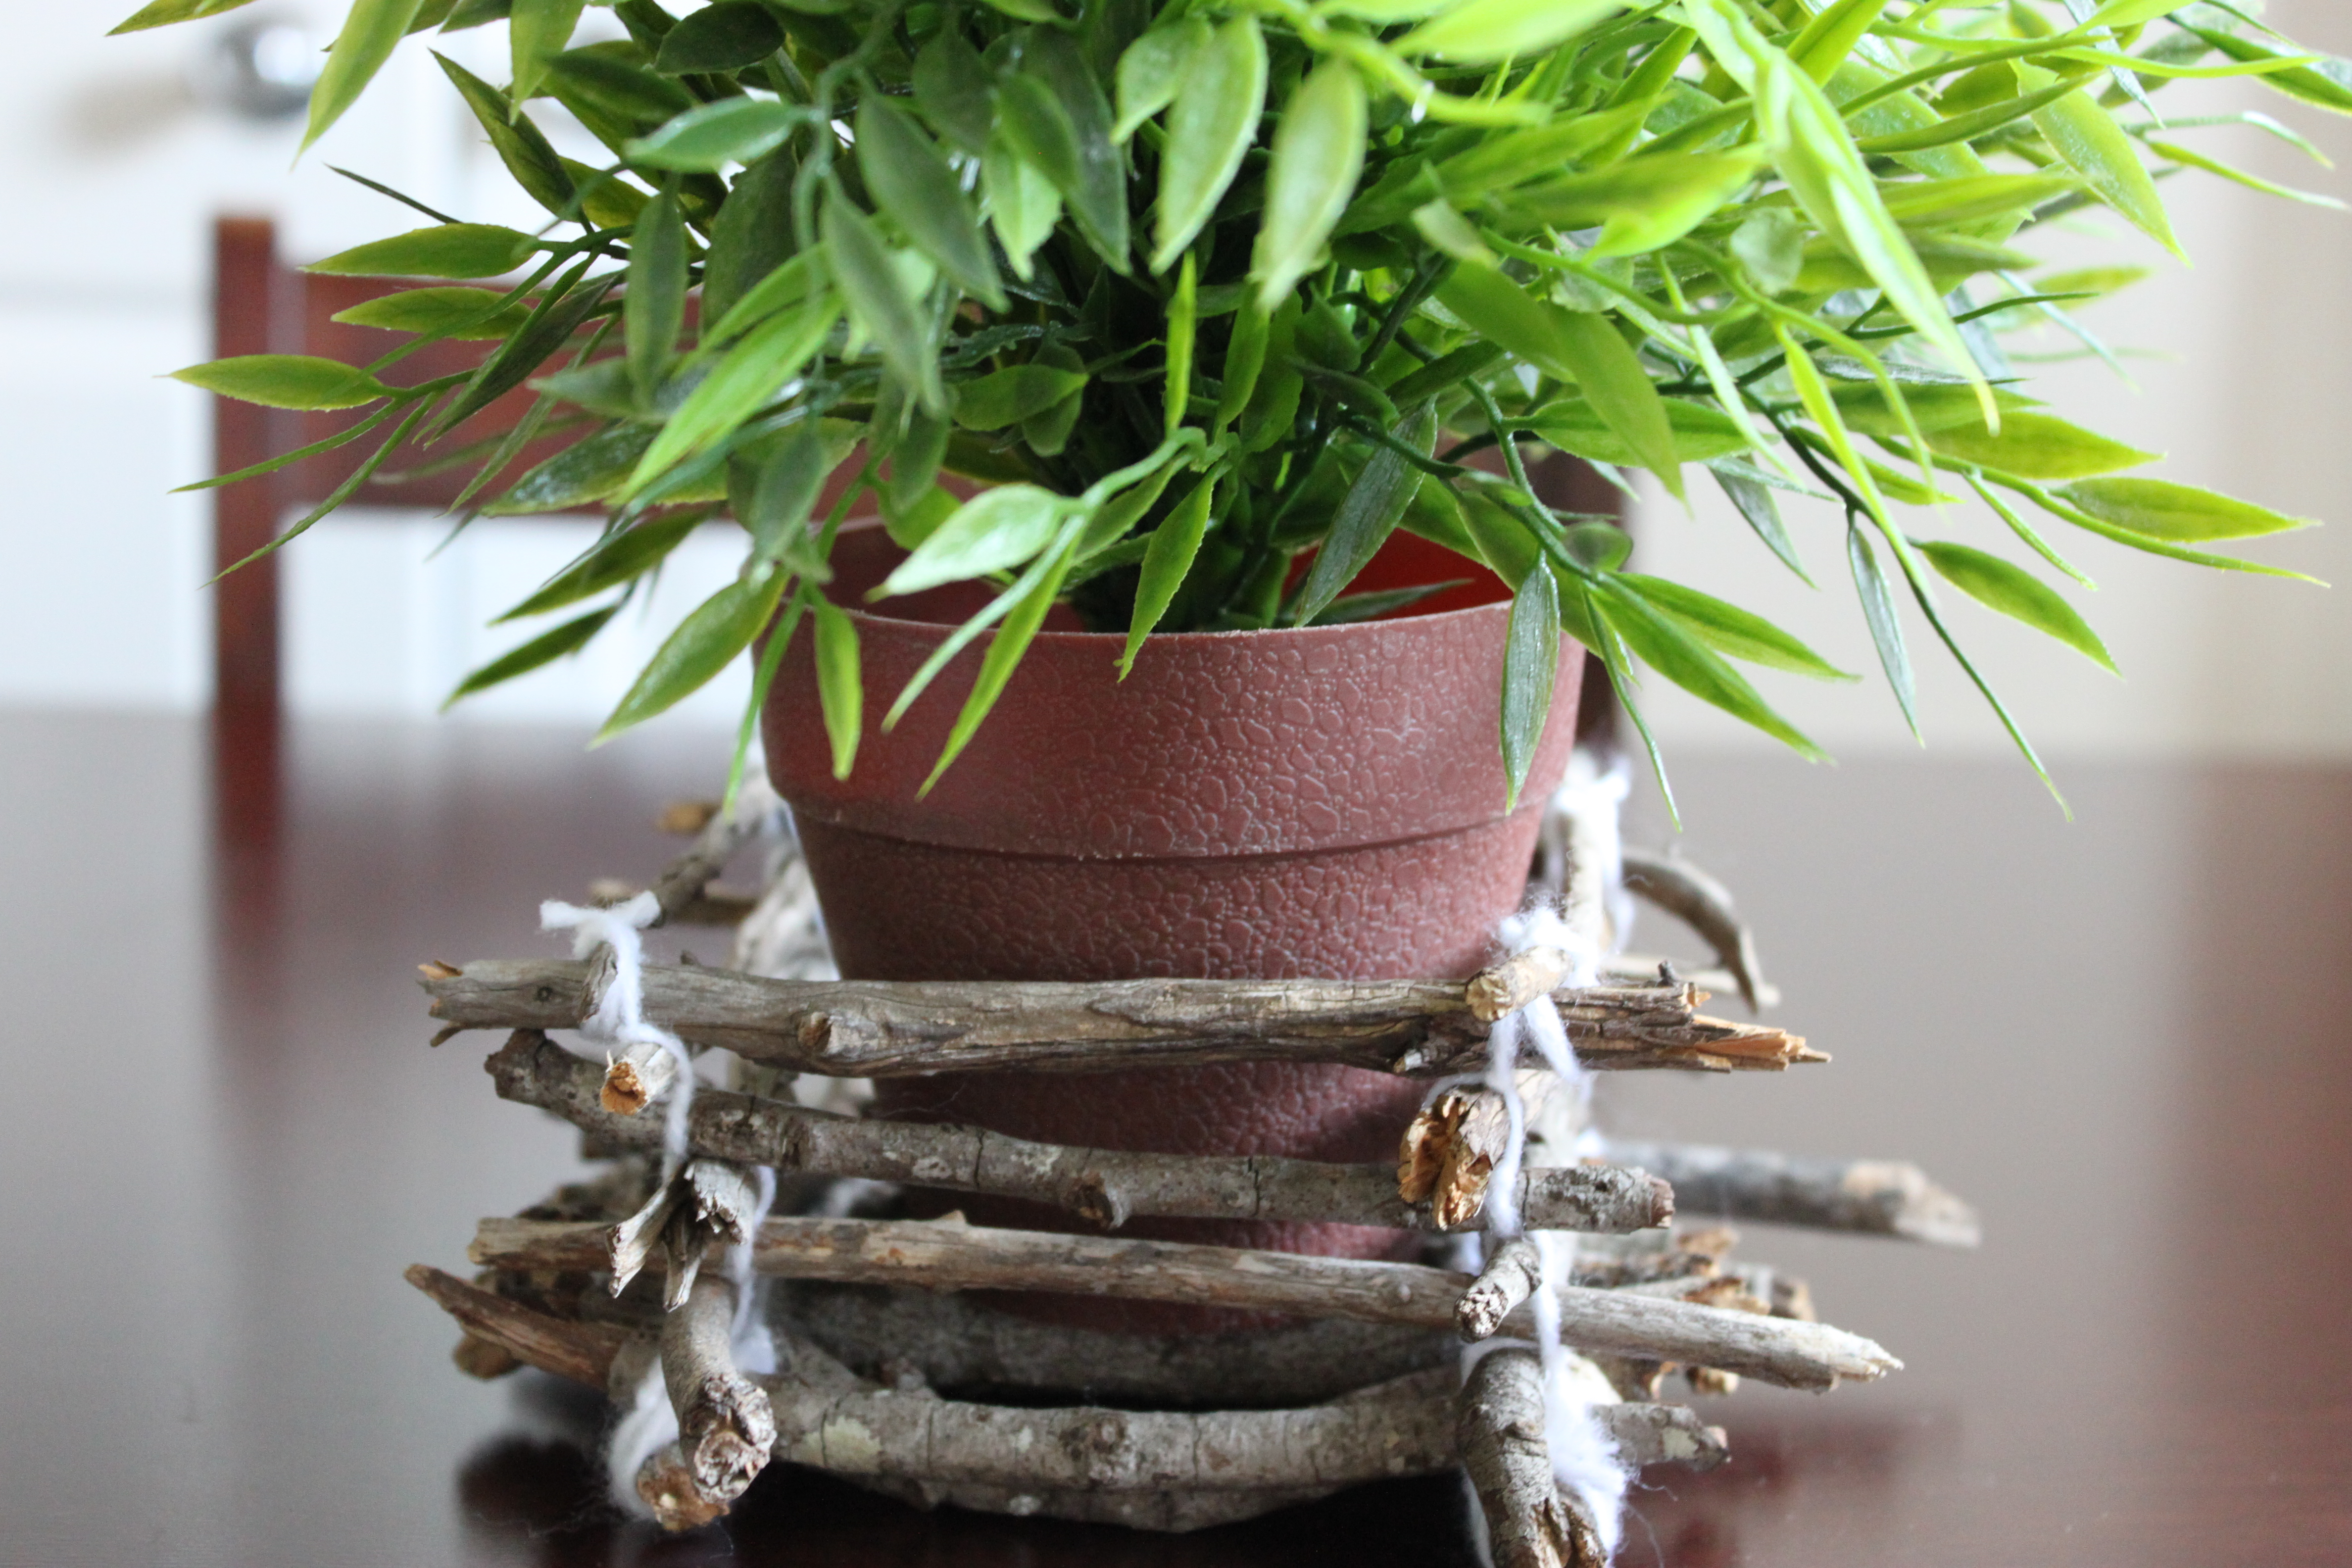
Done!
You can use your basket for anything! Store your markers in it, fill it with flowers, or use it as a centerpiece on a table.


