Step-by-step tutorial
Step 1
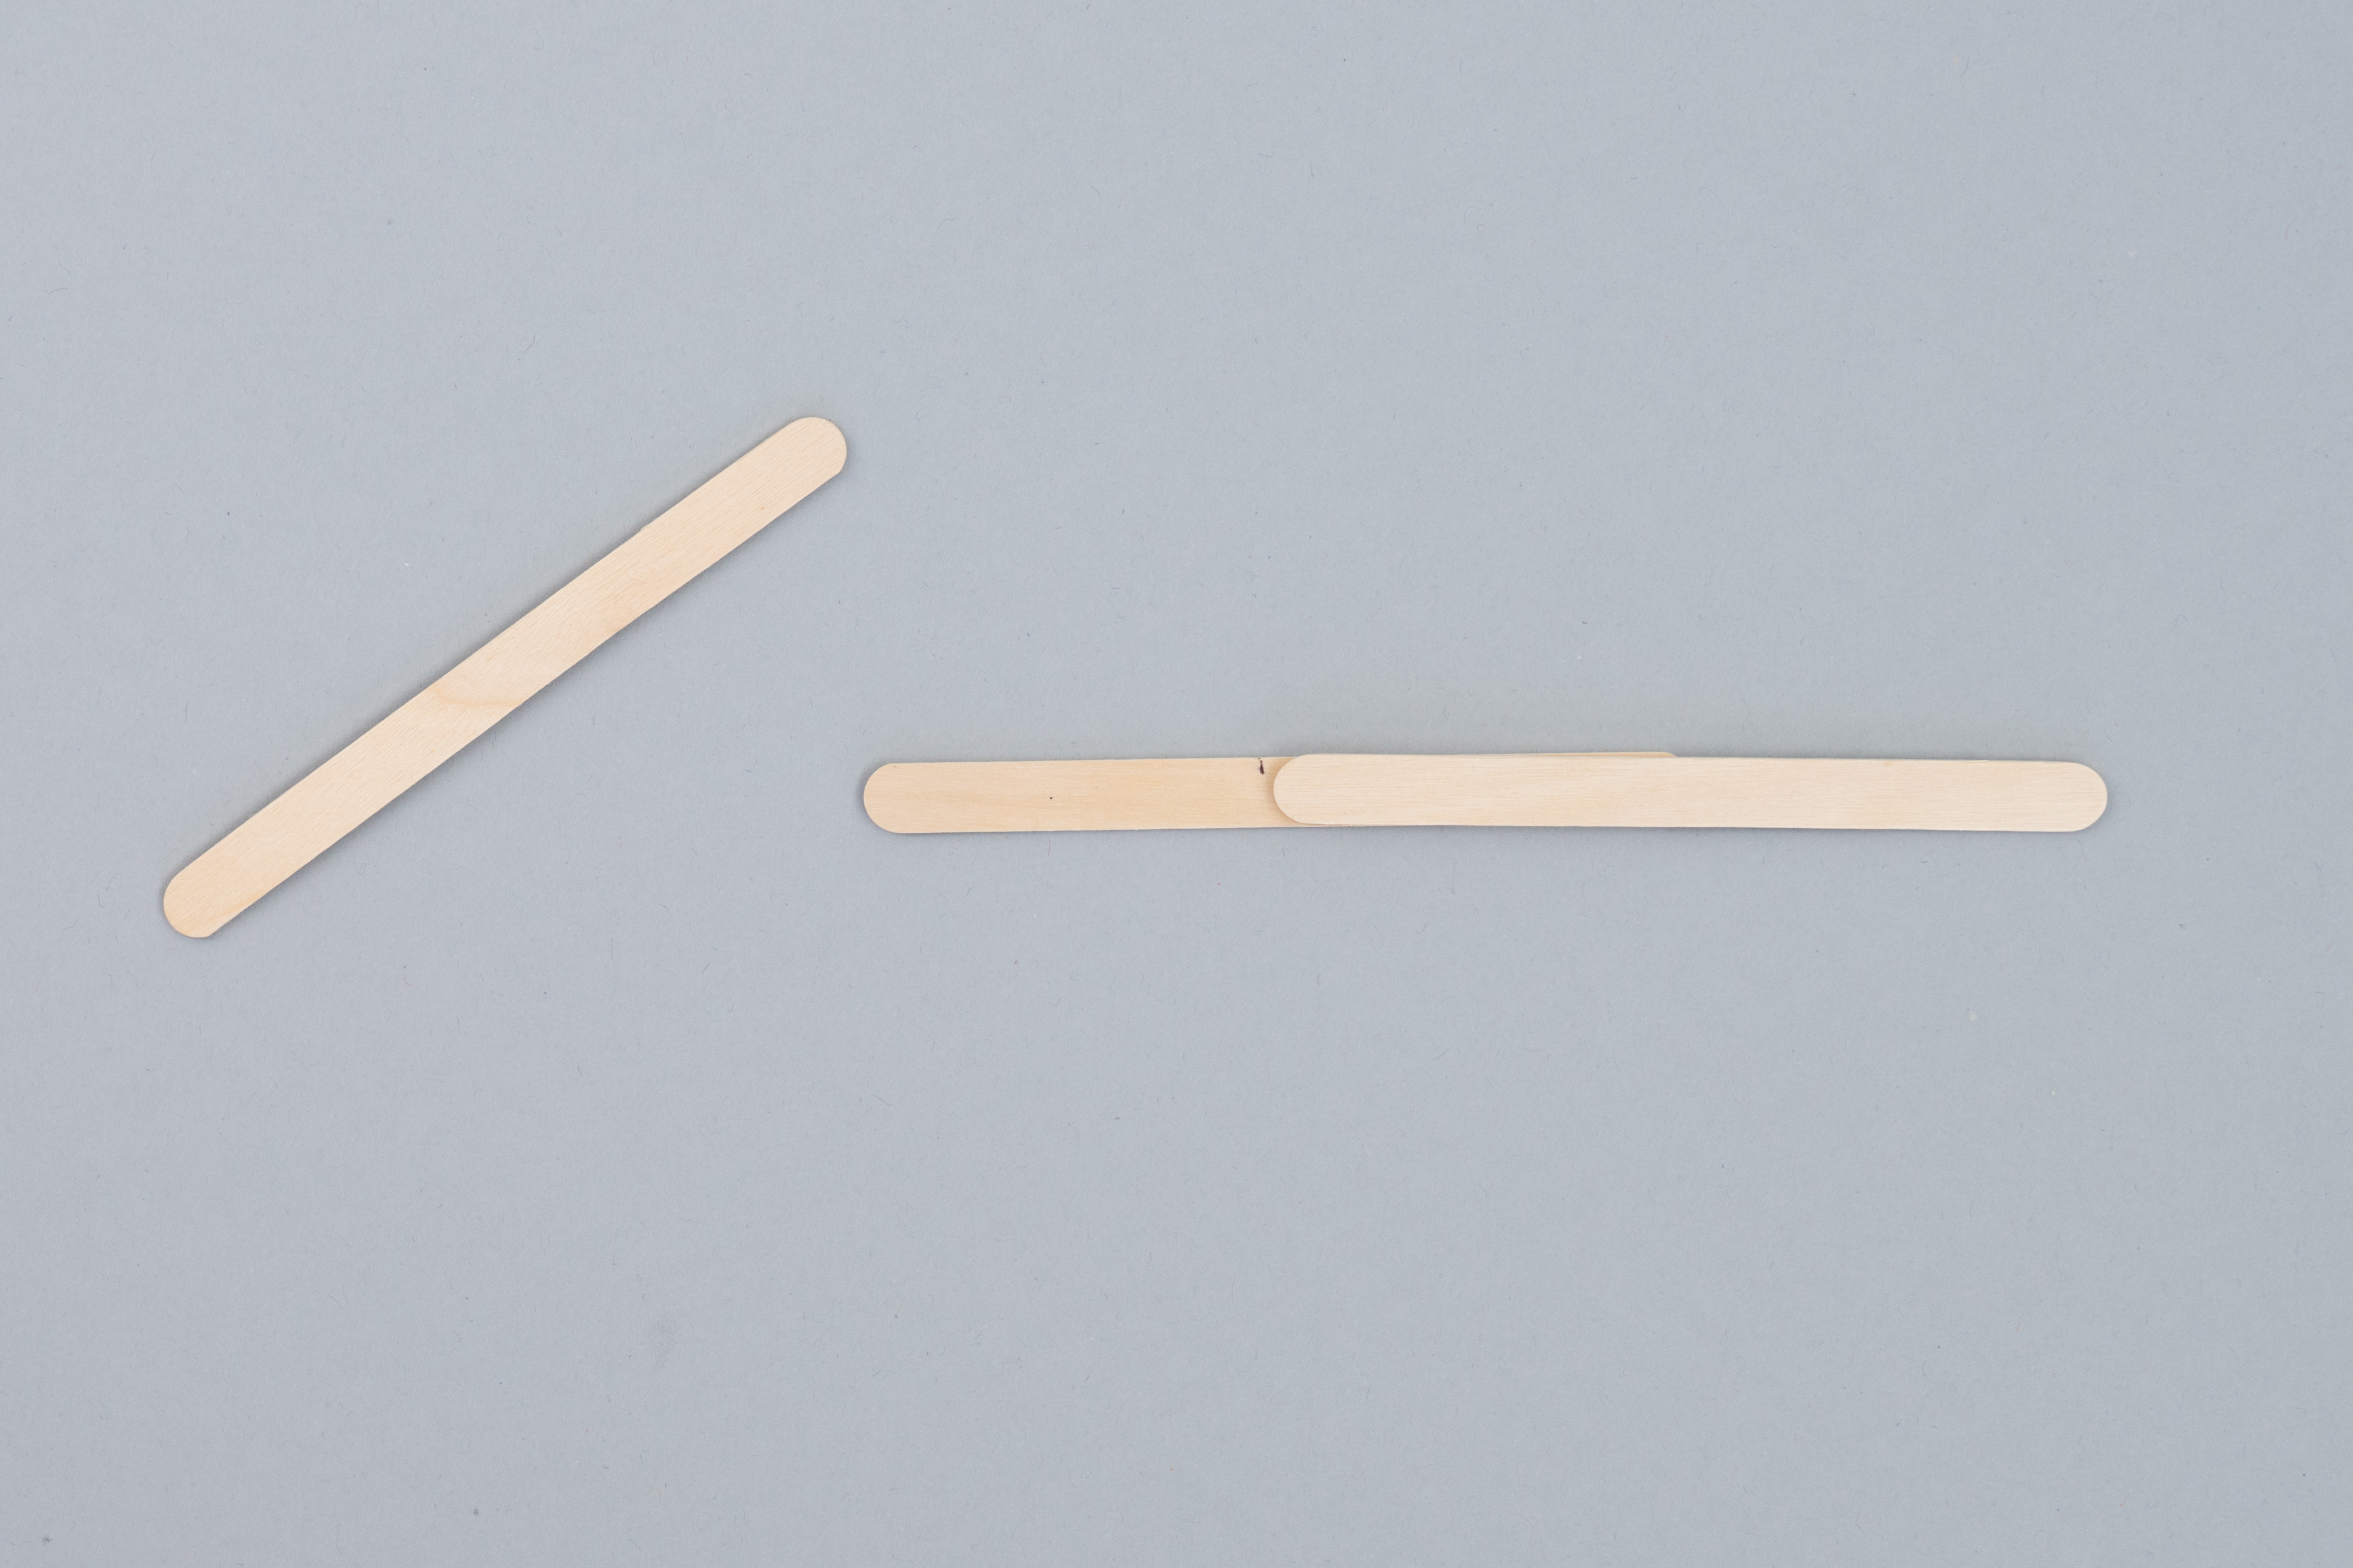
In this step, you'll attach three craft sticks together to create one long stick, using one as the center piece and placing the other two on top of it.
First, take a craft stick and use a pencil to mark its center. With a hot glue gun, attach the second stick to one half of the first stick, laying it on top. Repeat this for the third stick, attaching it to the first stick's other side.
Let the glue dry.
Tip
Handle the hot glue gun with care. If needed, a grownup assistant should handle this step.
Step 2
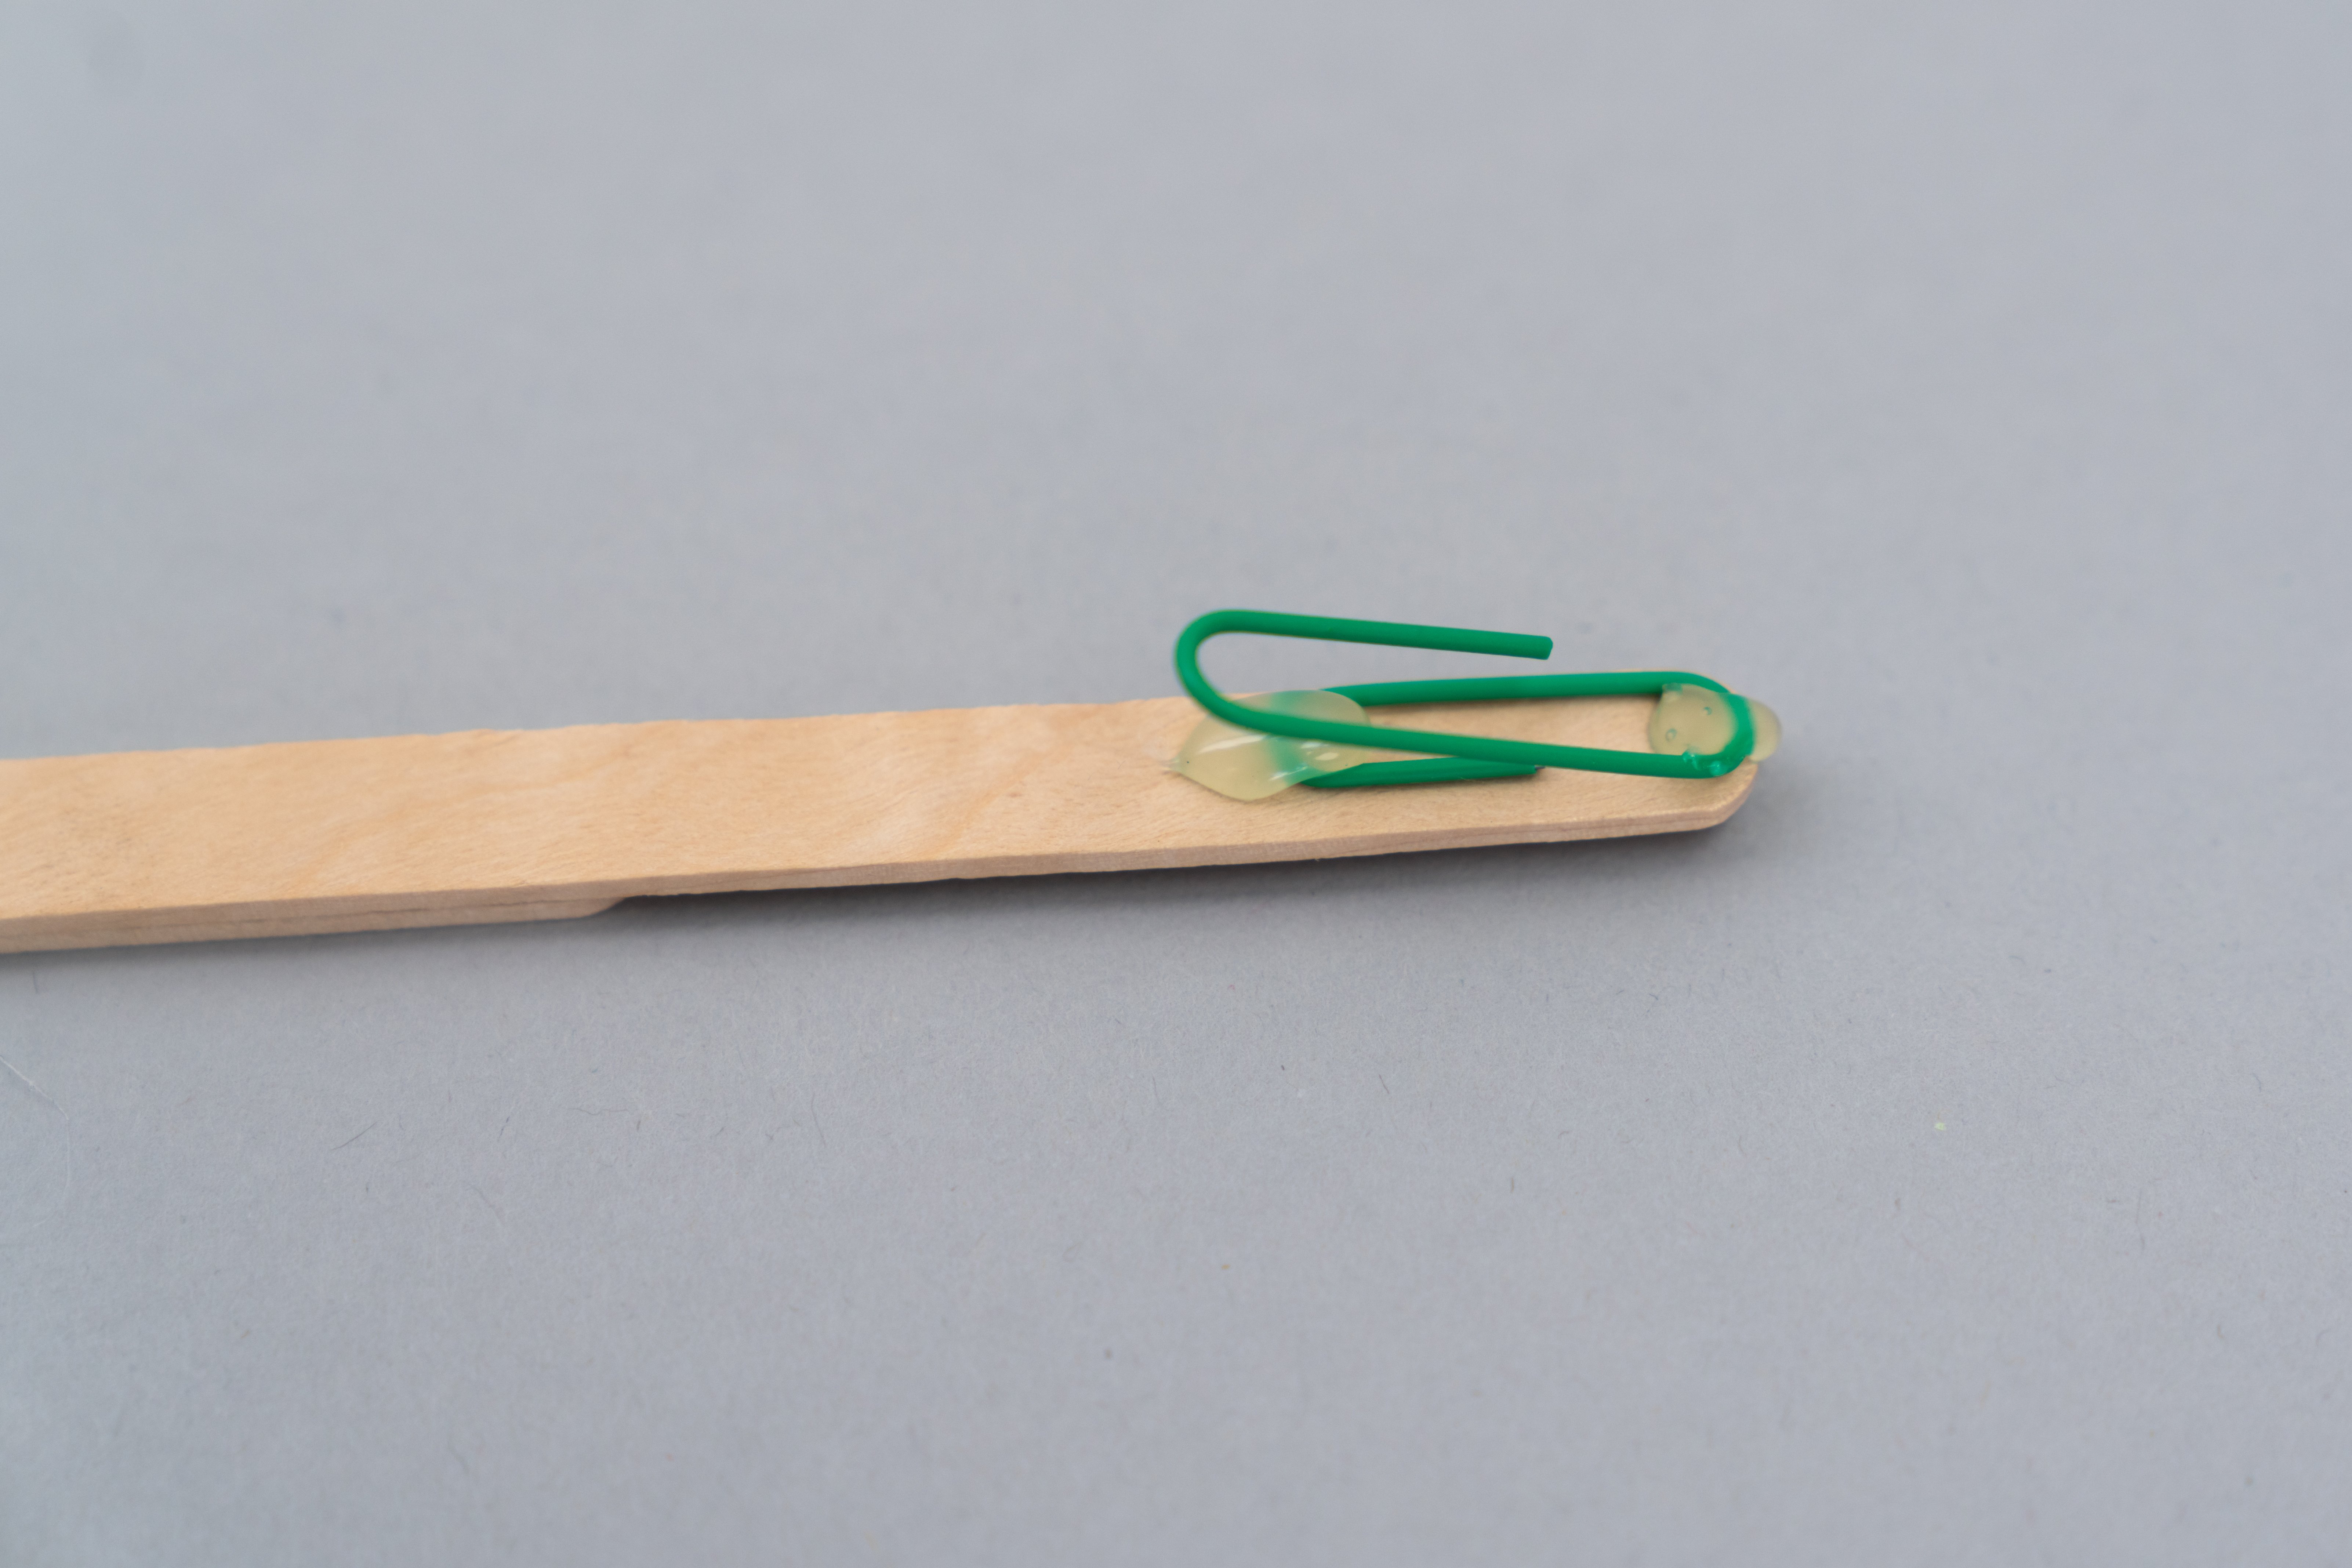
Take a paper clip and bend it partway open so the two wire loops are separated. Use the hot glue gun to attach the shorter inner loop to one end of the long stick constructed in Step 1. Make sure to place the paper clip so the two looped ends point toward the center of the stick.
Step 3
Wrap tape around both the glued paper clip loop and the stick to make it extra-secure.

Step 4
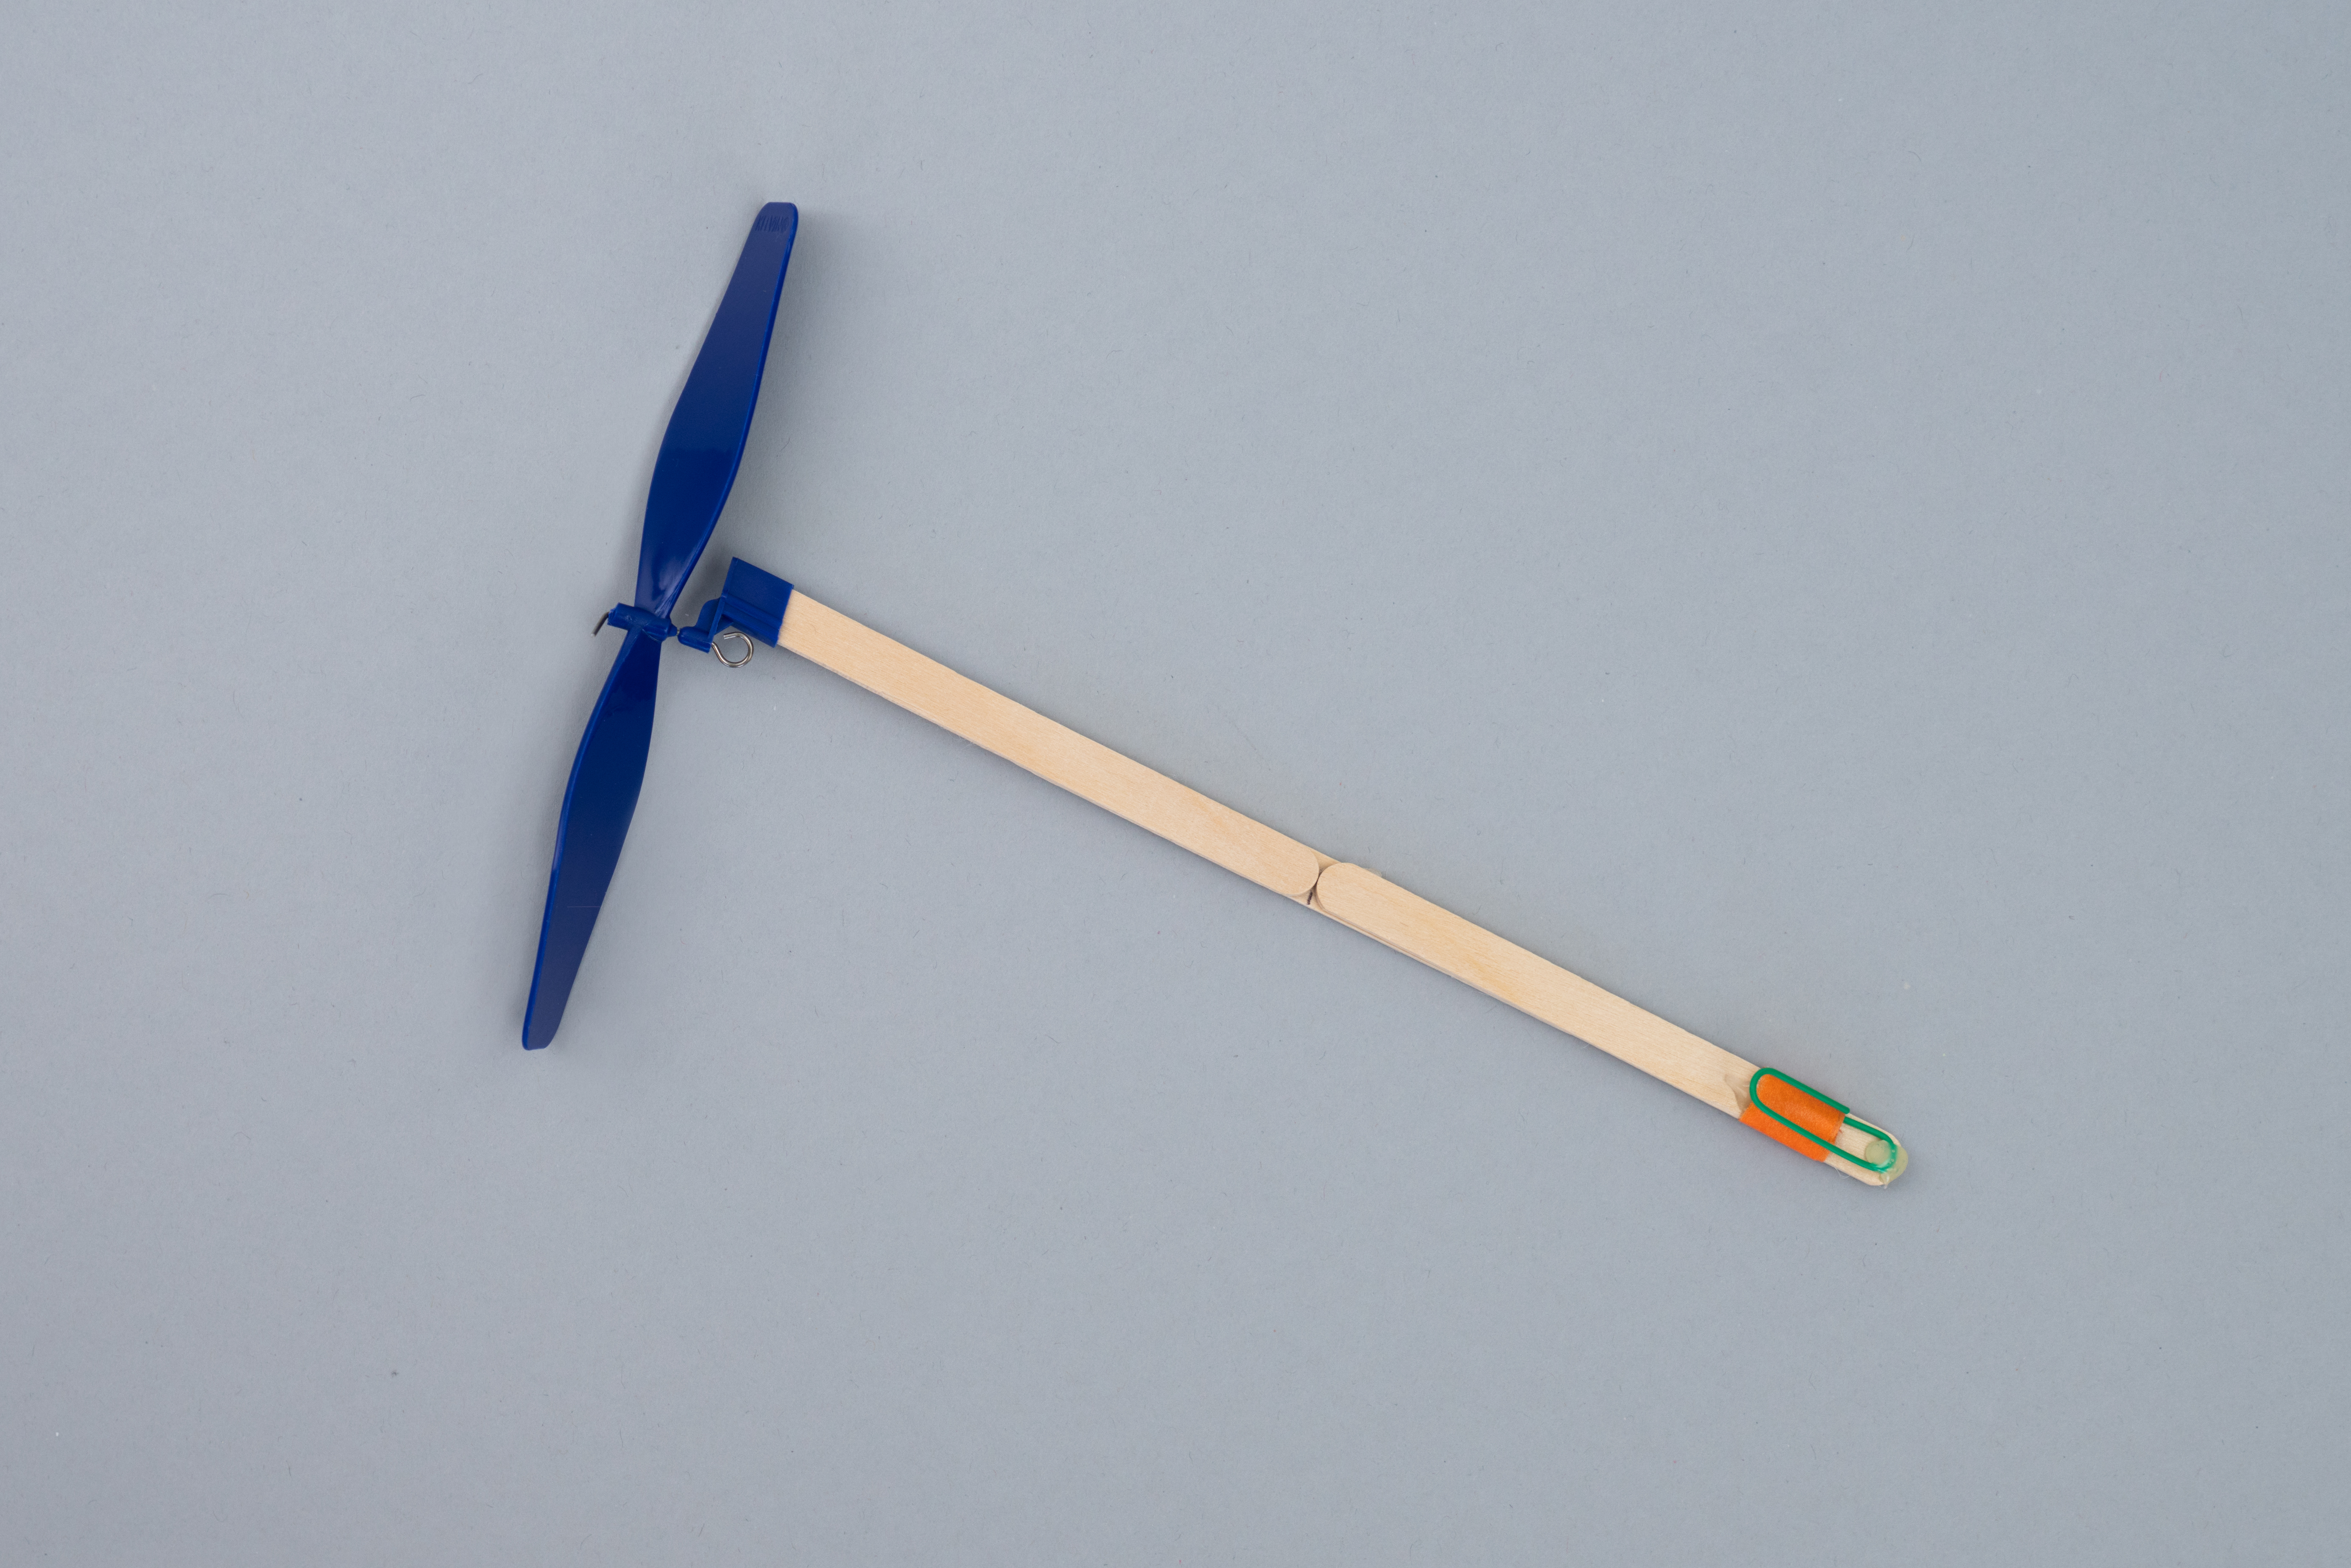
Hold the stick so the paper clip loop is to your right. Insert the other end of the stick into the propeller’s opening. Make sure the propeller hook is below the stick.
Step 5
Get the two rubber bands and hold them together. For each rubber band, loop one end through the paper clip loop and the other end through the propeller hook. The rubber bands should lay against the stick.
Congratulations—you just completed the propeller base! Now, just a bit more work to do before Buzz and Woody can take off!
Step 6
Bend open two paper clips so they make backward S-shapes. Use a hot glue gun to attach the smaller paper clip loops to a long side of the cardboard rectangle. Attach the paper clips so they are spaced roughly two inches apart. Let the glue dry.
Step 7
Add tape to the glued paper clip loop to keep it securely attached to the cardboard.
Tip
Optional: The other side of the cardboard rectangle (without the paper clips) will serve as the backdrop for Buzz. Add color or decorate it to make him pop against a bright background.
Step 8
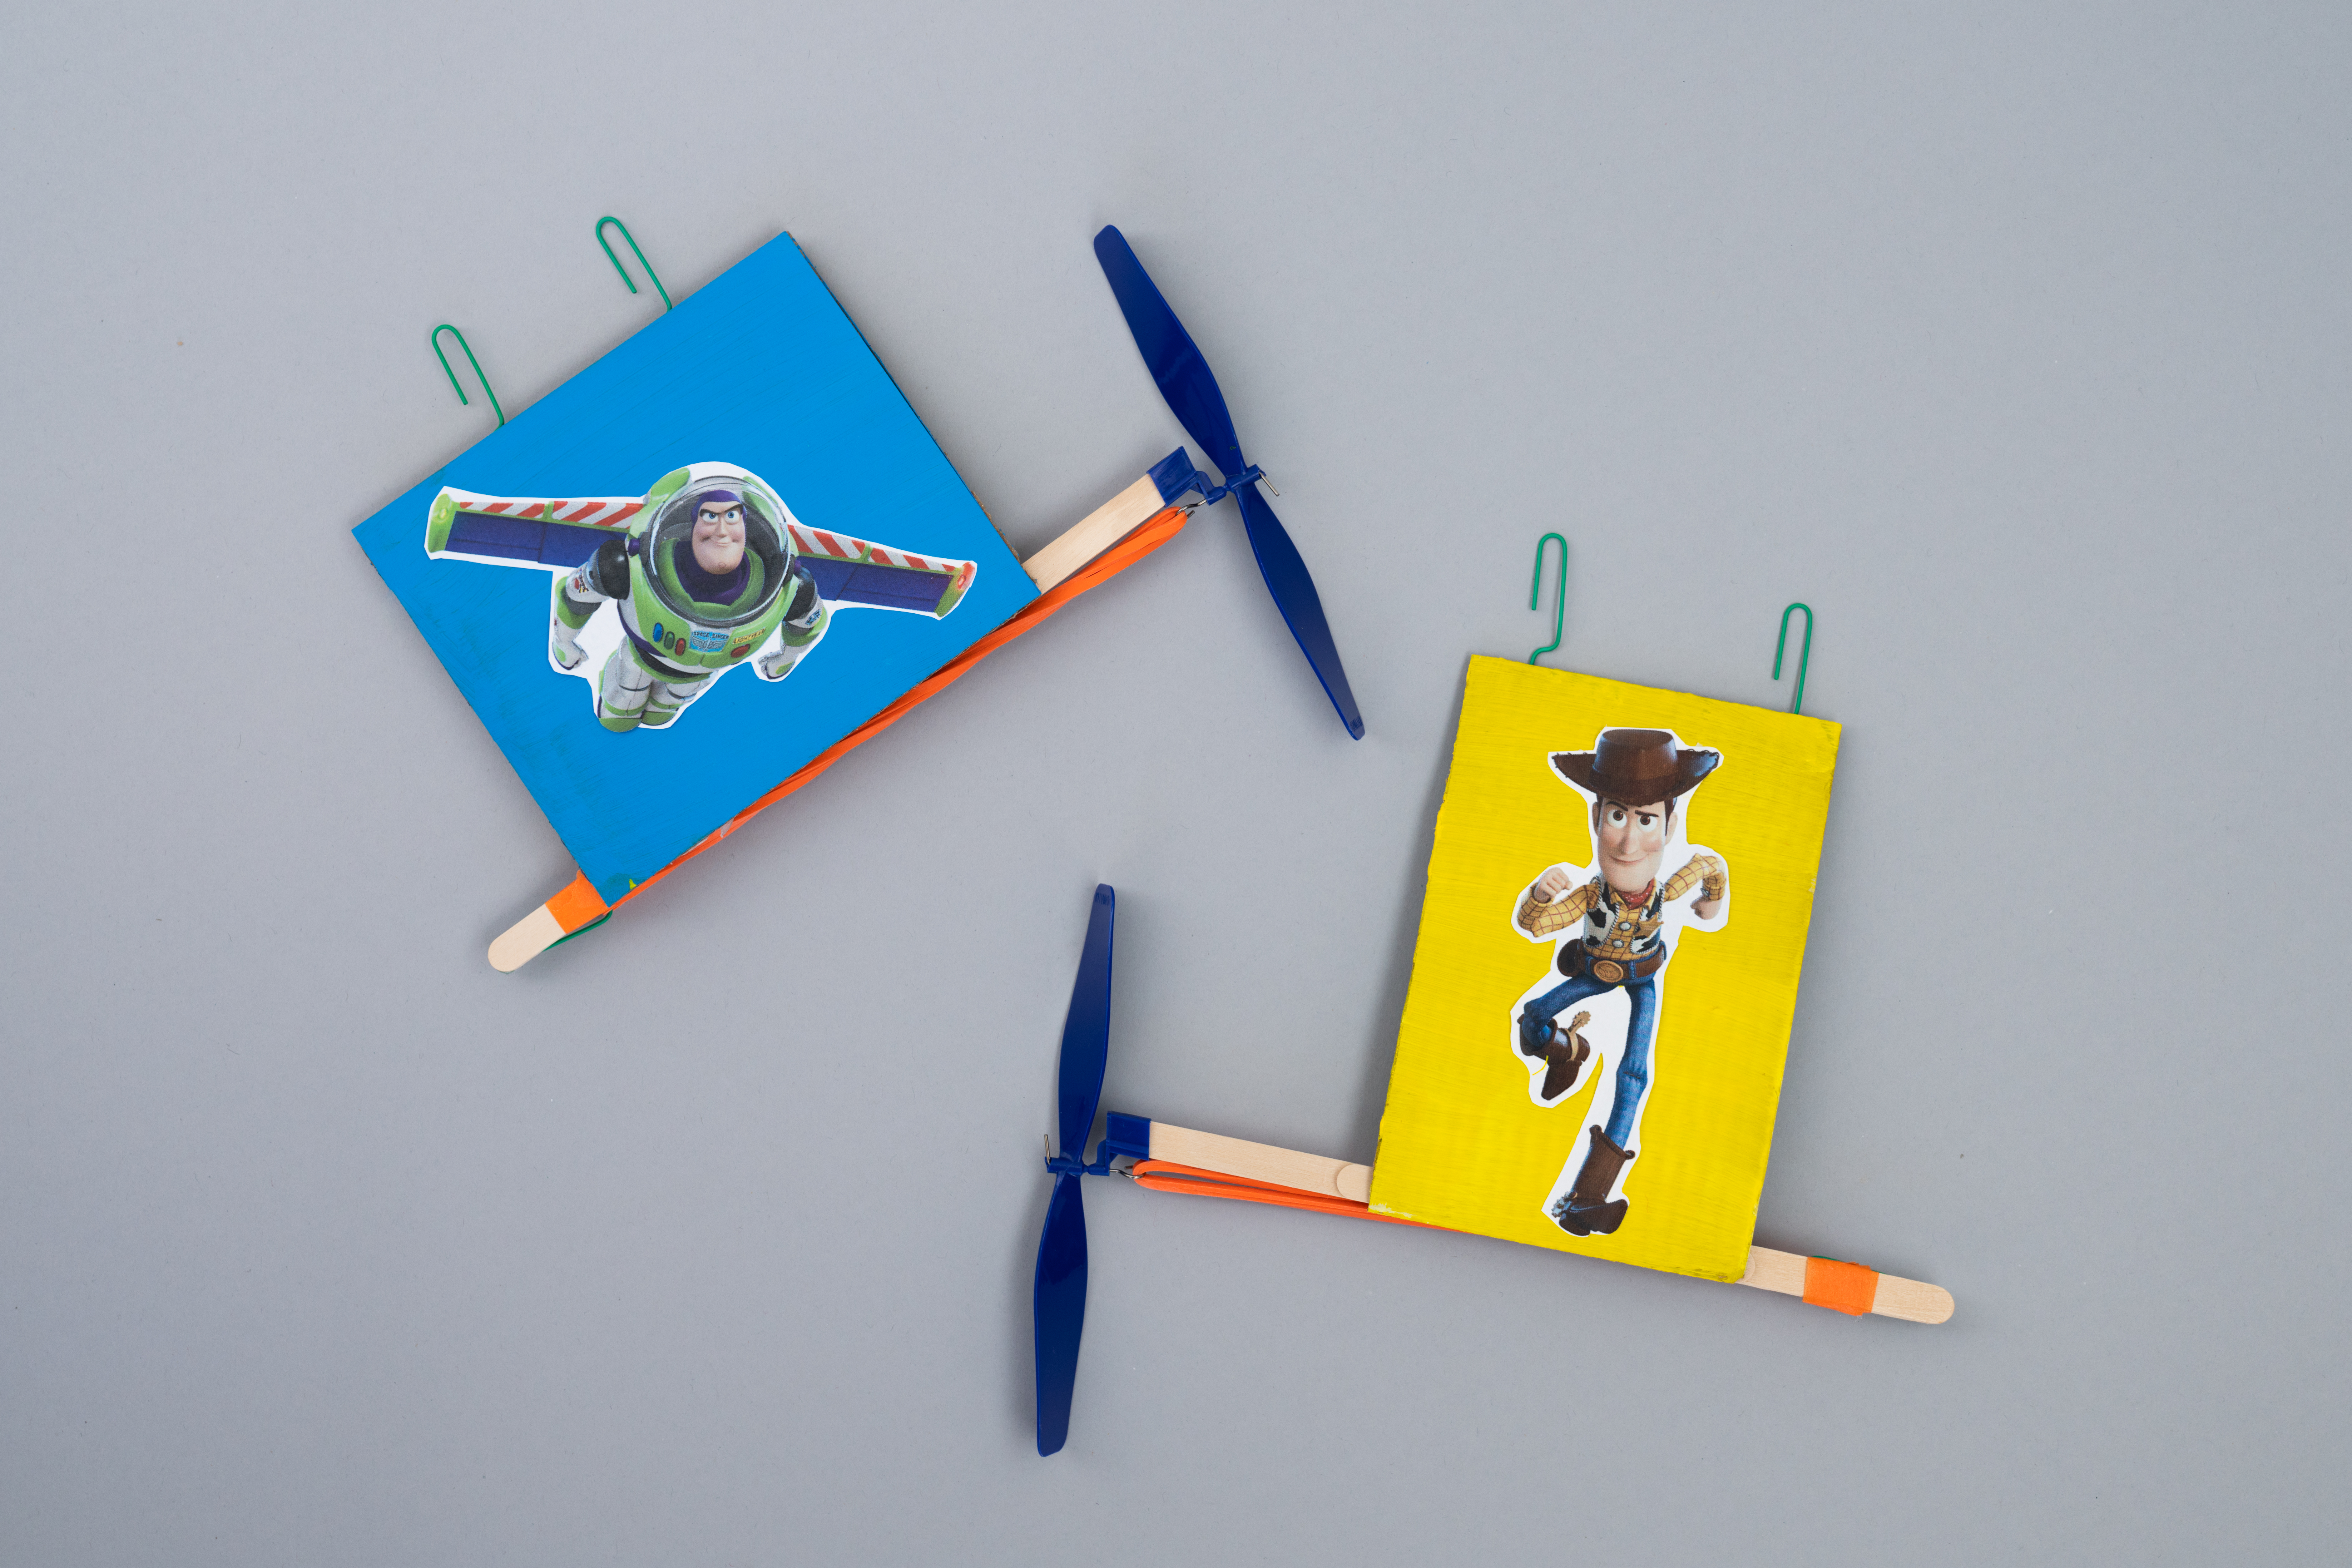
Download and print the provided template. Cut out Buzz and use a glue stick to attach him to the cardboard.
Step 9
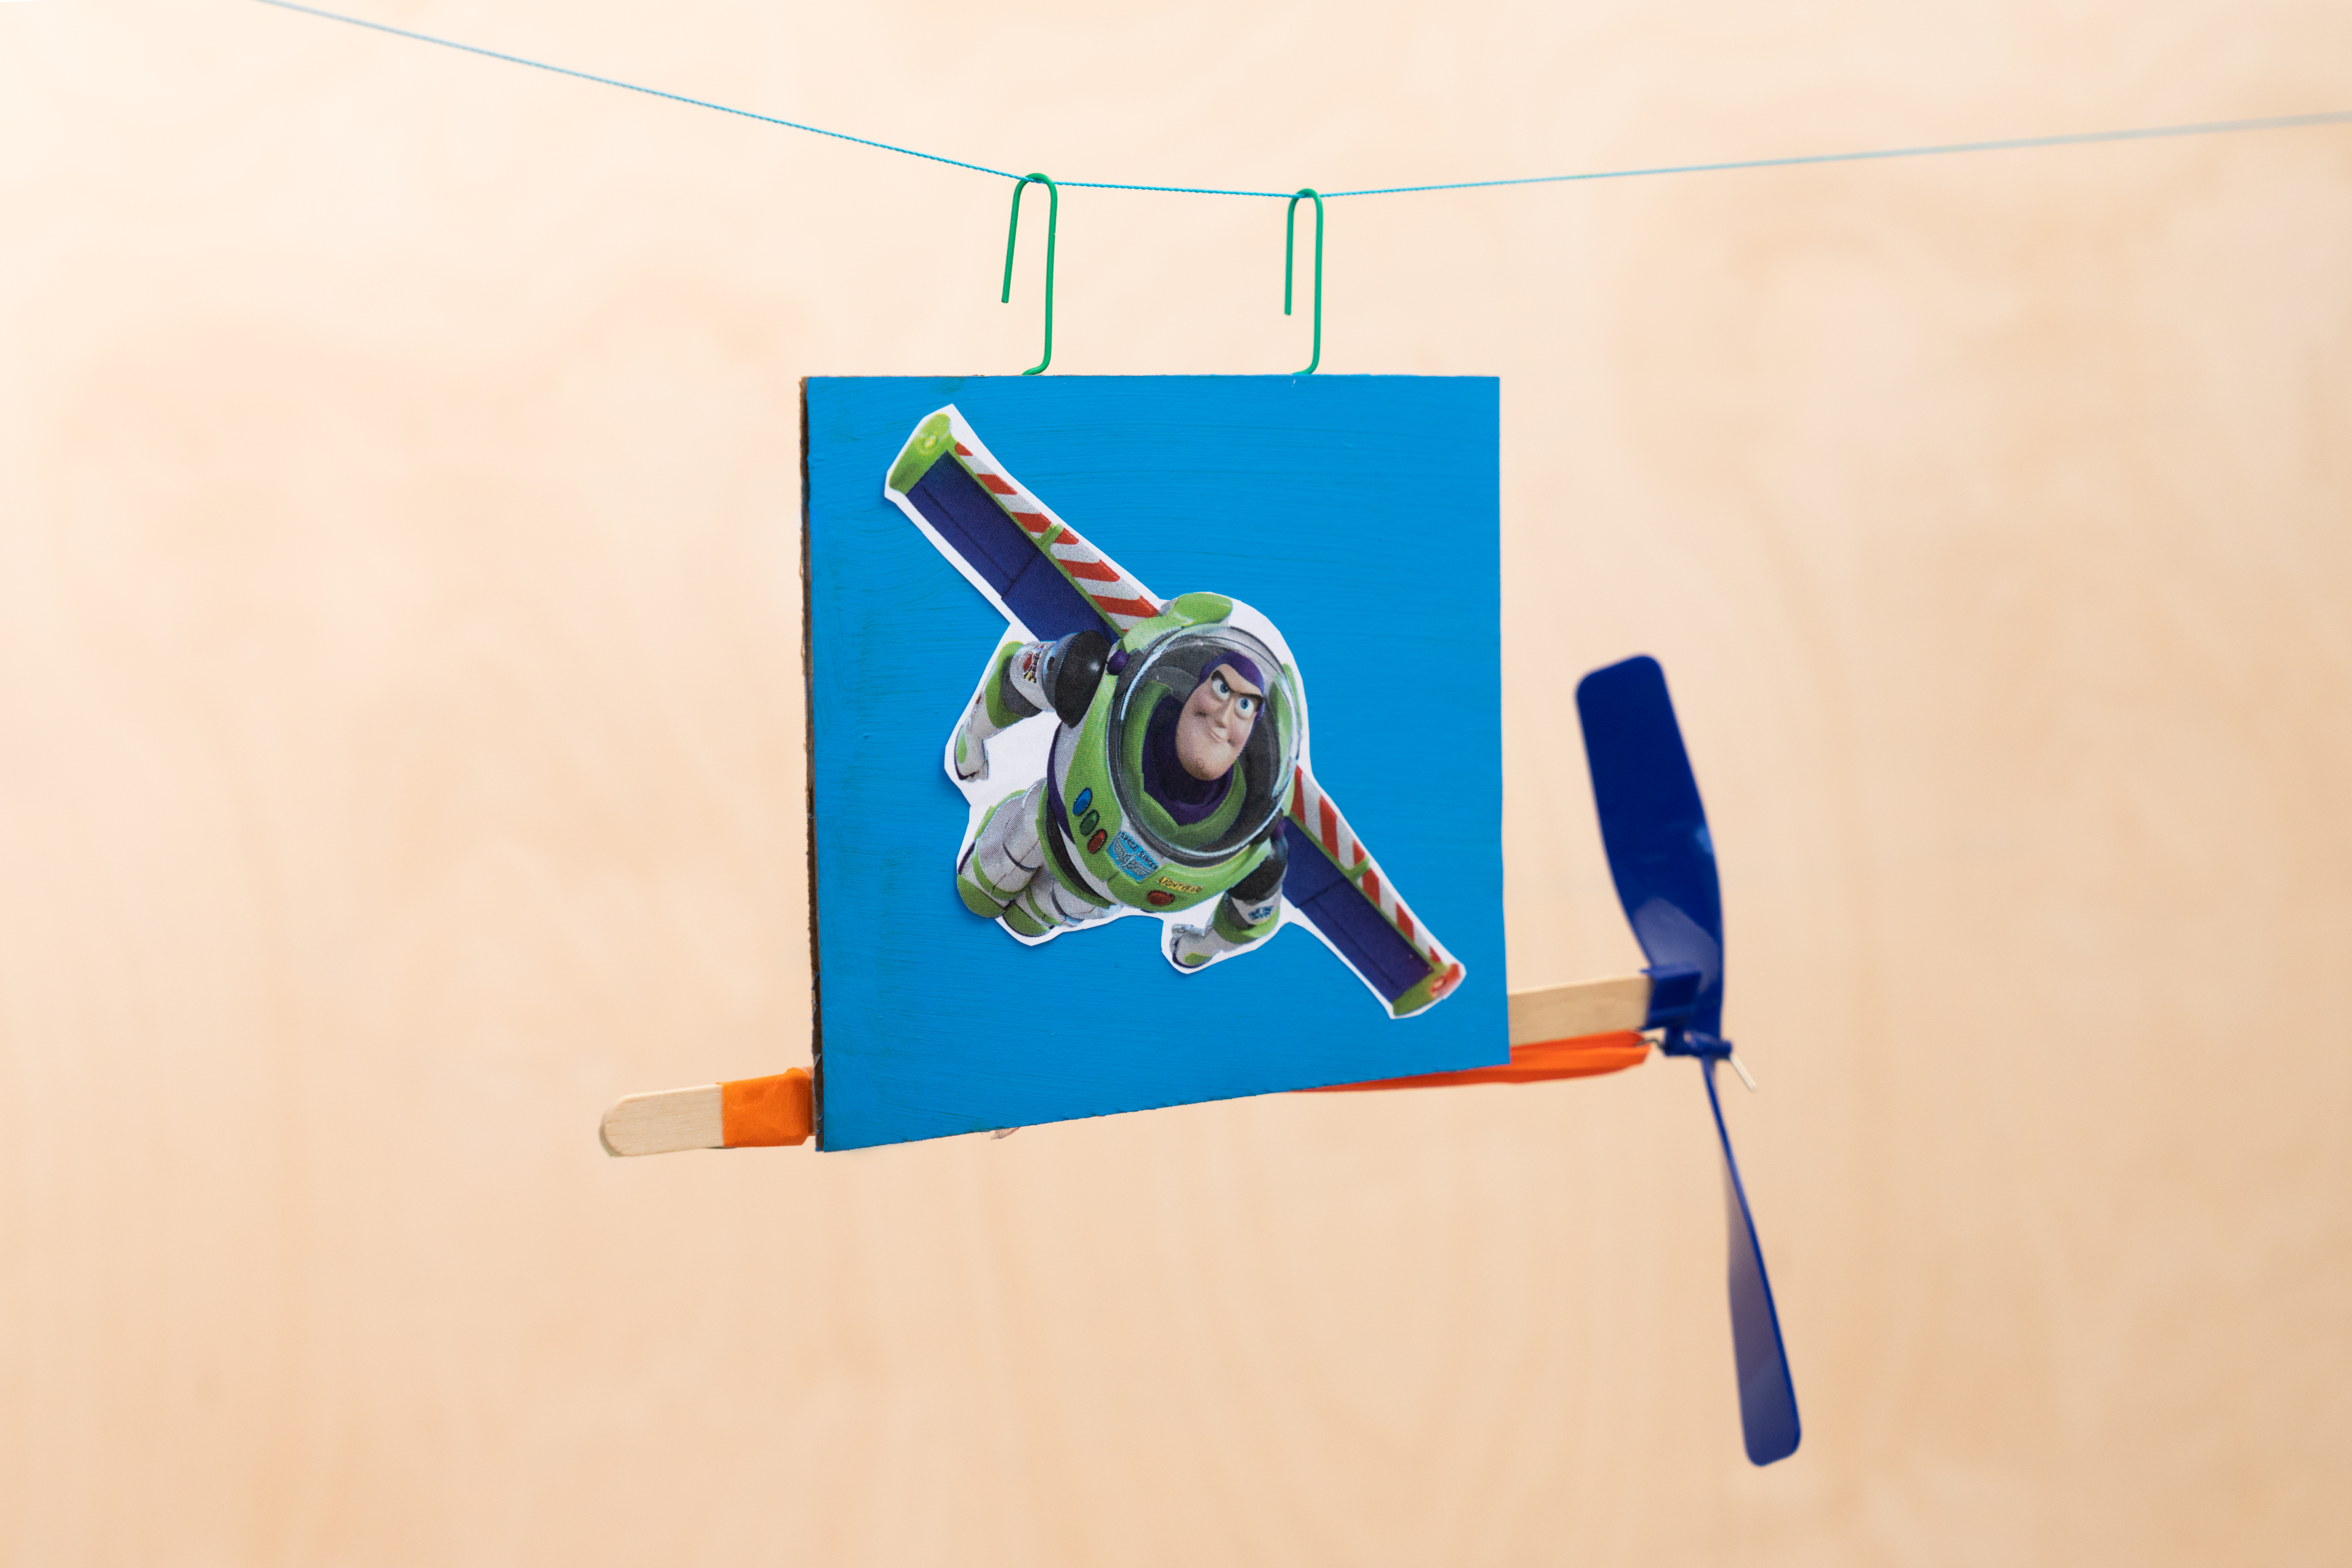
Flip the cardboard over. Assemble your zipline flier by gluing the stick of the propeller base to the bottom of the cardboard rectangle. Make sure to keep the cardboard rectangle centered to give the propeller enough clearance to spin freely.
Your Buzz zipline flier is complete!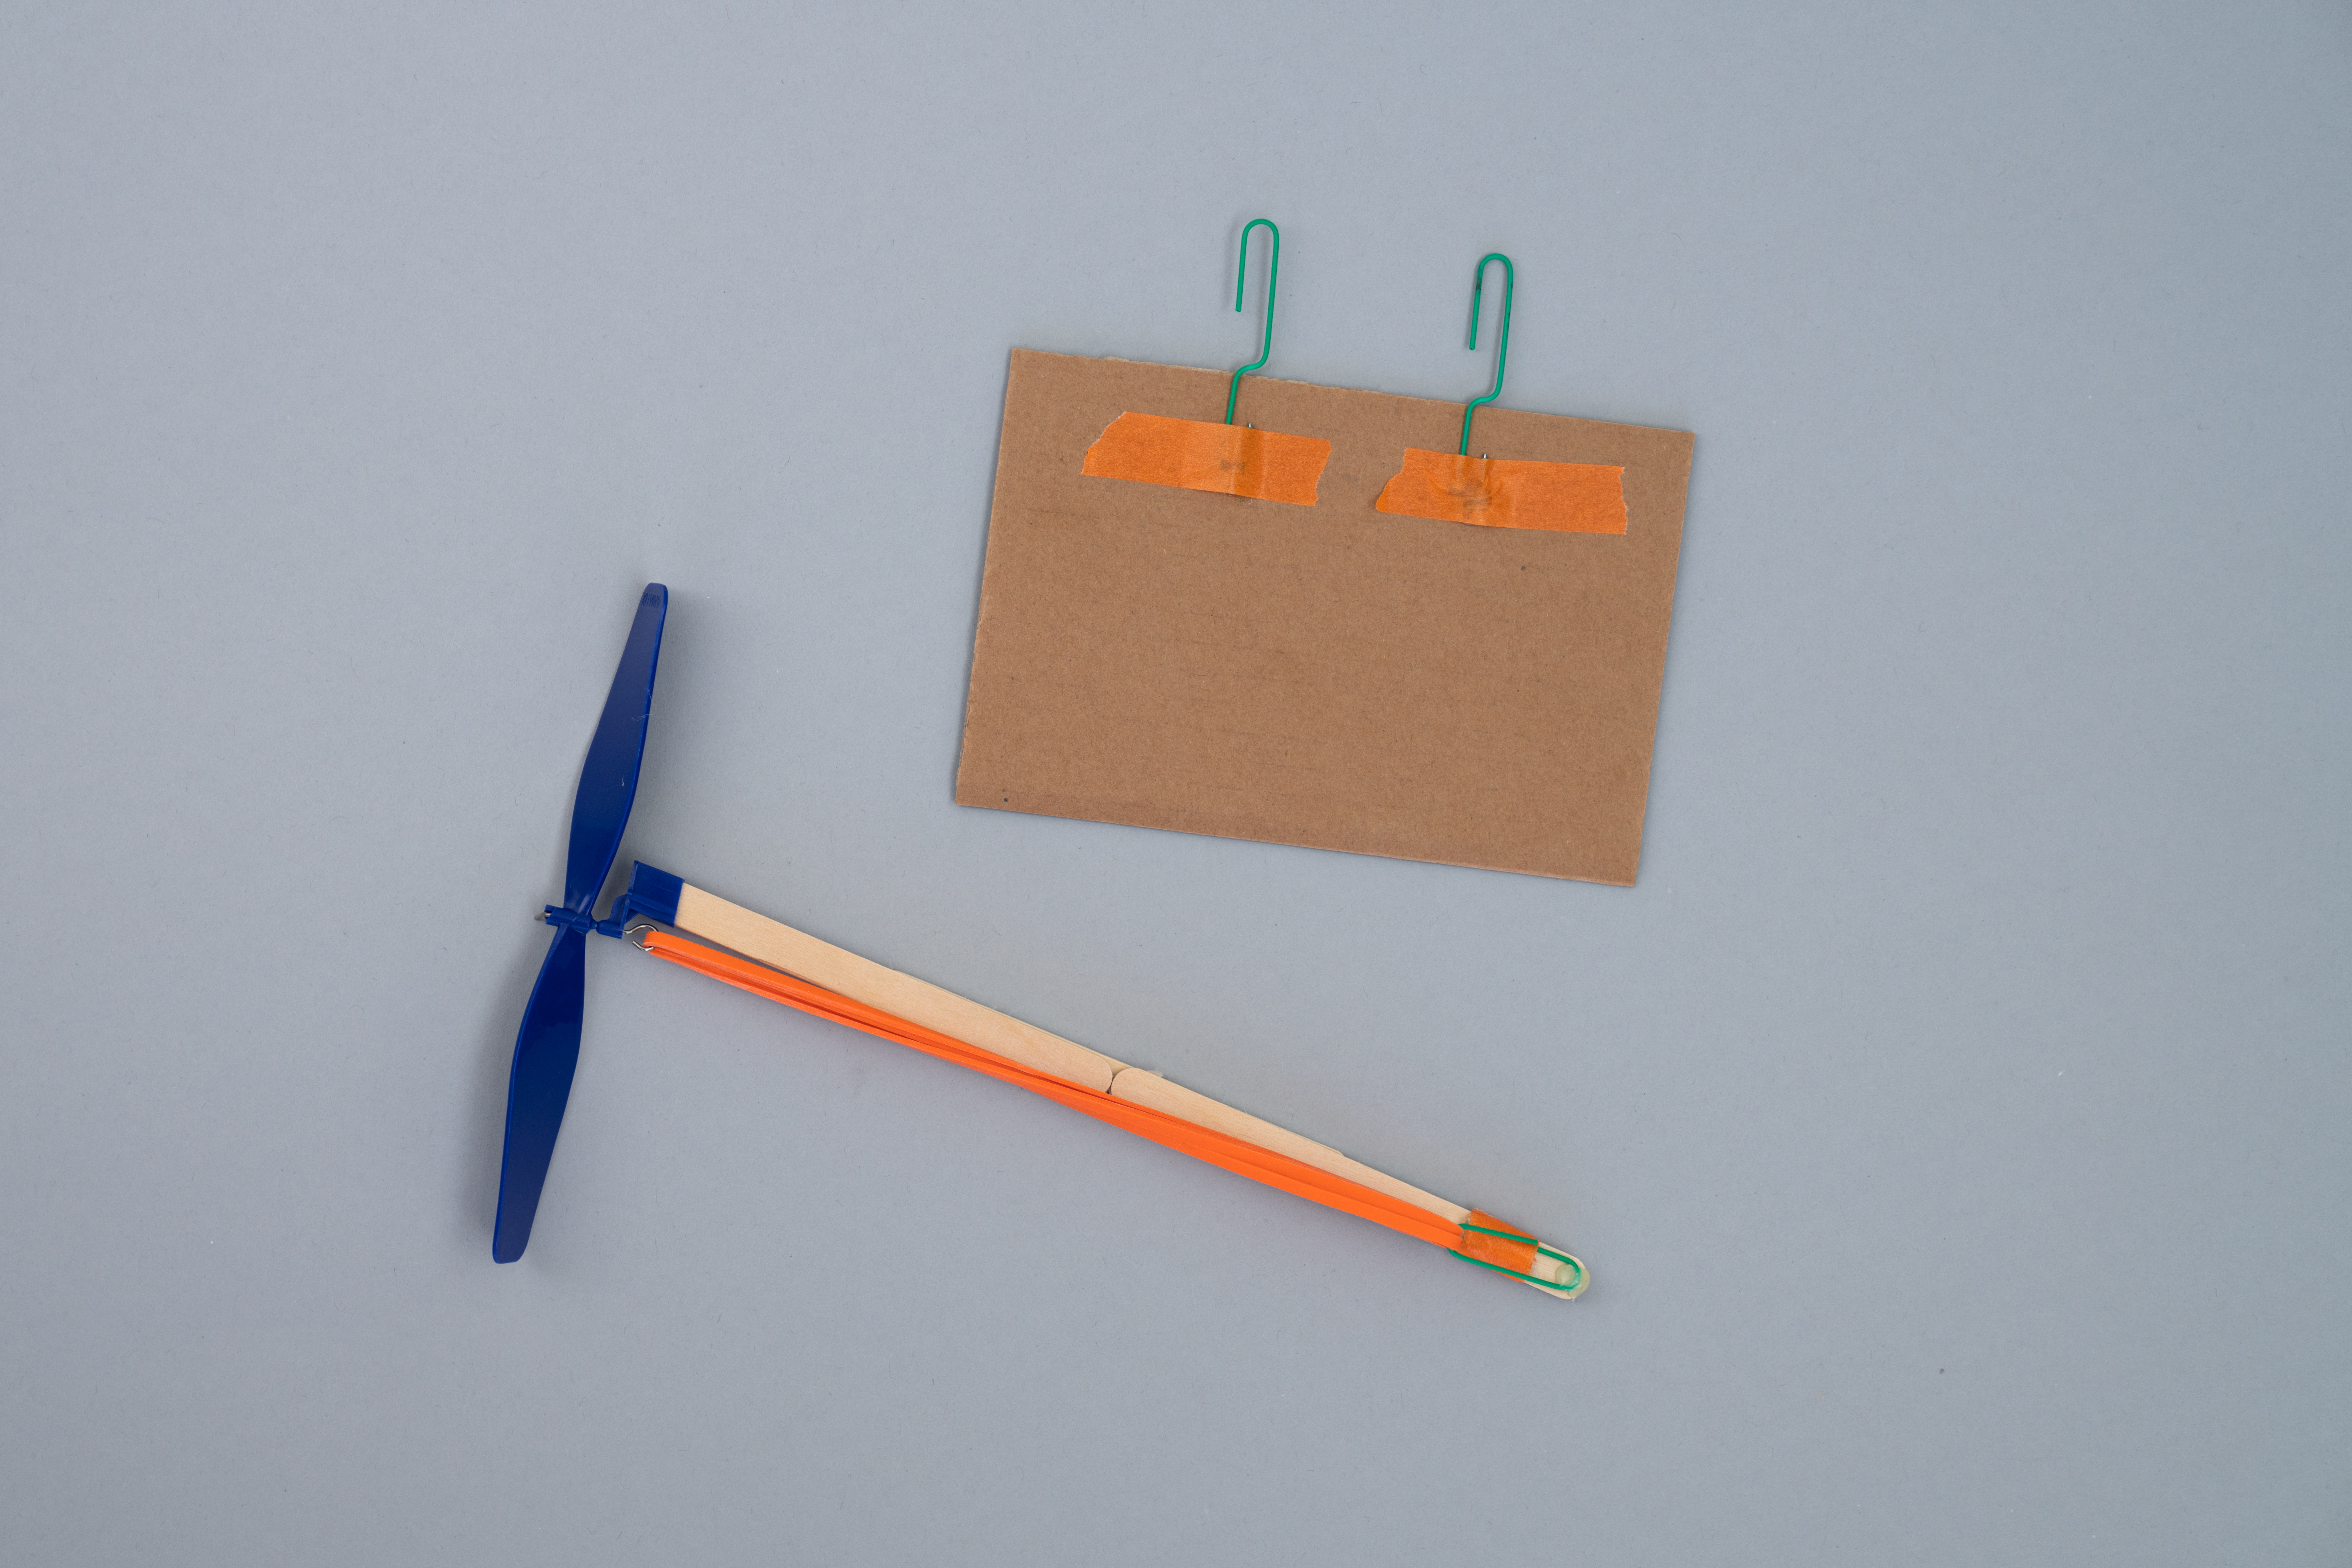
Step 10
To create Woody, repeat Steps 5–9 but with the cardboard rectangle positioned vertically (so the paper clips and propeller base are attached on the shorter sides of the rectangle).
Step 11
Find an open area to set up the Space Ranger course. Attach your string to two points to create a taut zipline. Make sure one end of the string is slightly higher than the other, then decide which flier is going first!
Turn the paper clip loops on the flier so they are perpendicular to the cardboard. This will allow it to easily hook onto the zipline.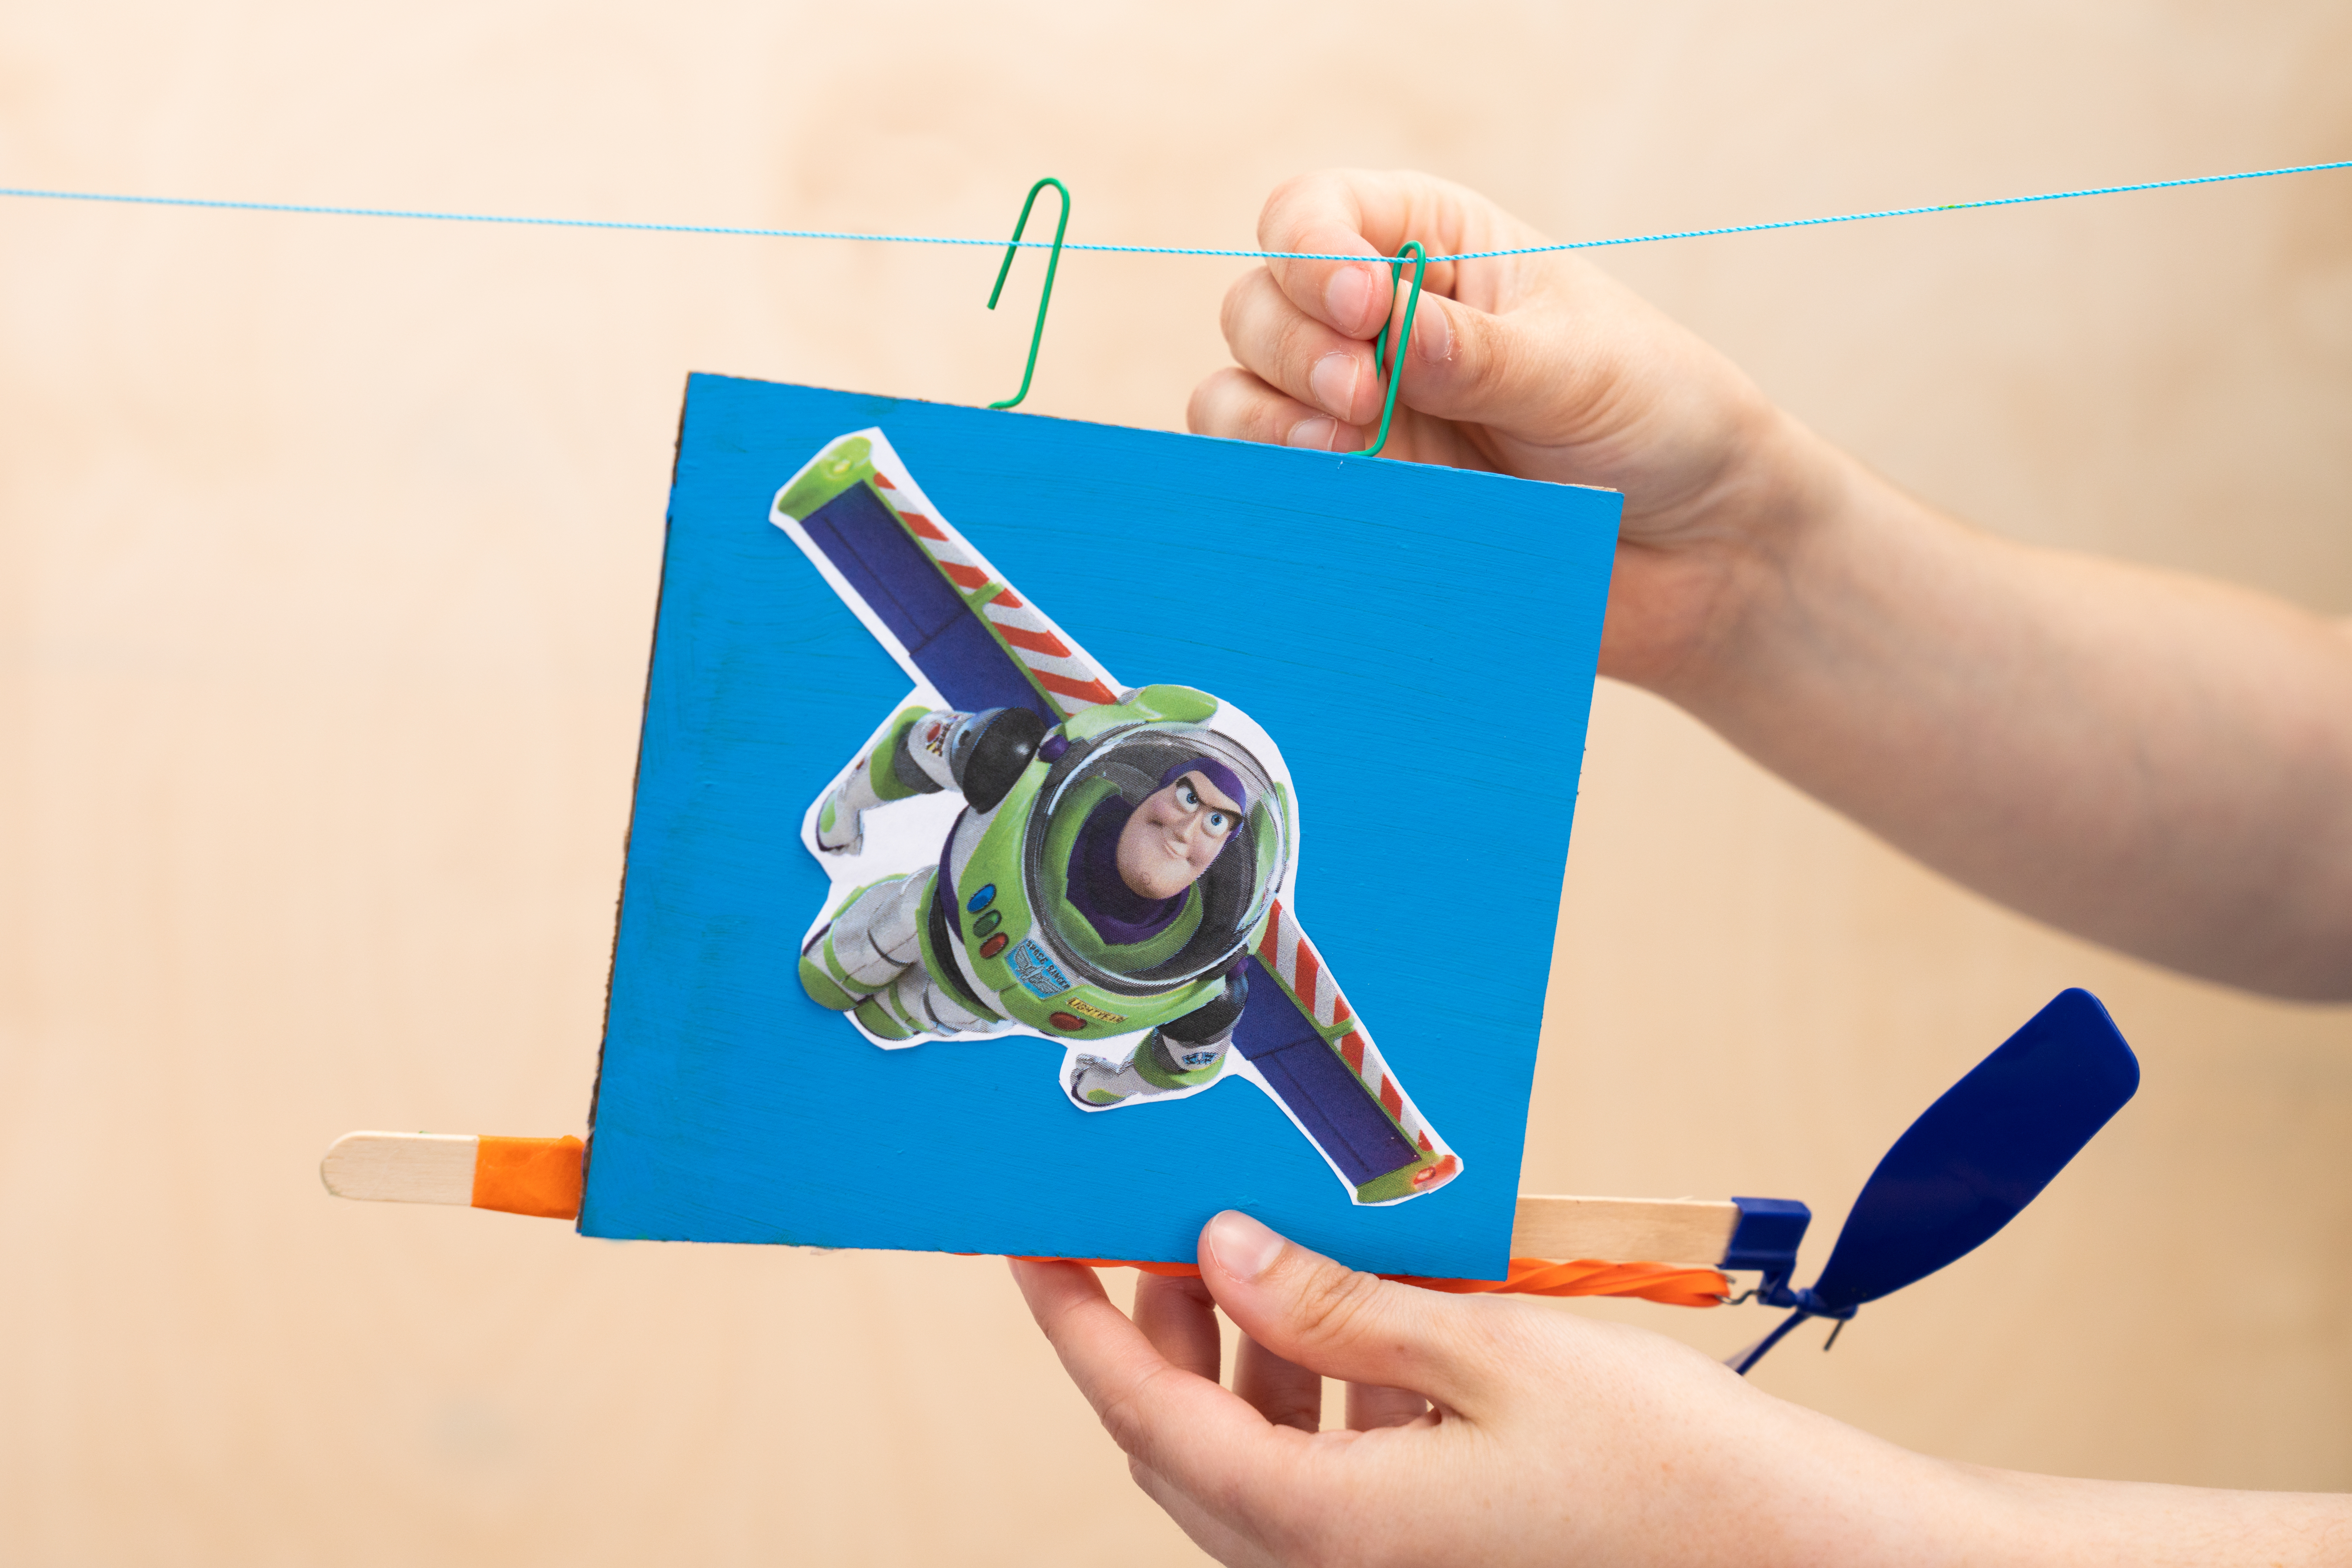
Step 12
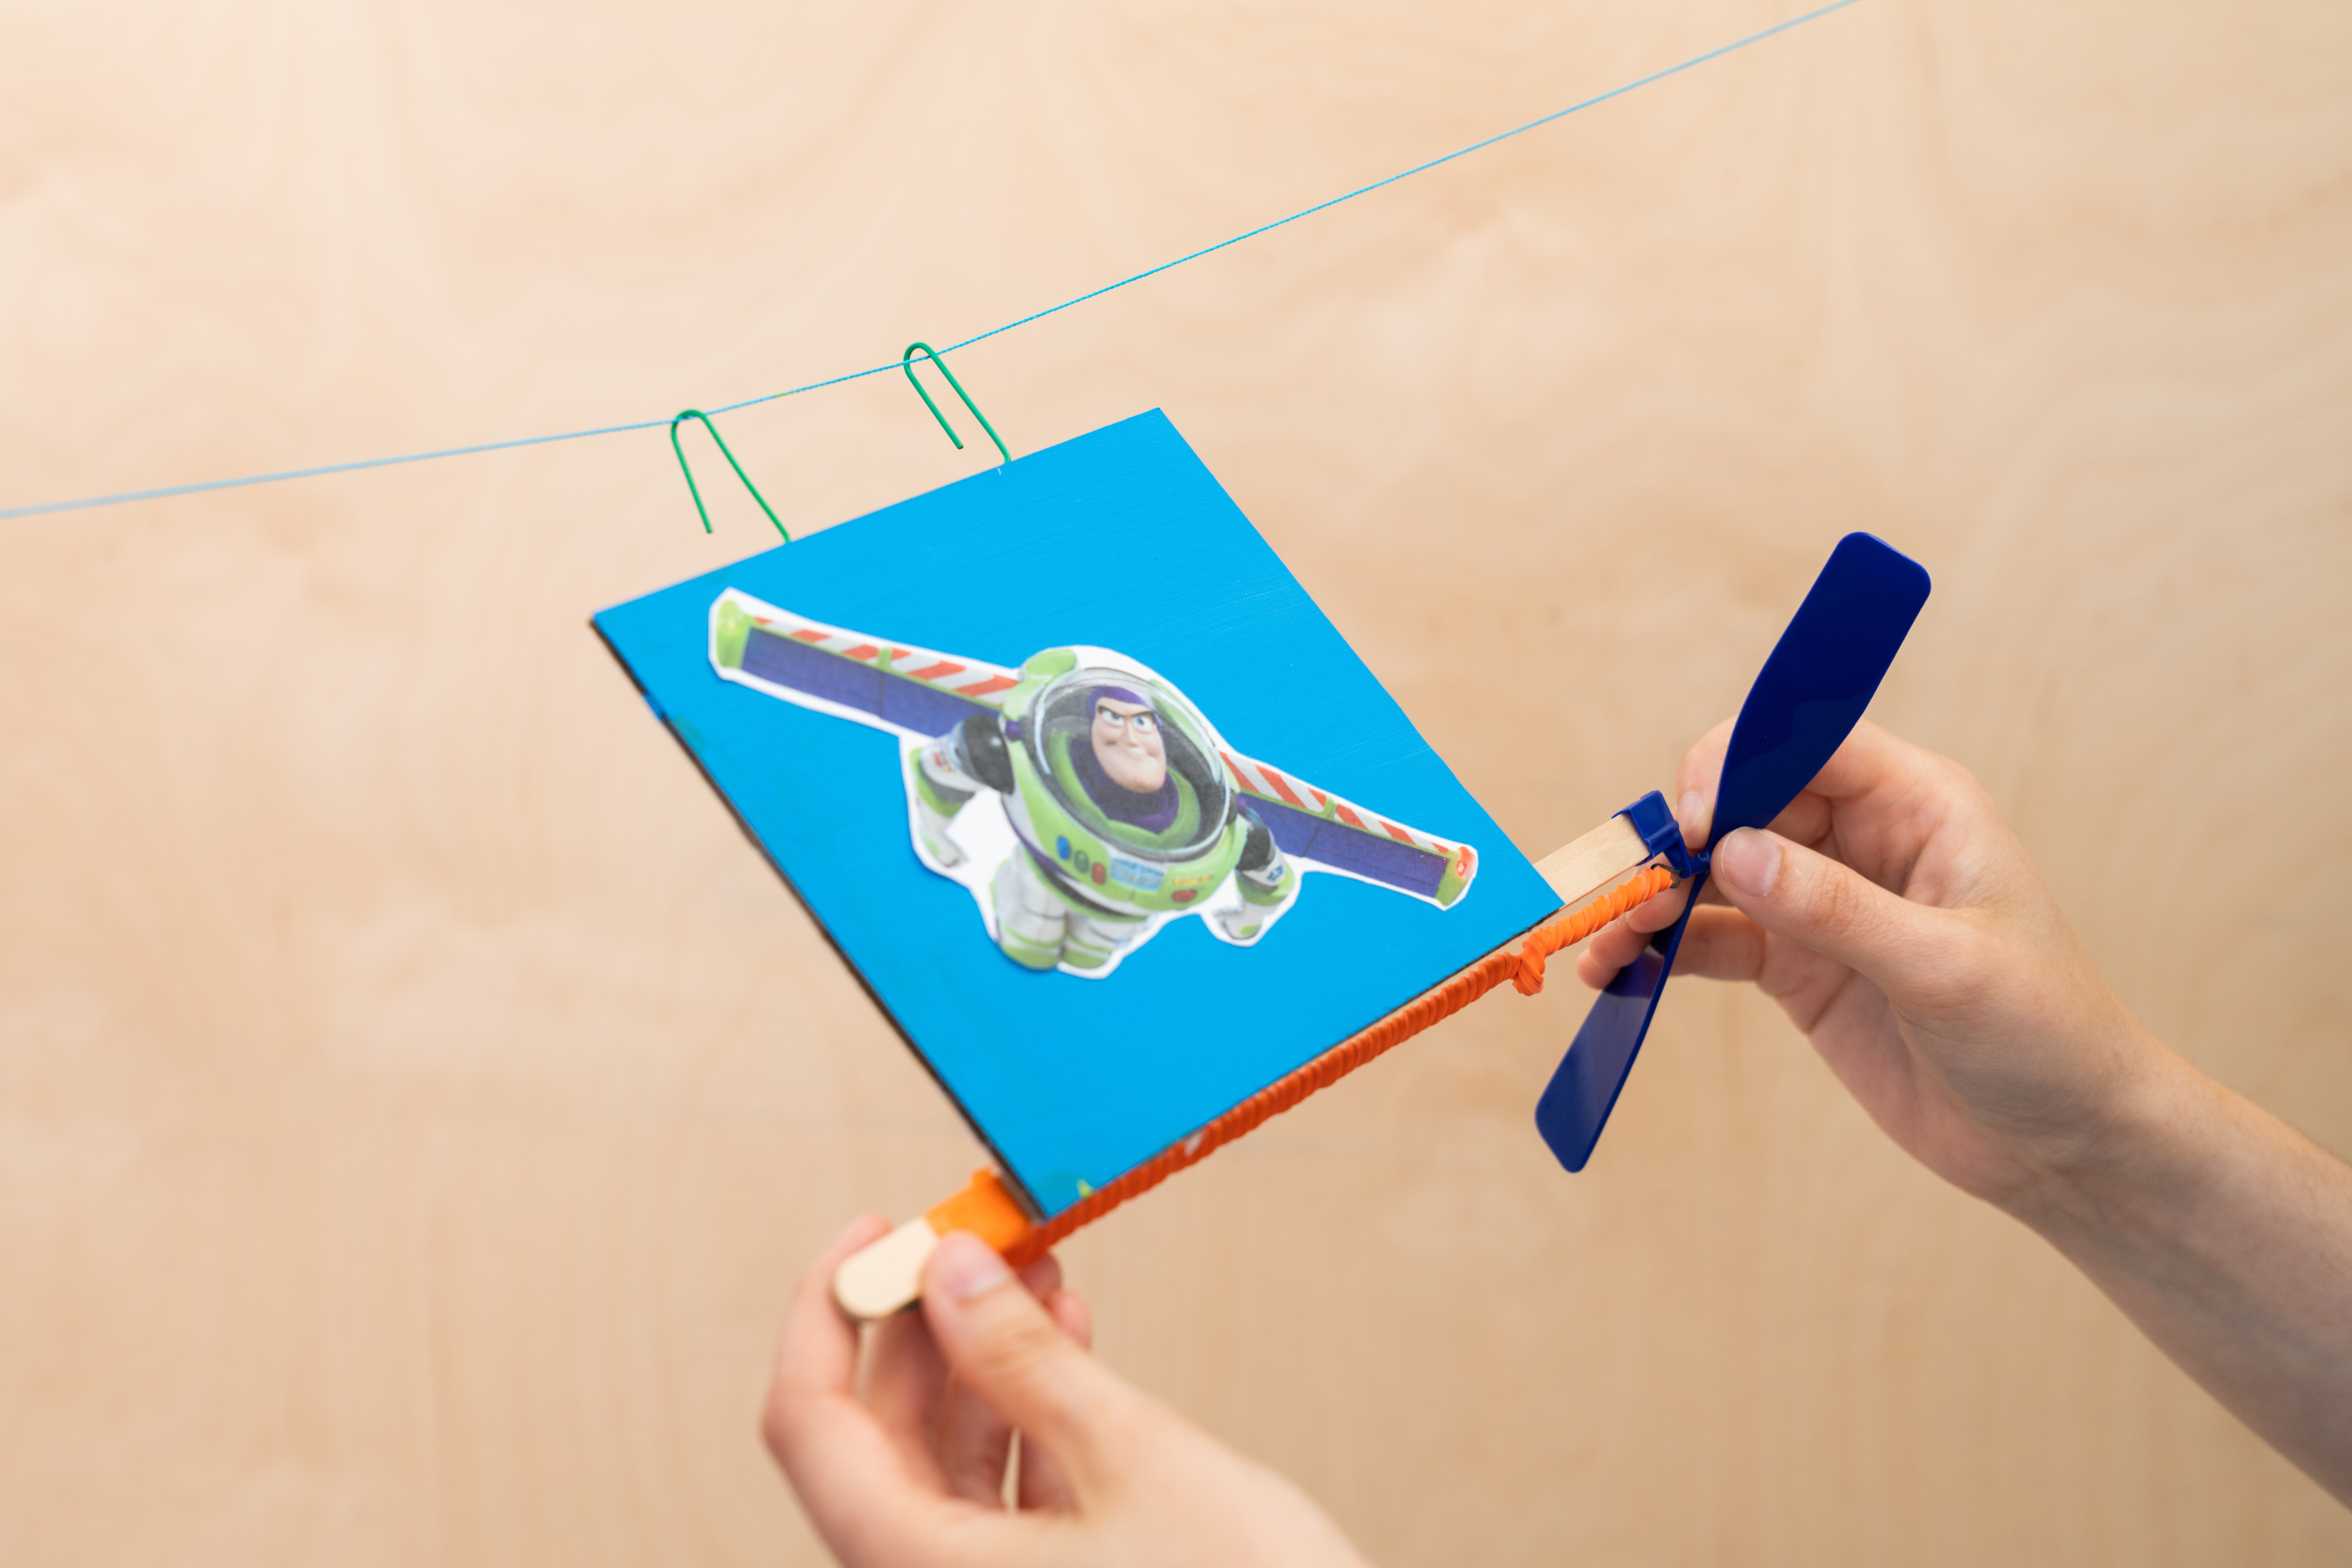
To launch the flier, position it at the higher end of the zipline course. The propeller side is the front of the flier. Hook it onto the zipline. Wind the propeller clockwise 20–30 times so that the rubber band is well twisted.
Step 13
Once everything is in position, release the propeller and watch your character fly! Then repeat Steps 12–13 for your second Space Ranger student!
Learn more

When you wind up the propeller, energy is stored in its twisted rubber band. When you release the propeller, it rapidly unwinds and generates a force that pulls the flier along the zipline. This pulling force is called propulsion! To make your flier speed along, the propeller's propulsion has to be stronger than the resistance from the string it's traveling along and the air it's moving through.
Try experimenting with your fliers! Can you think of ways to make them move even faster? What happens if you swap the string for smooth fishing wire? What if the zipline course was angled at an extreme incline? What would happen if Buzz and Woody were bigger or smaller? Fire up your Space Ranger zipline course and give it a go!


