Step-by-step tutorial
Step 1
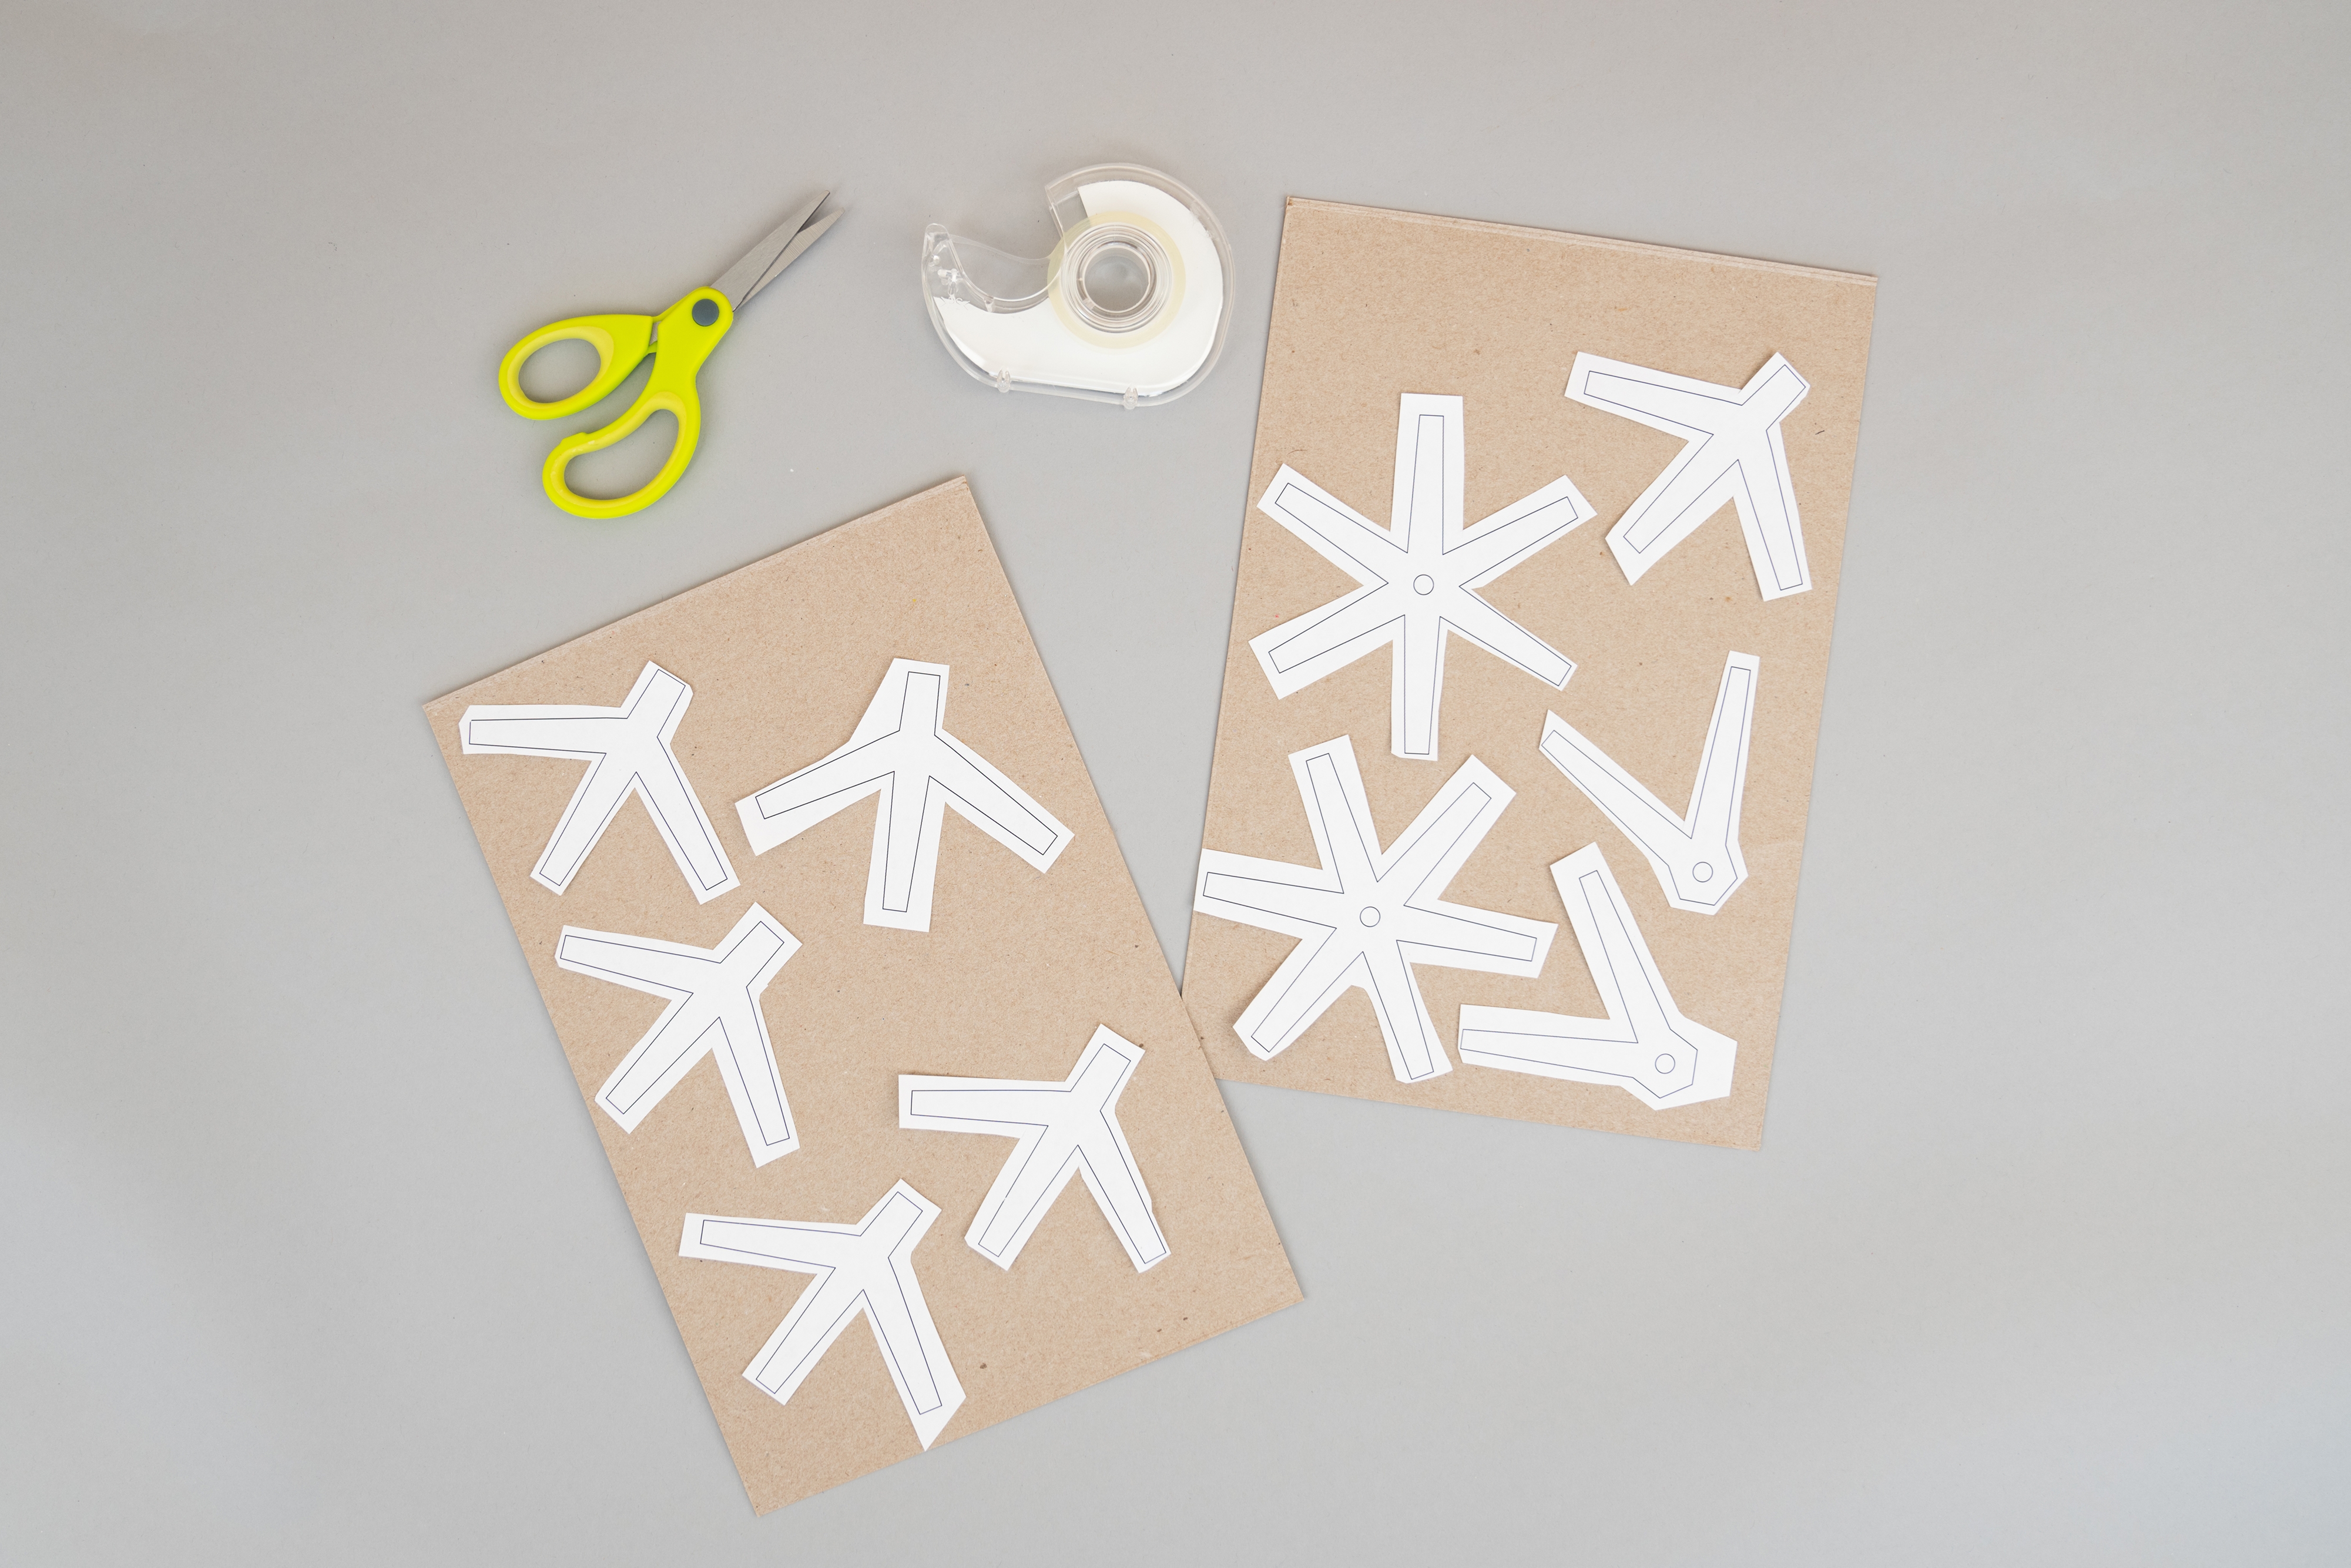
Download and print the provided template on letter-sized paper, making sure to print it at 100% scale. Find the Ferris wheel connector pieces and roughly cut out the shapes.
You’ll have a total of 16 pieces:
- 2 hub-connectors
- 2 base-connectors
- 12 spoke-connectors
Arrange the pieces on the opened cereal boxes and mount them with double-stick tape.
Step 2
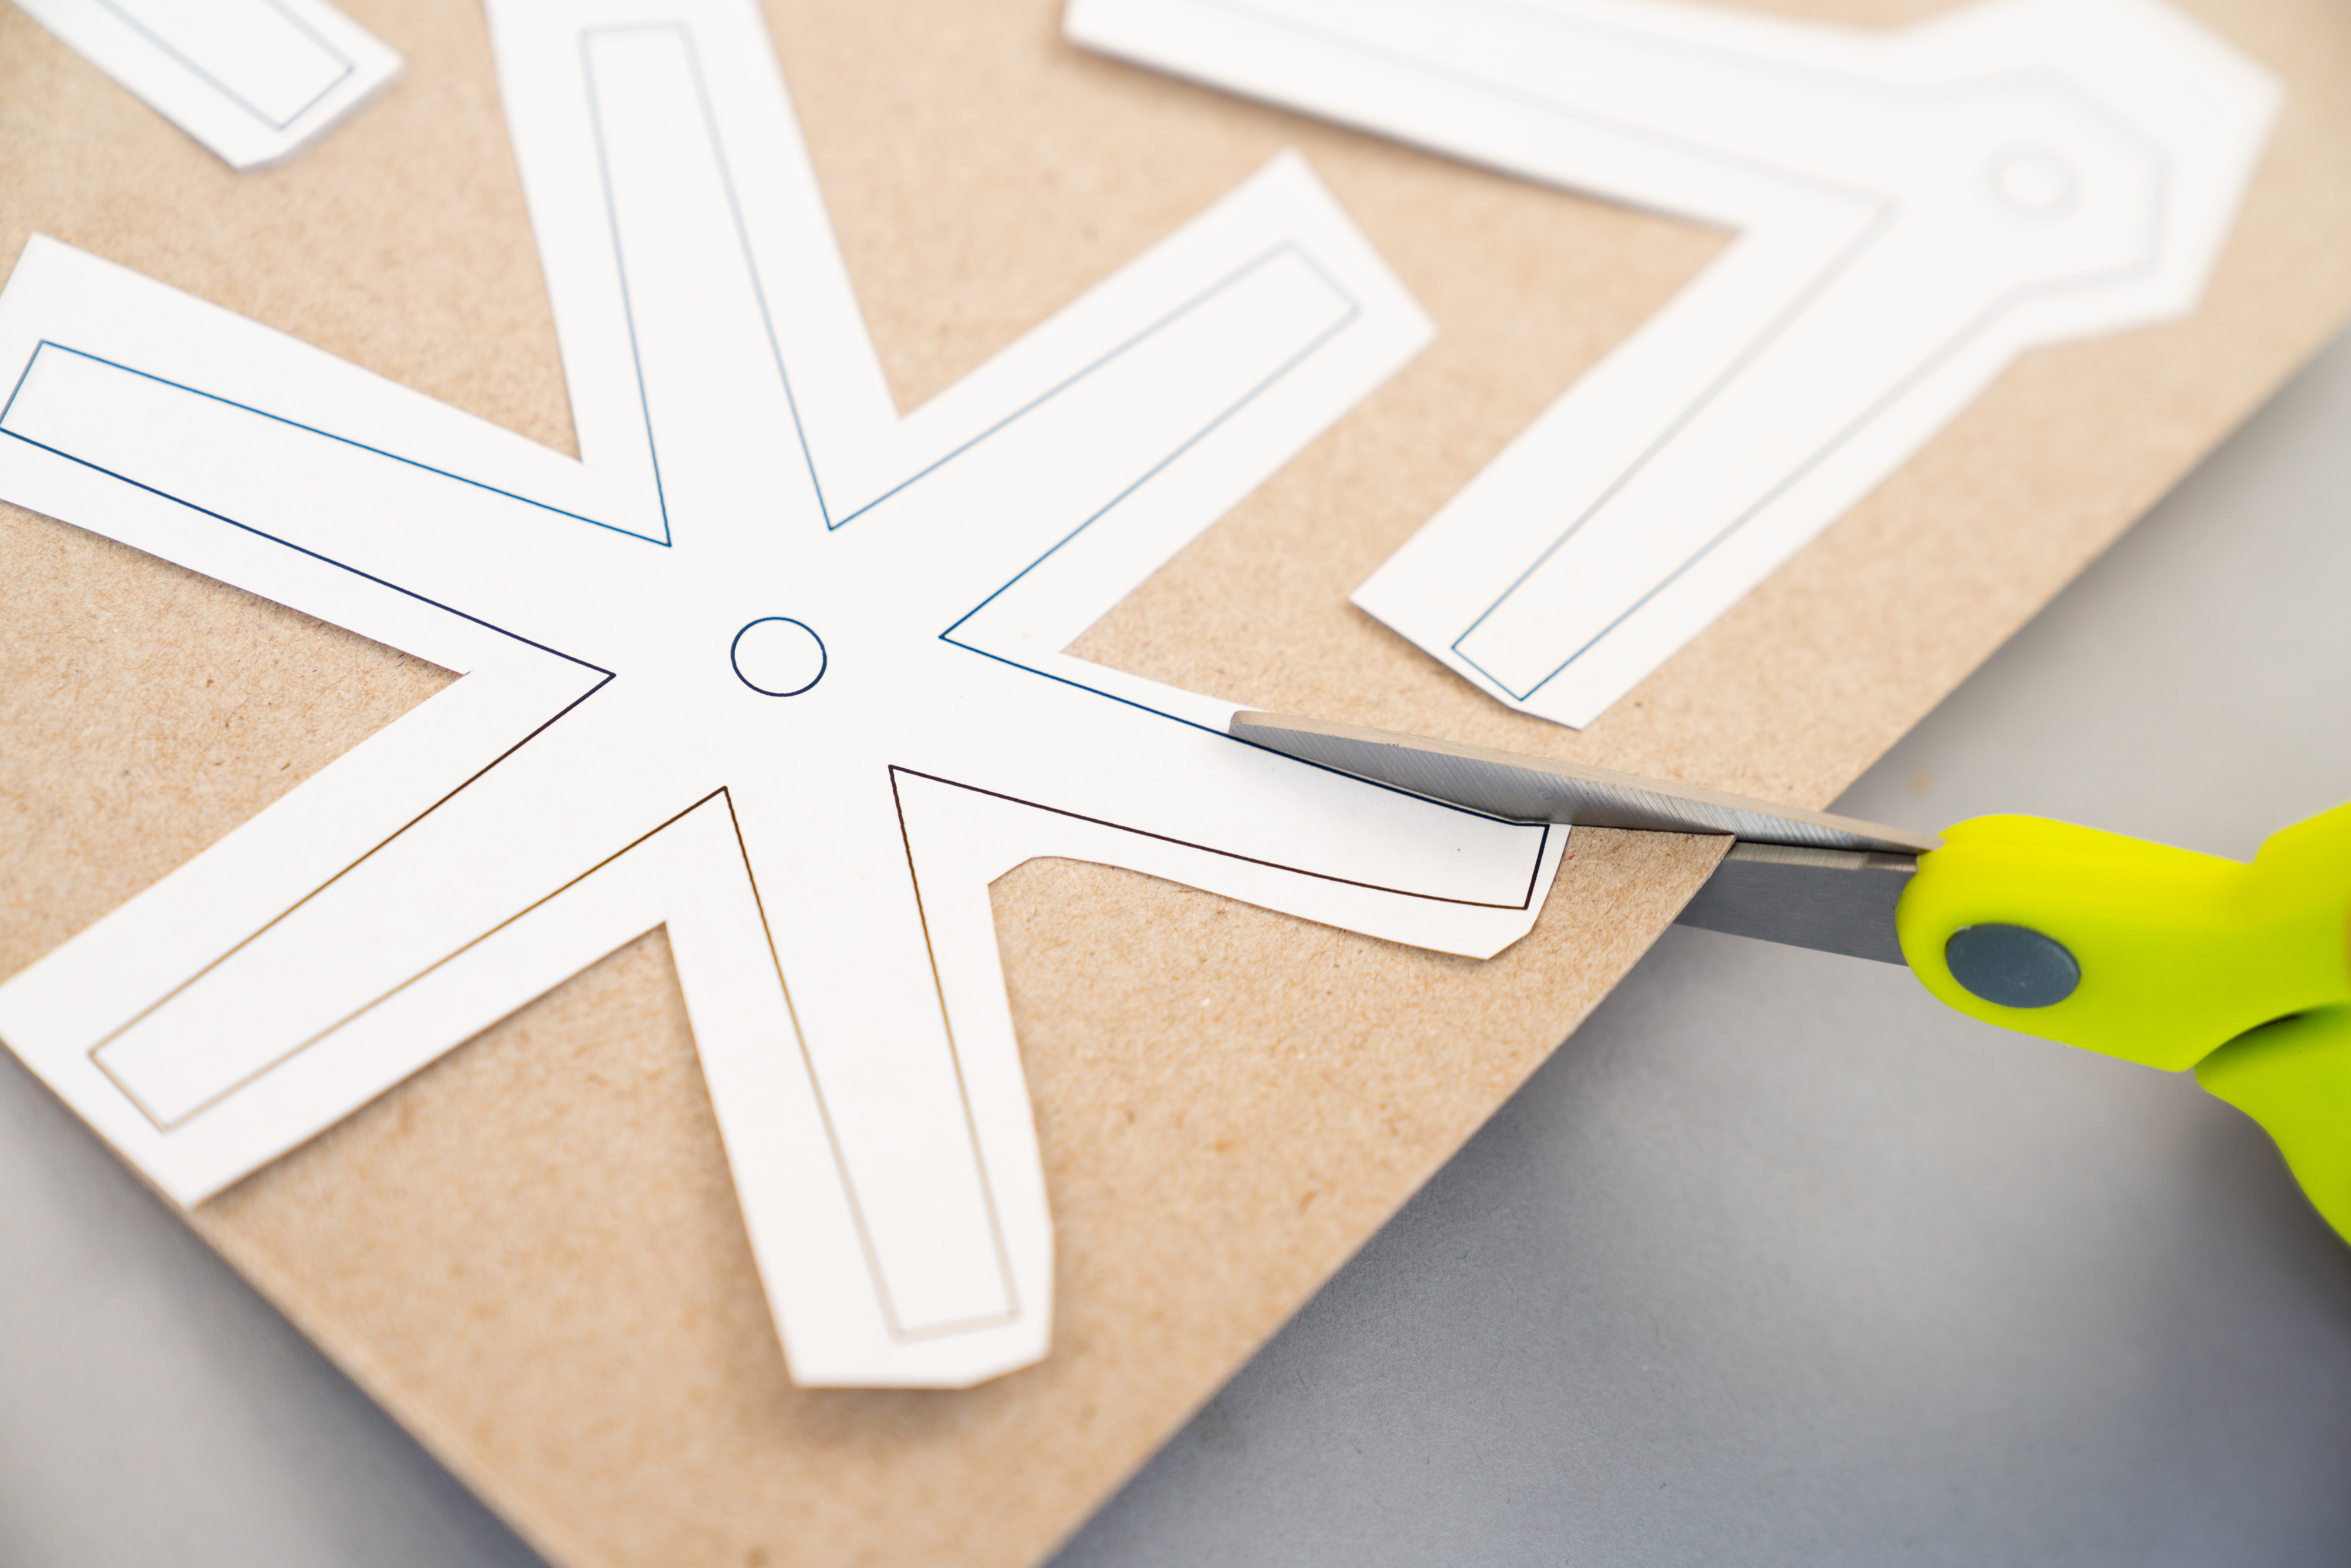
Carefully cut out all the mounted shapes with scissors. As you cut, make sure to follow the lines since cleaner cuts will help with the construction of the Ferris wheel.
Step 3
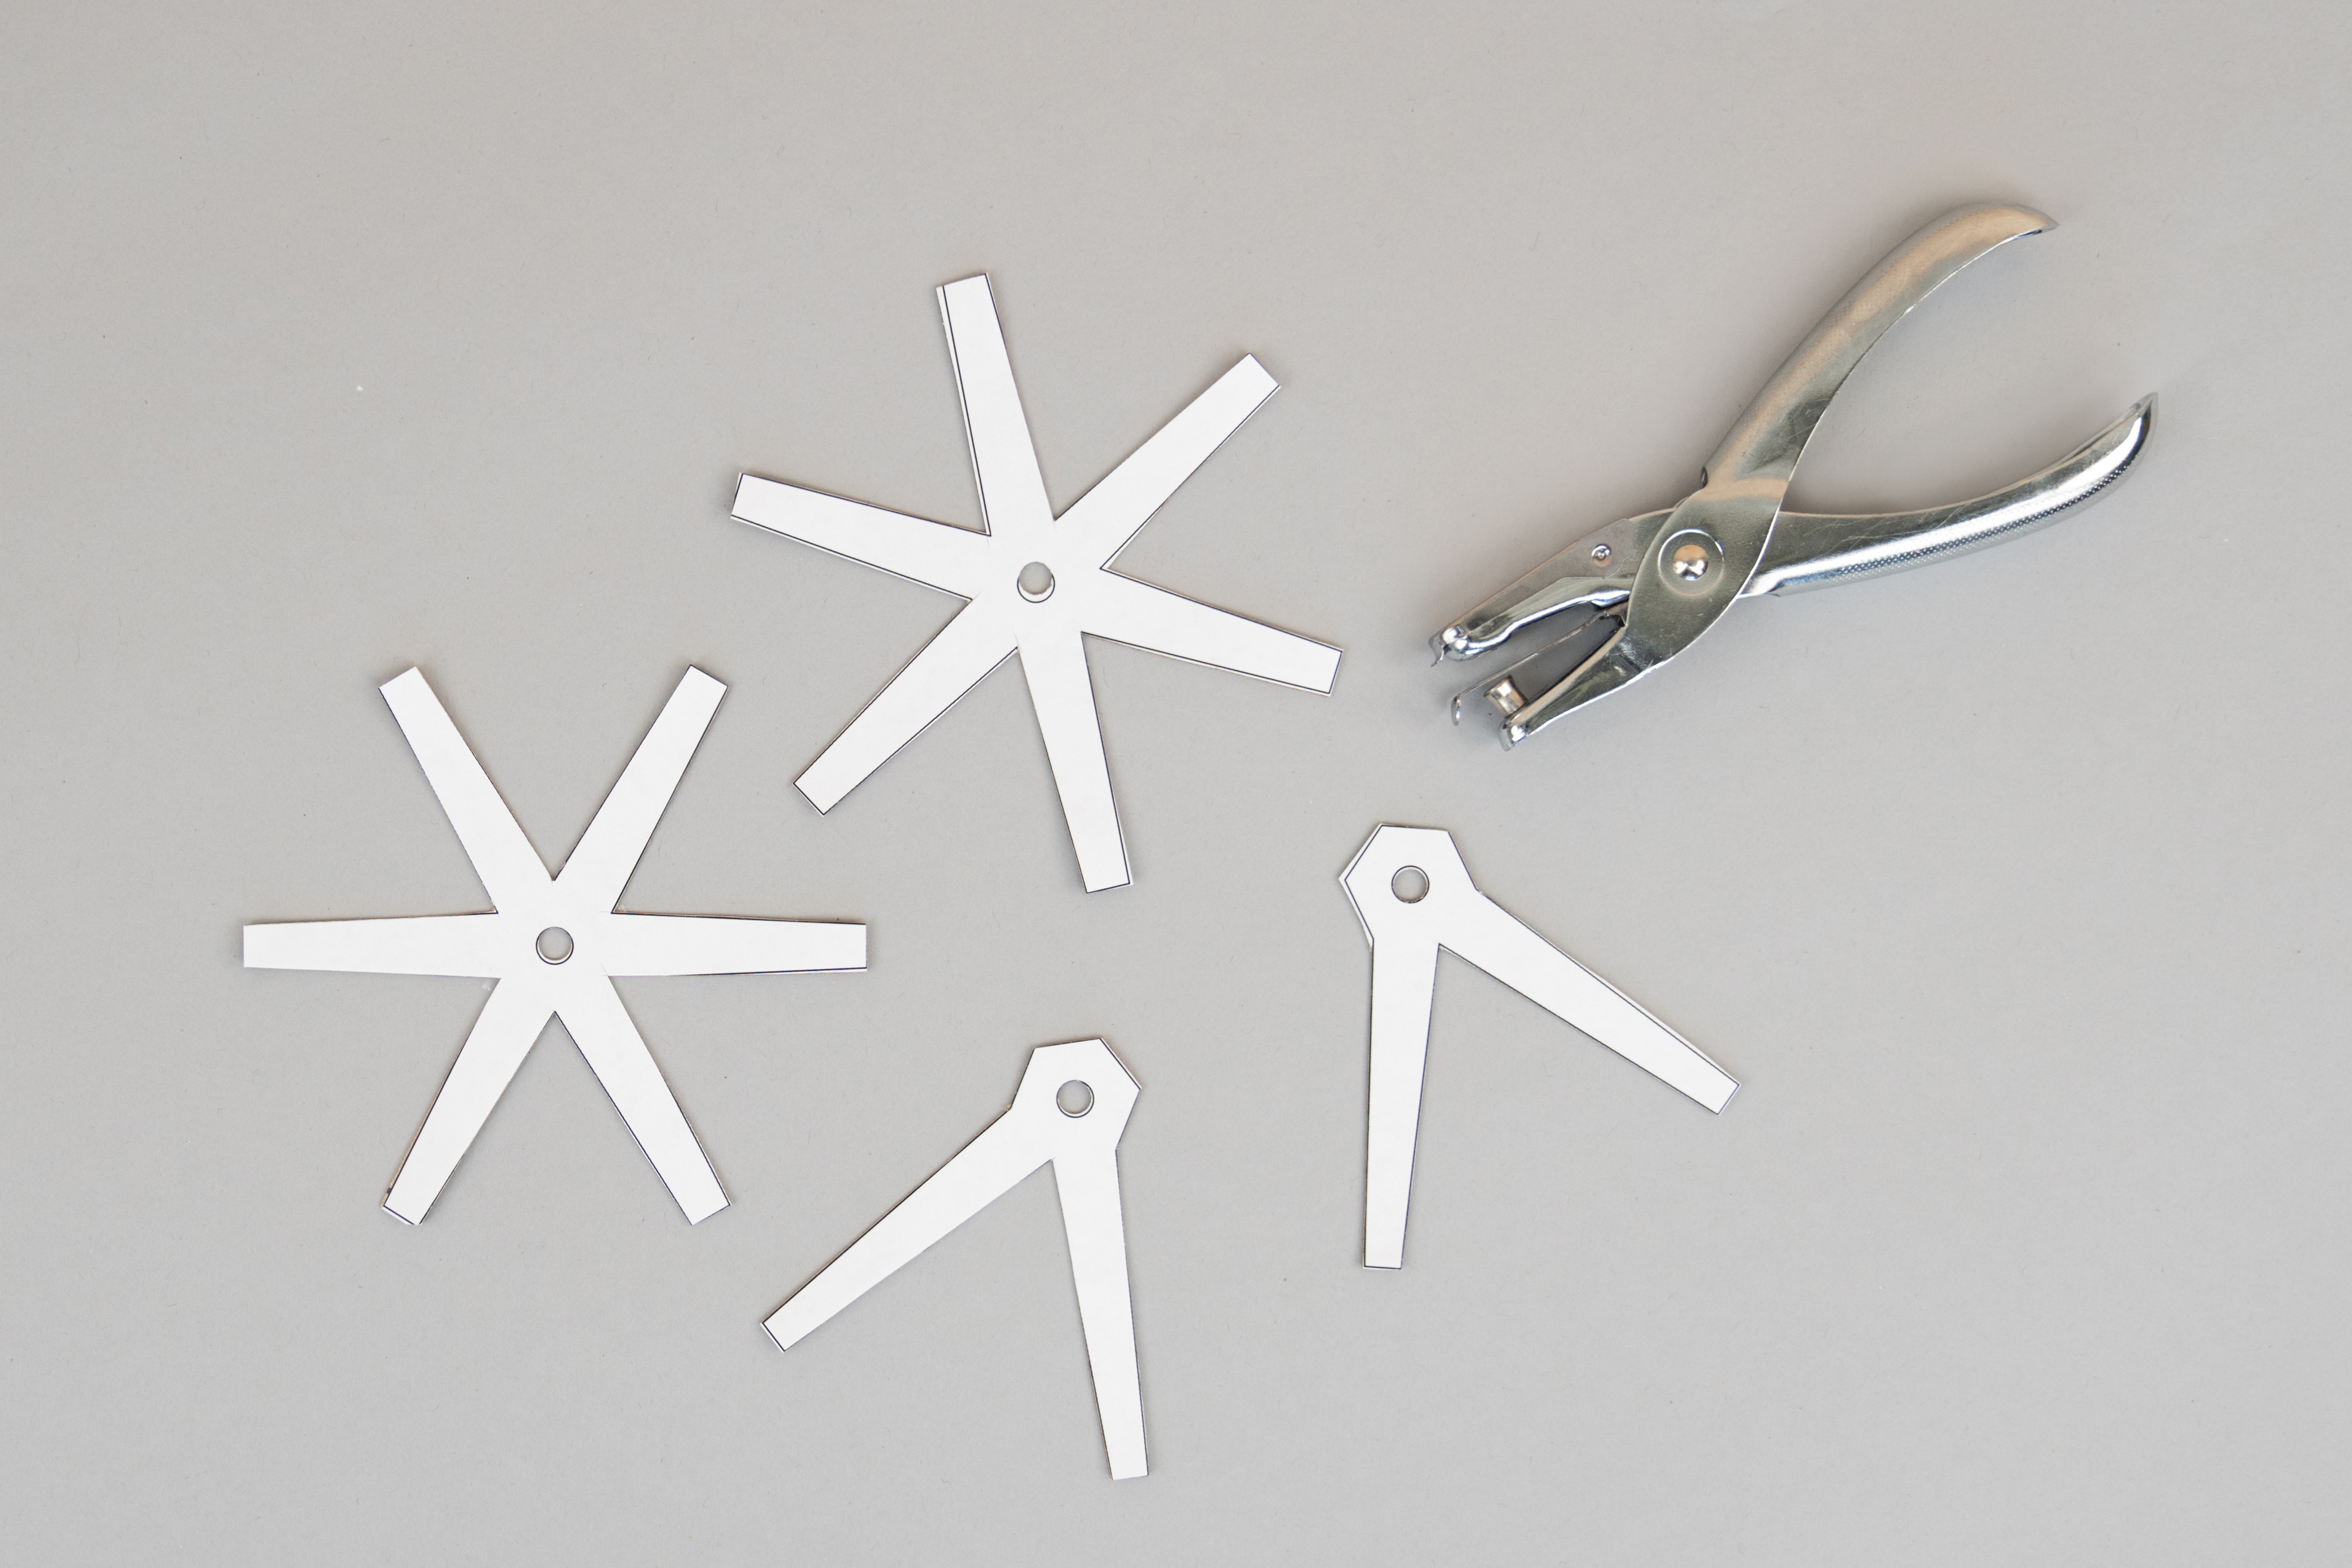
Use the hole punch to create holes on the two hub-connectors and two base-connectors as marked on the template.
Step 4
Now, get the straws ready.
First set aside four full-length straws. These will serve as the four base legs of the Ferris wheel.
Then measure and cut the rest of the straws for your Ferris wheel's spokes and frame. You can do this in the same color or in a mix of colors.
You’ll need:
- Twenty-four 4-inch pieces
- Six 2.5-inch pieces
Step 5
To build the central wheels, insert each leg of a hub-connector into a 4-inch straw piece. (Make sure the end of the straw fits snugly at the base of each leg. If needed, trim the connector legs to make them narrower so they can be completely inserted into the straws.) Repeat this for the second hub-connector.
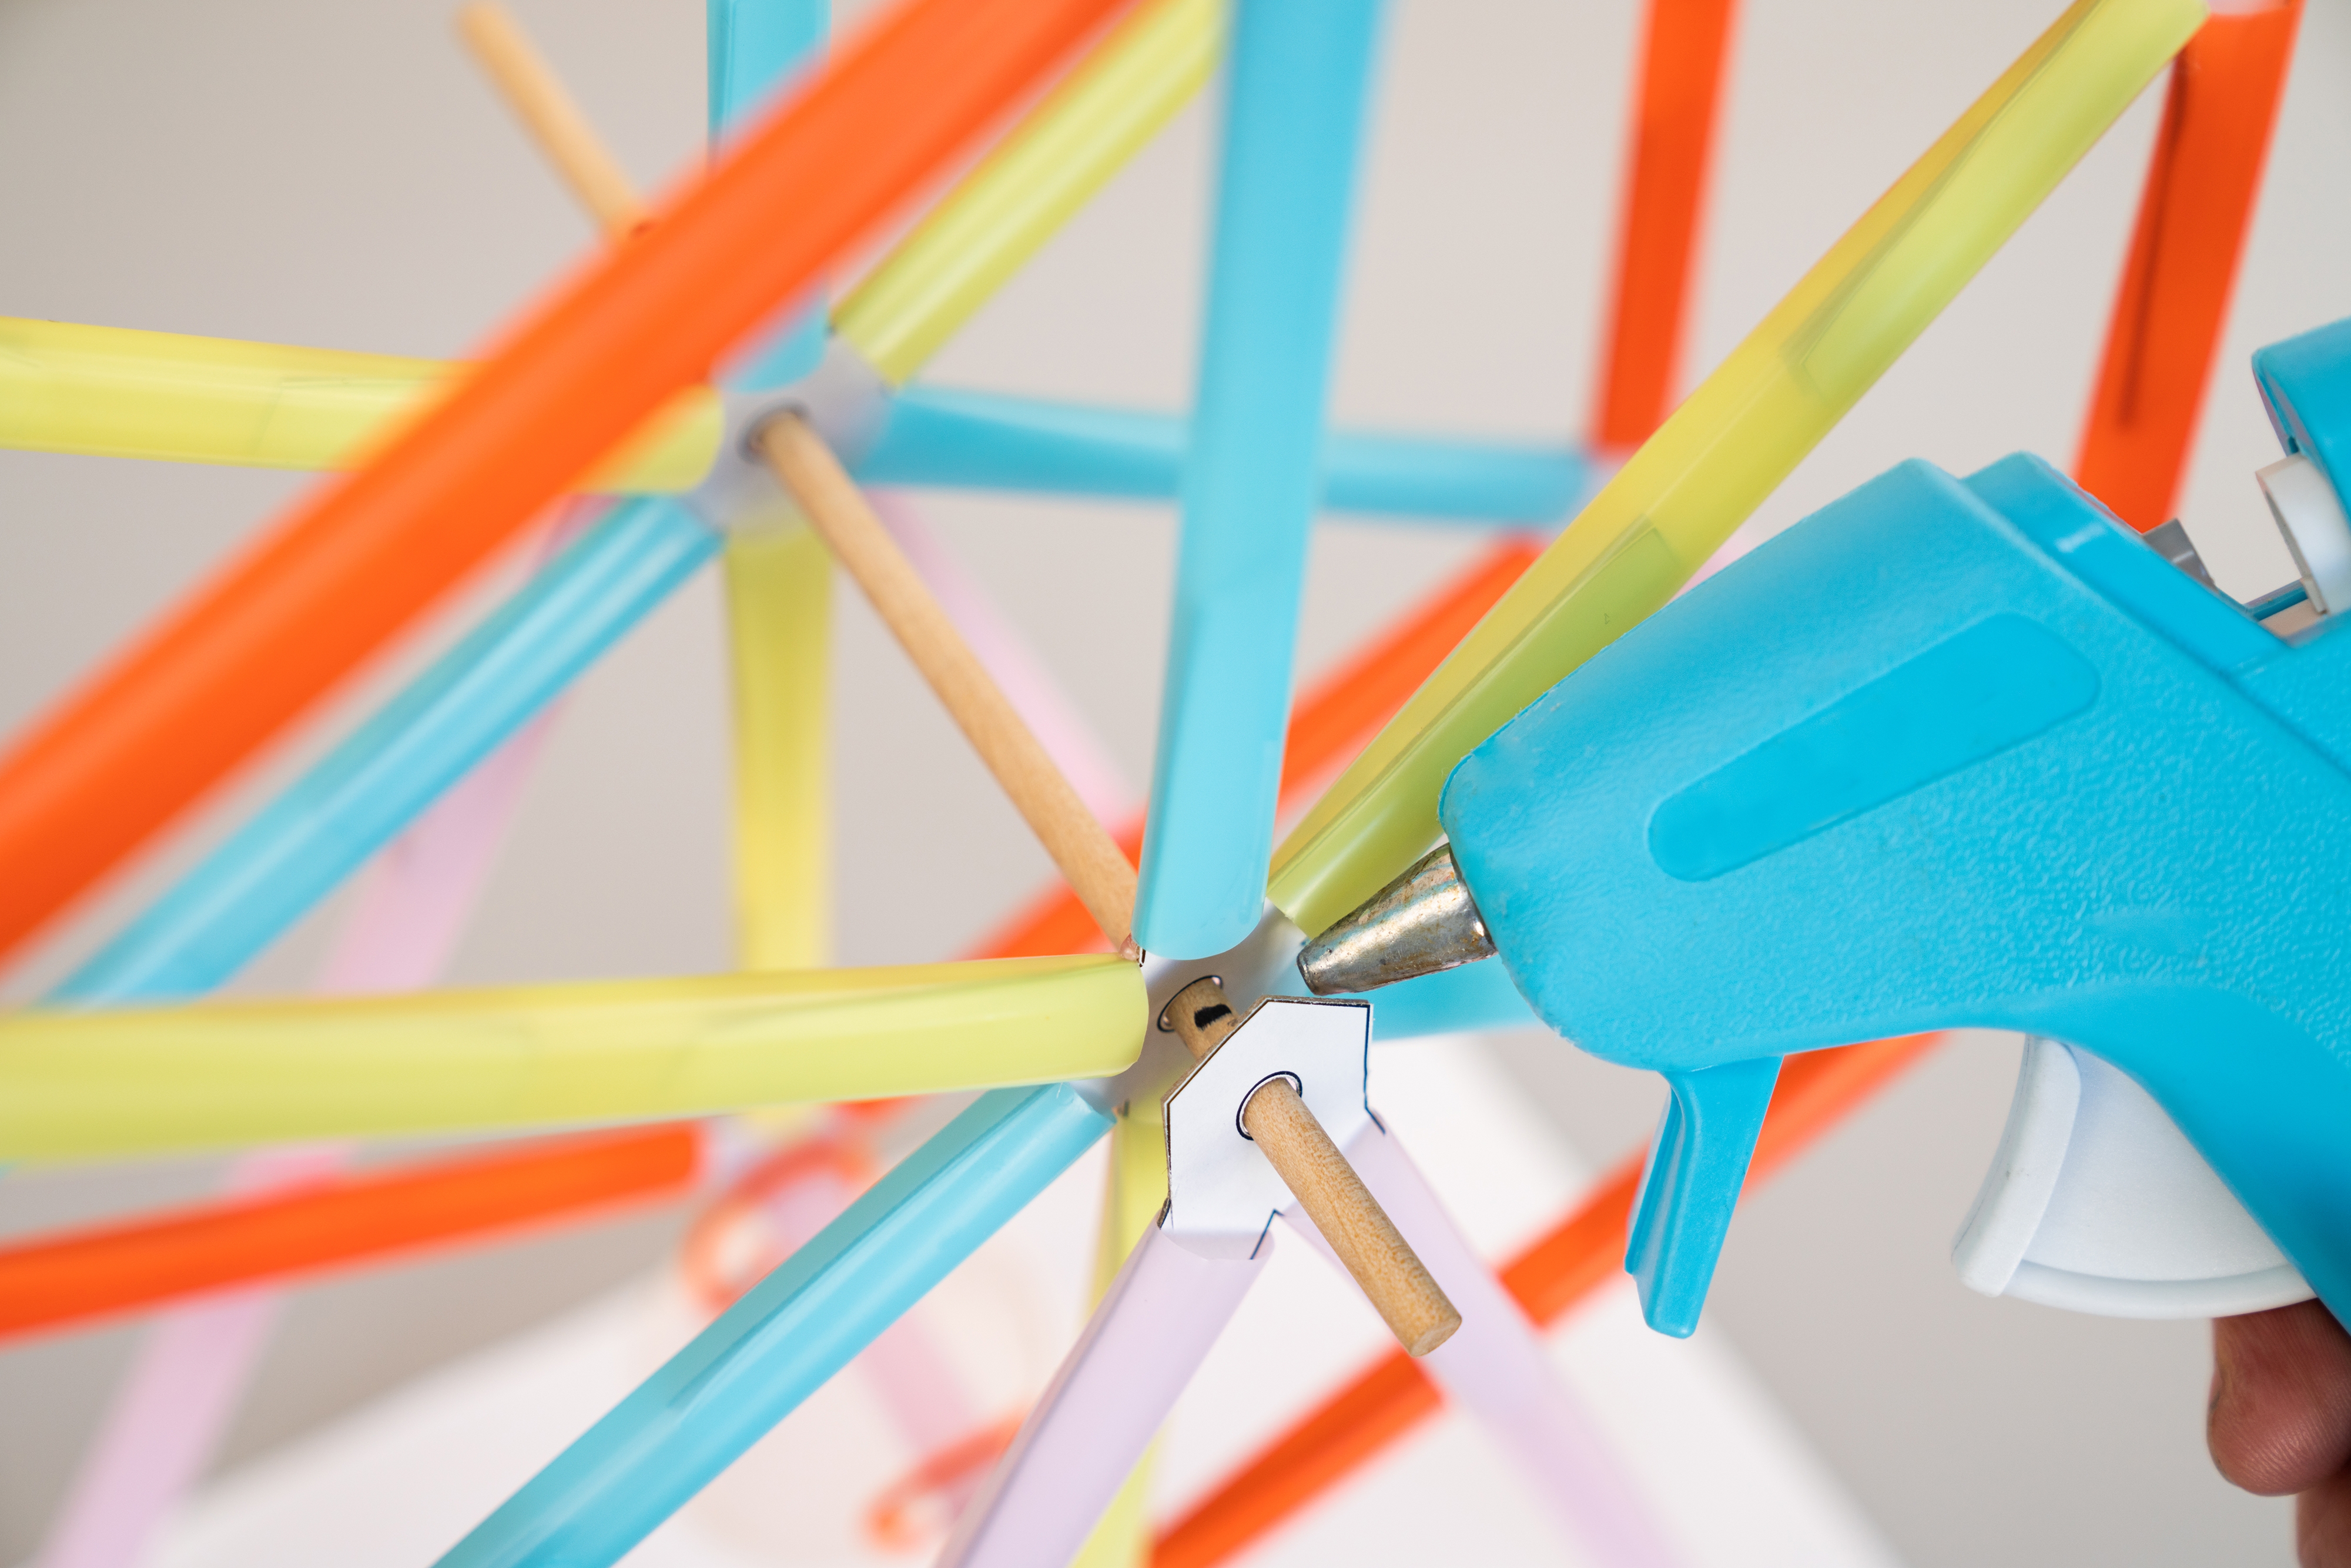
With a hot glue gun, attach each straw to the hub-connector. Let the glue dry.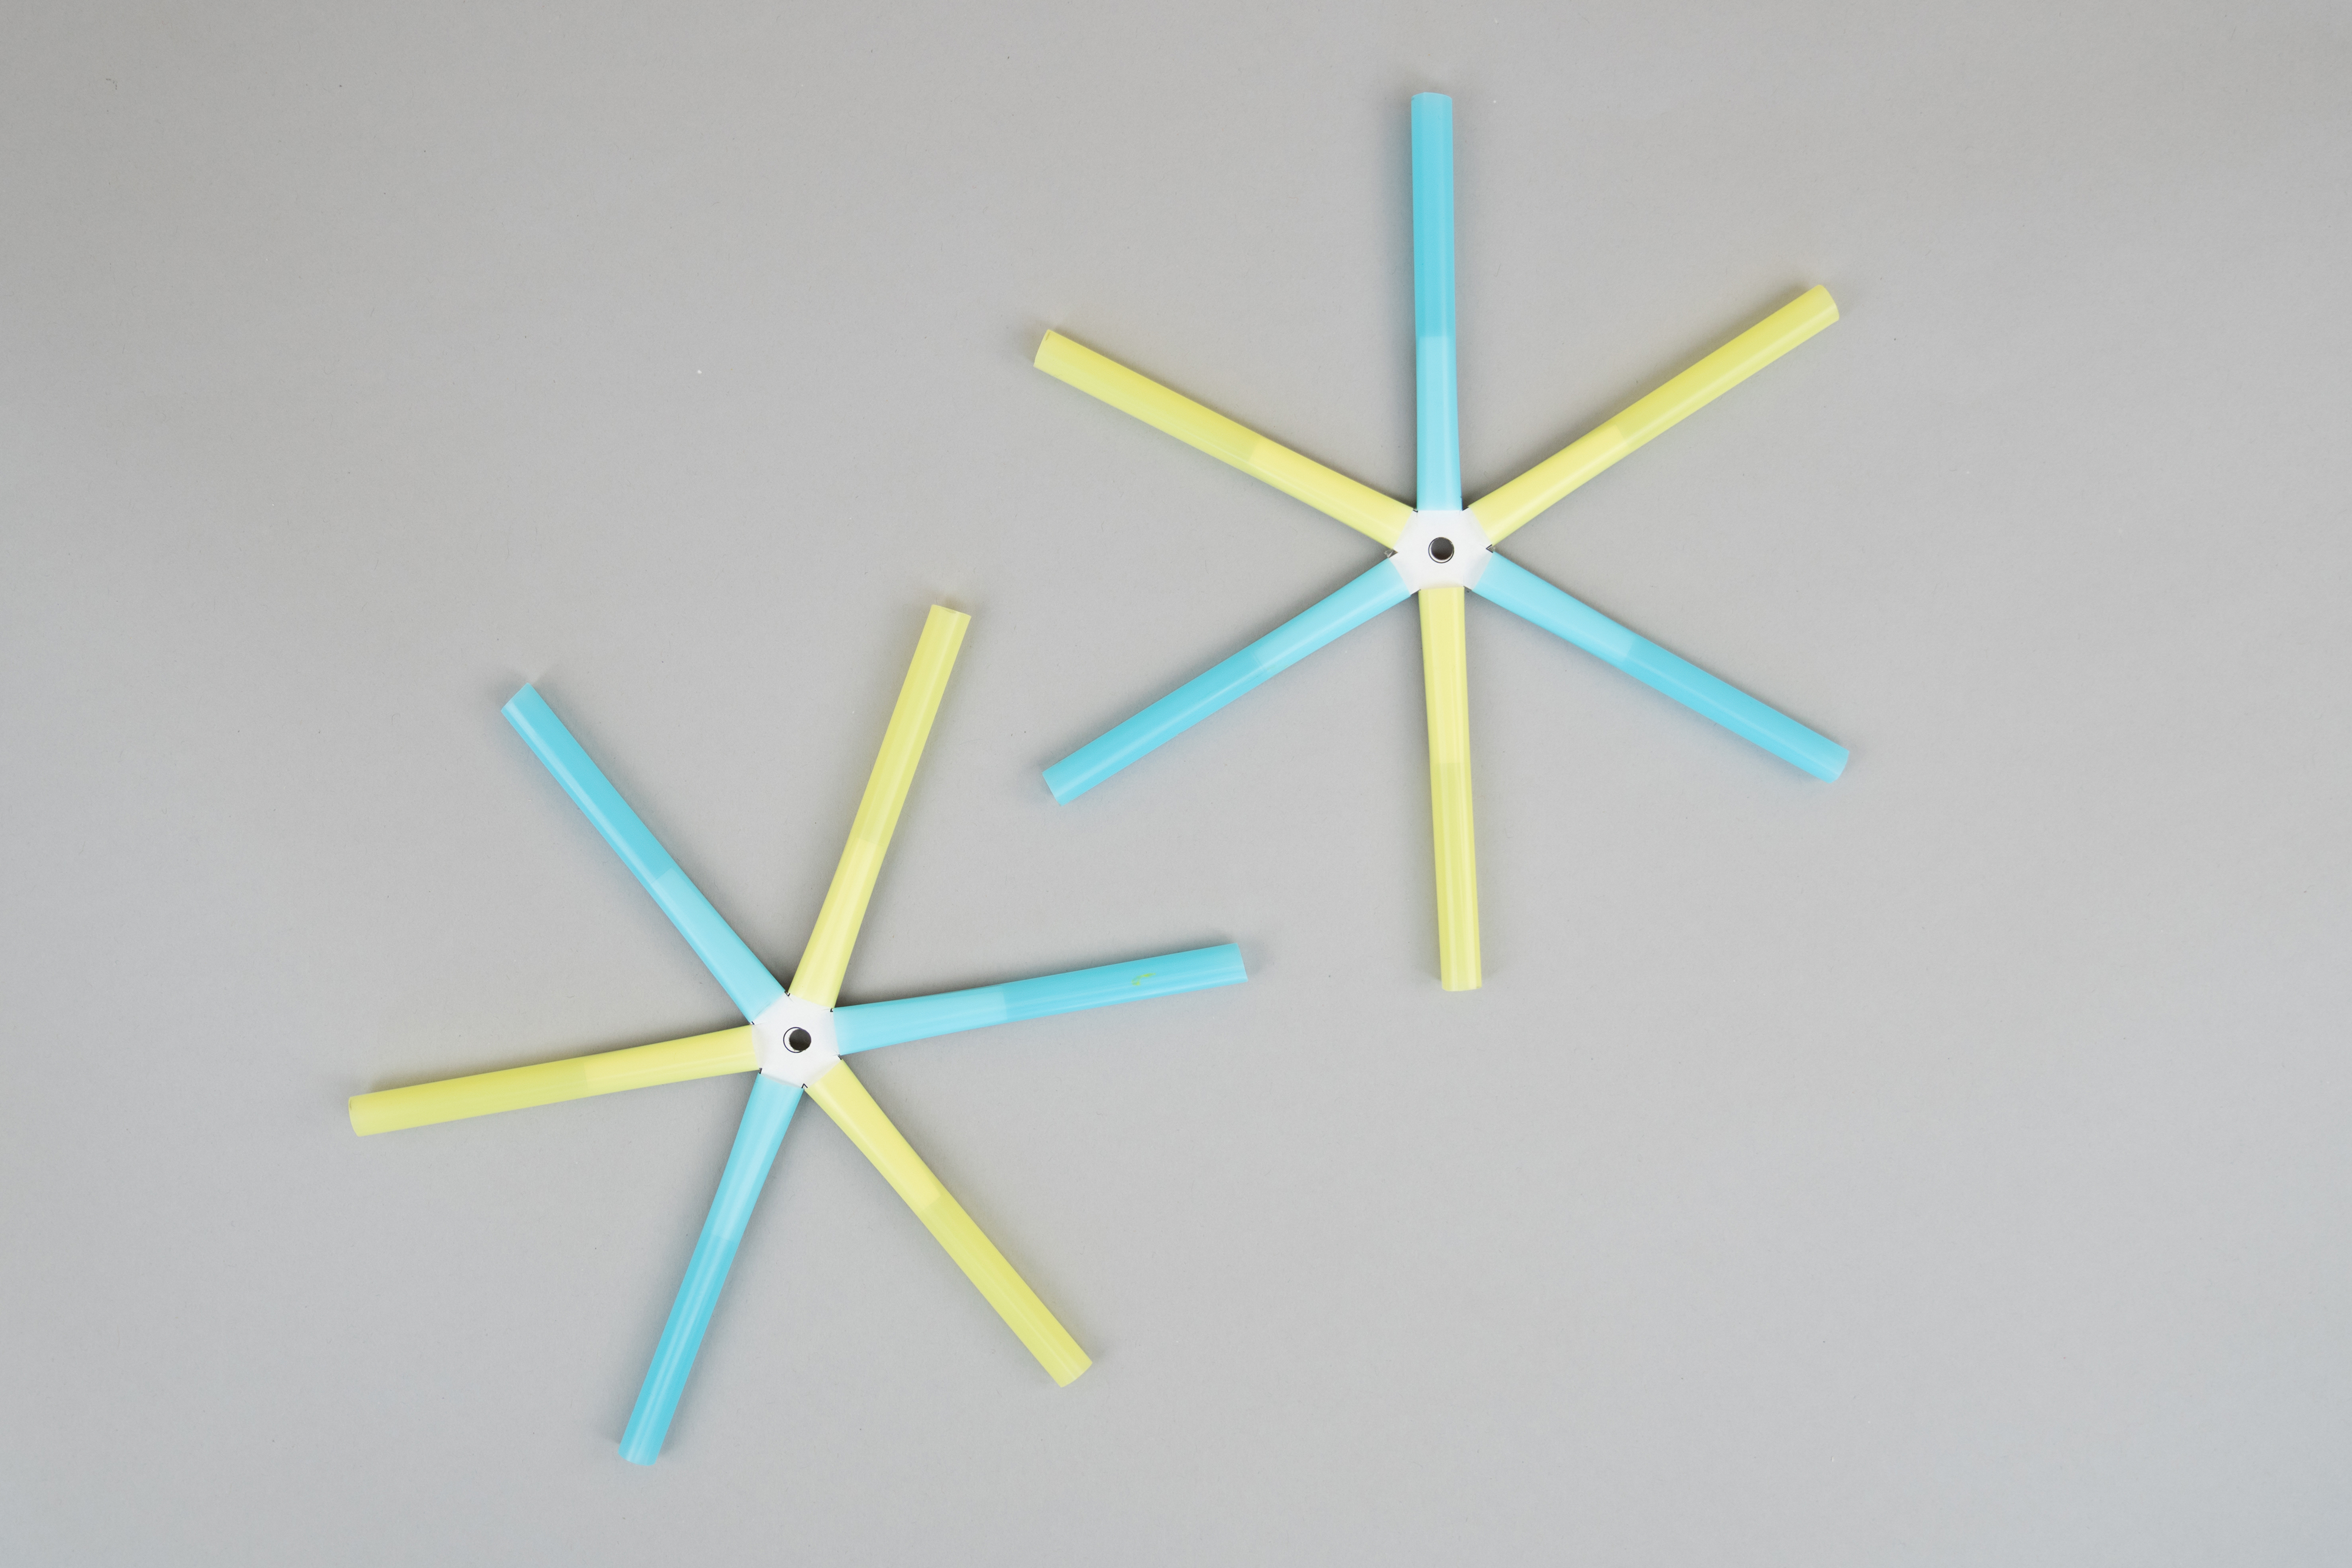
Tip
Handle the hot glue gun with care. If needed, a grownup assistant should handle this step.
Step 6
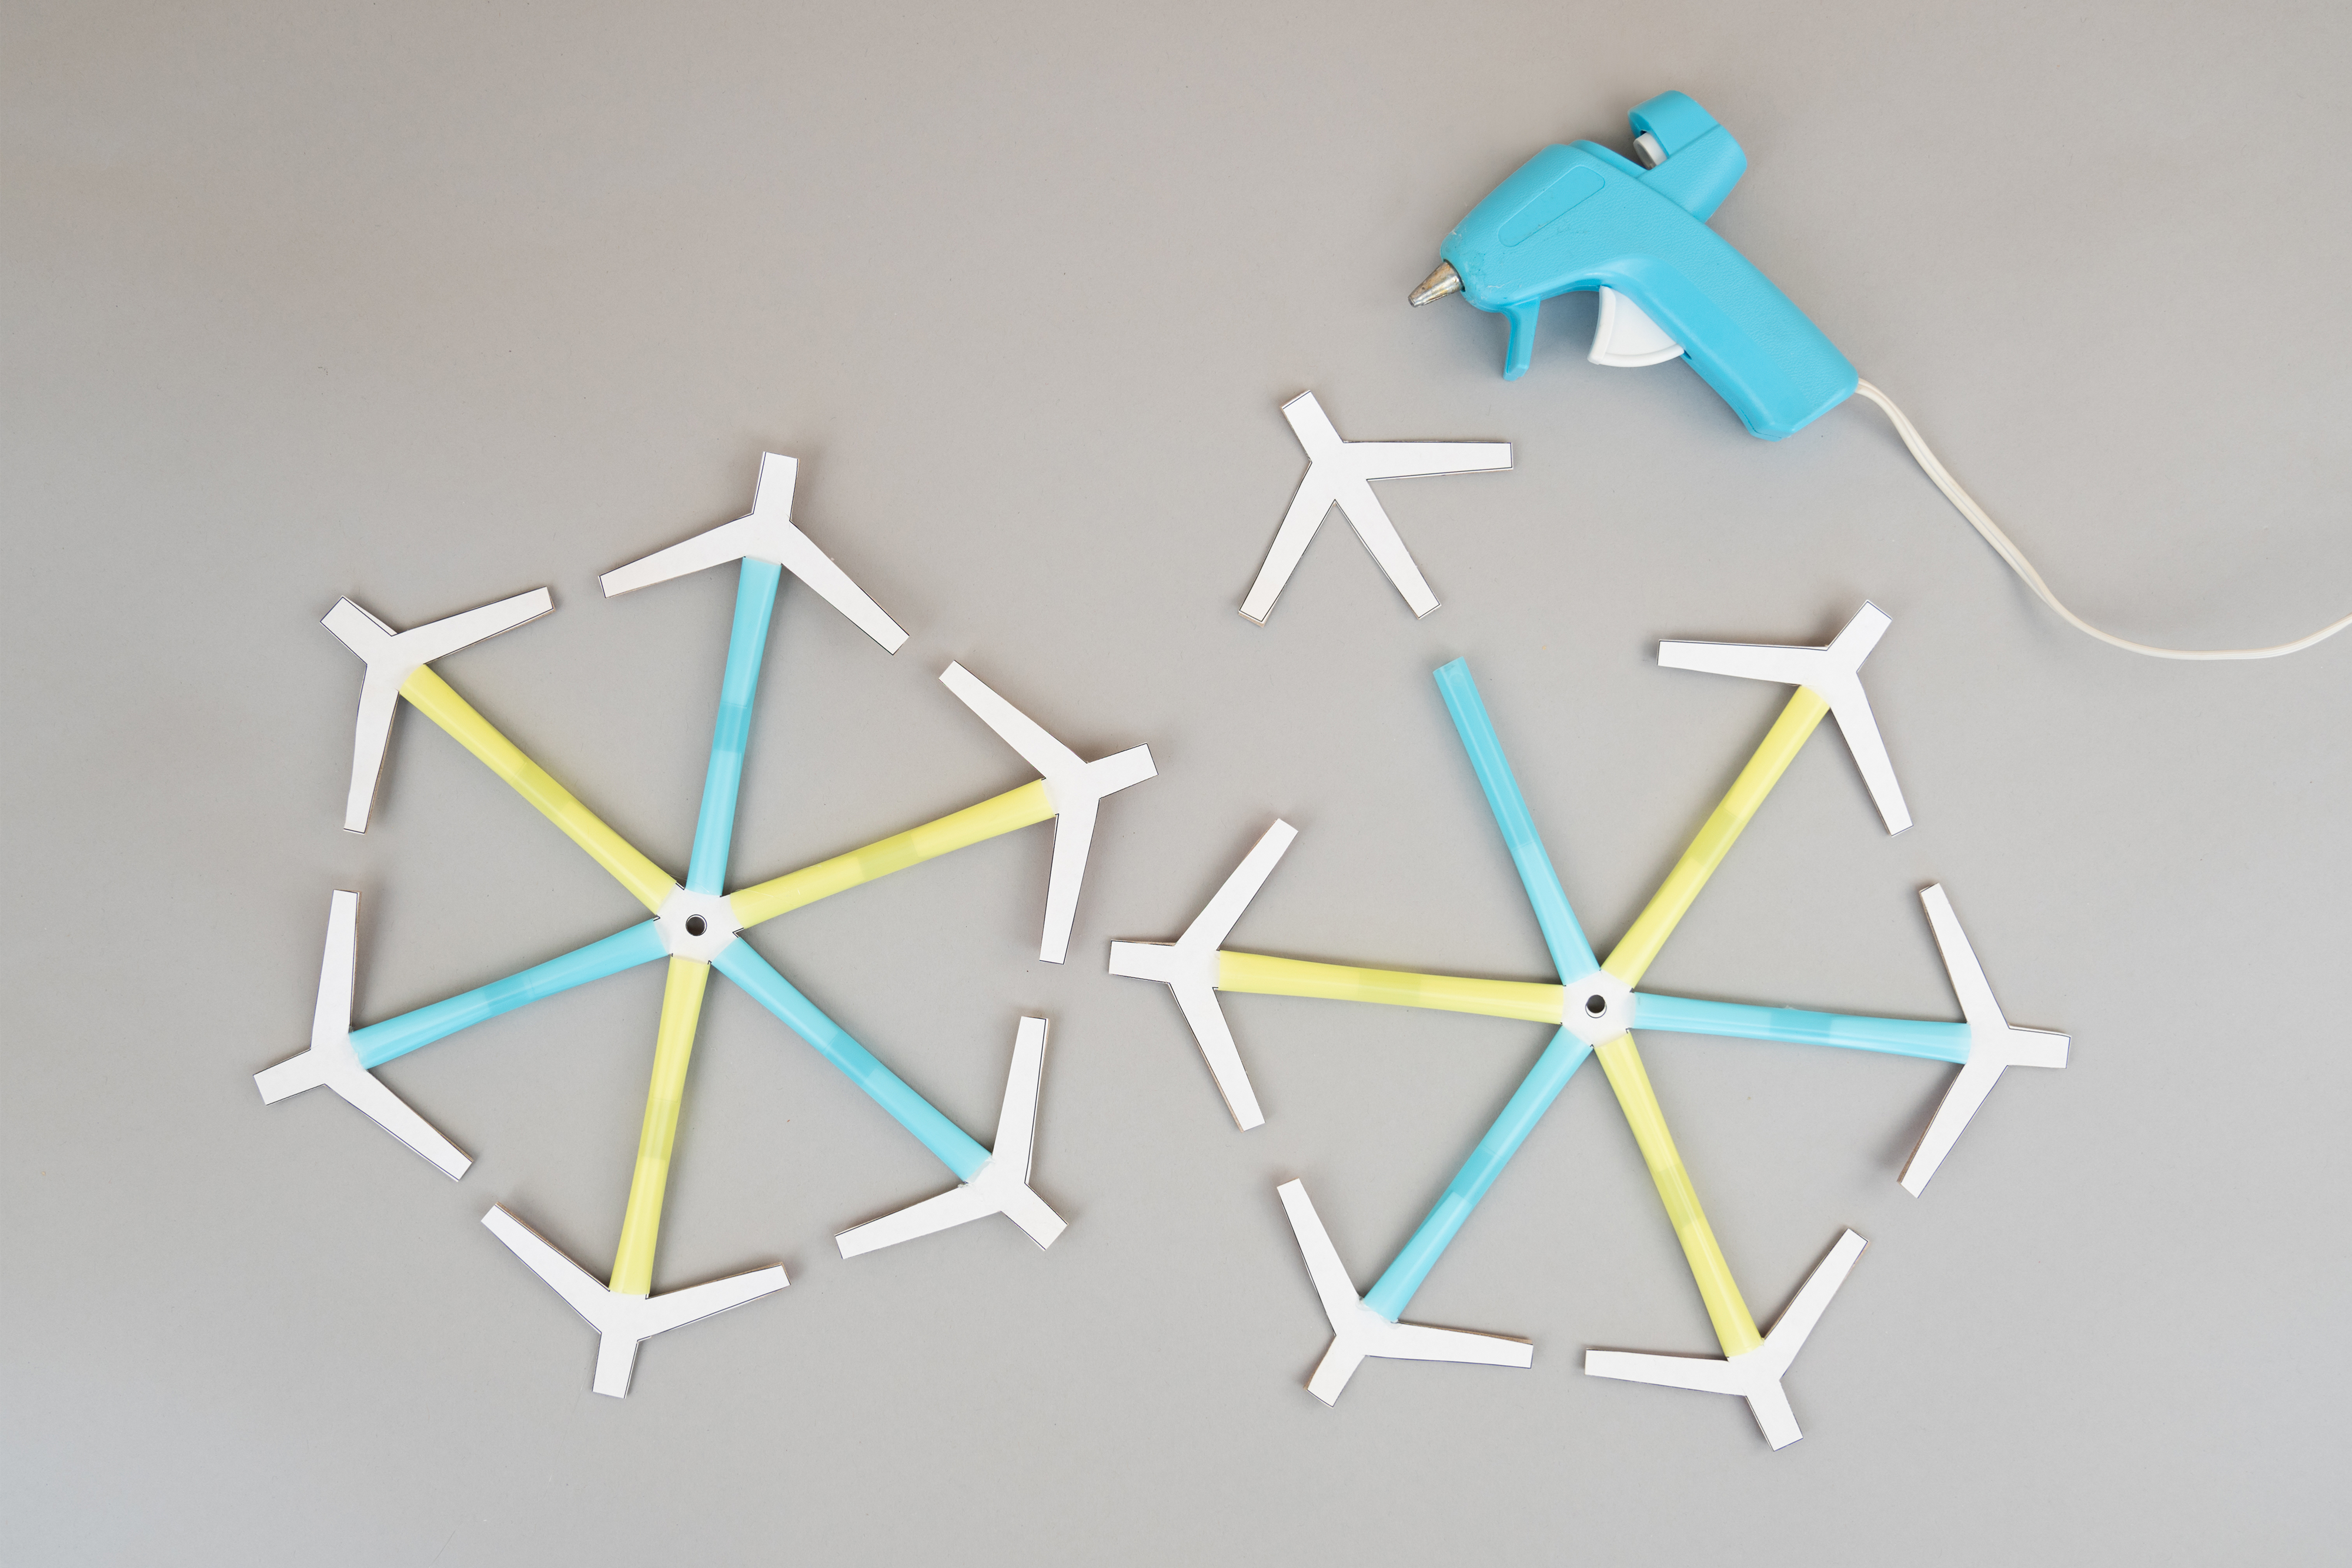
To start building the circular frame around spokes, take six spoke-connectors and insert the long middle legs into the open ends of the straws you attached in Step 5. Trim the spoke-connector legs, if needed, to ensure a snug fit. Repeat this for the second hub-connector. With a hot glue gun, attach the straws to the connector legs. Let the glue dry.
Step 7
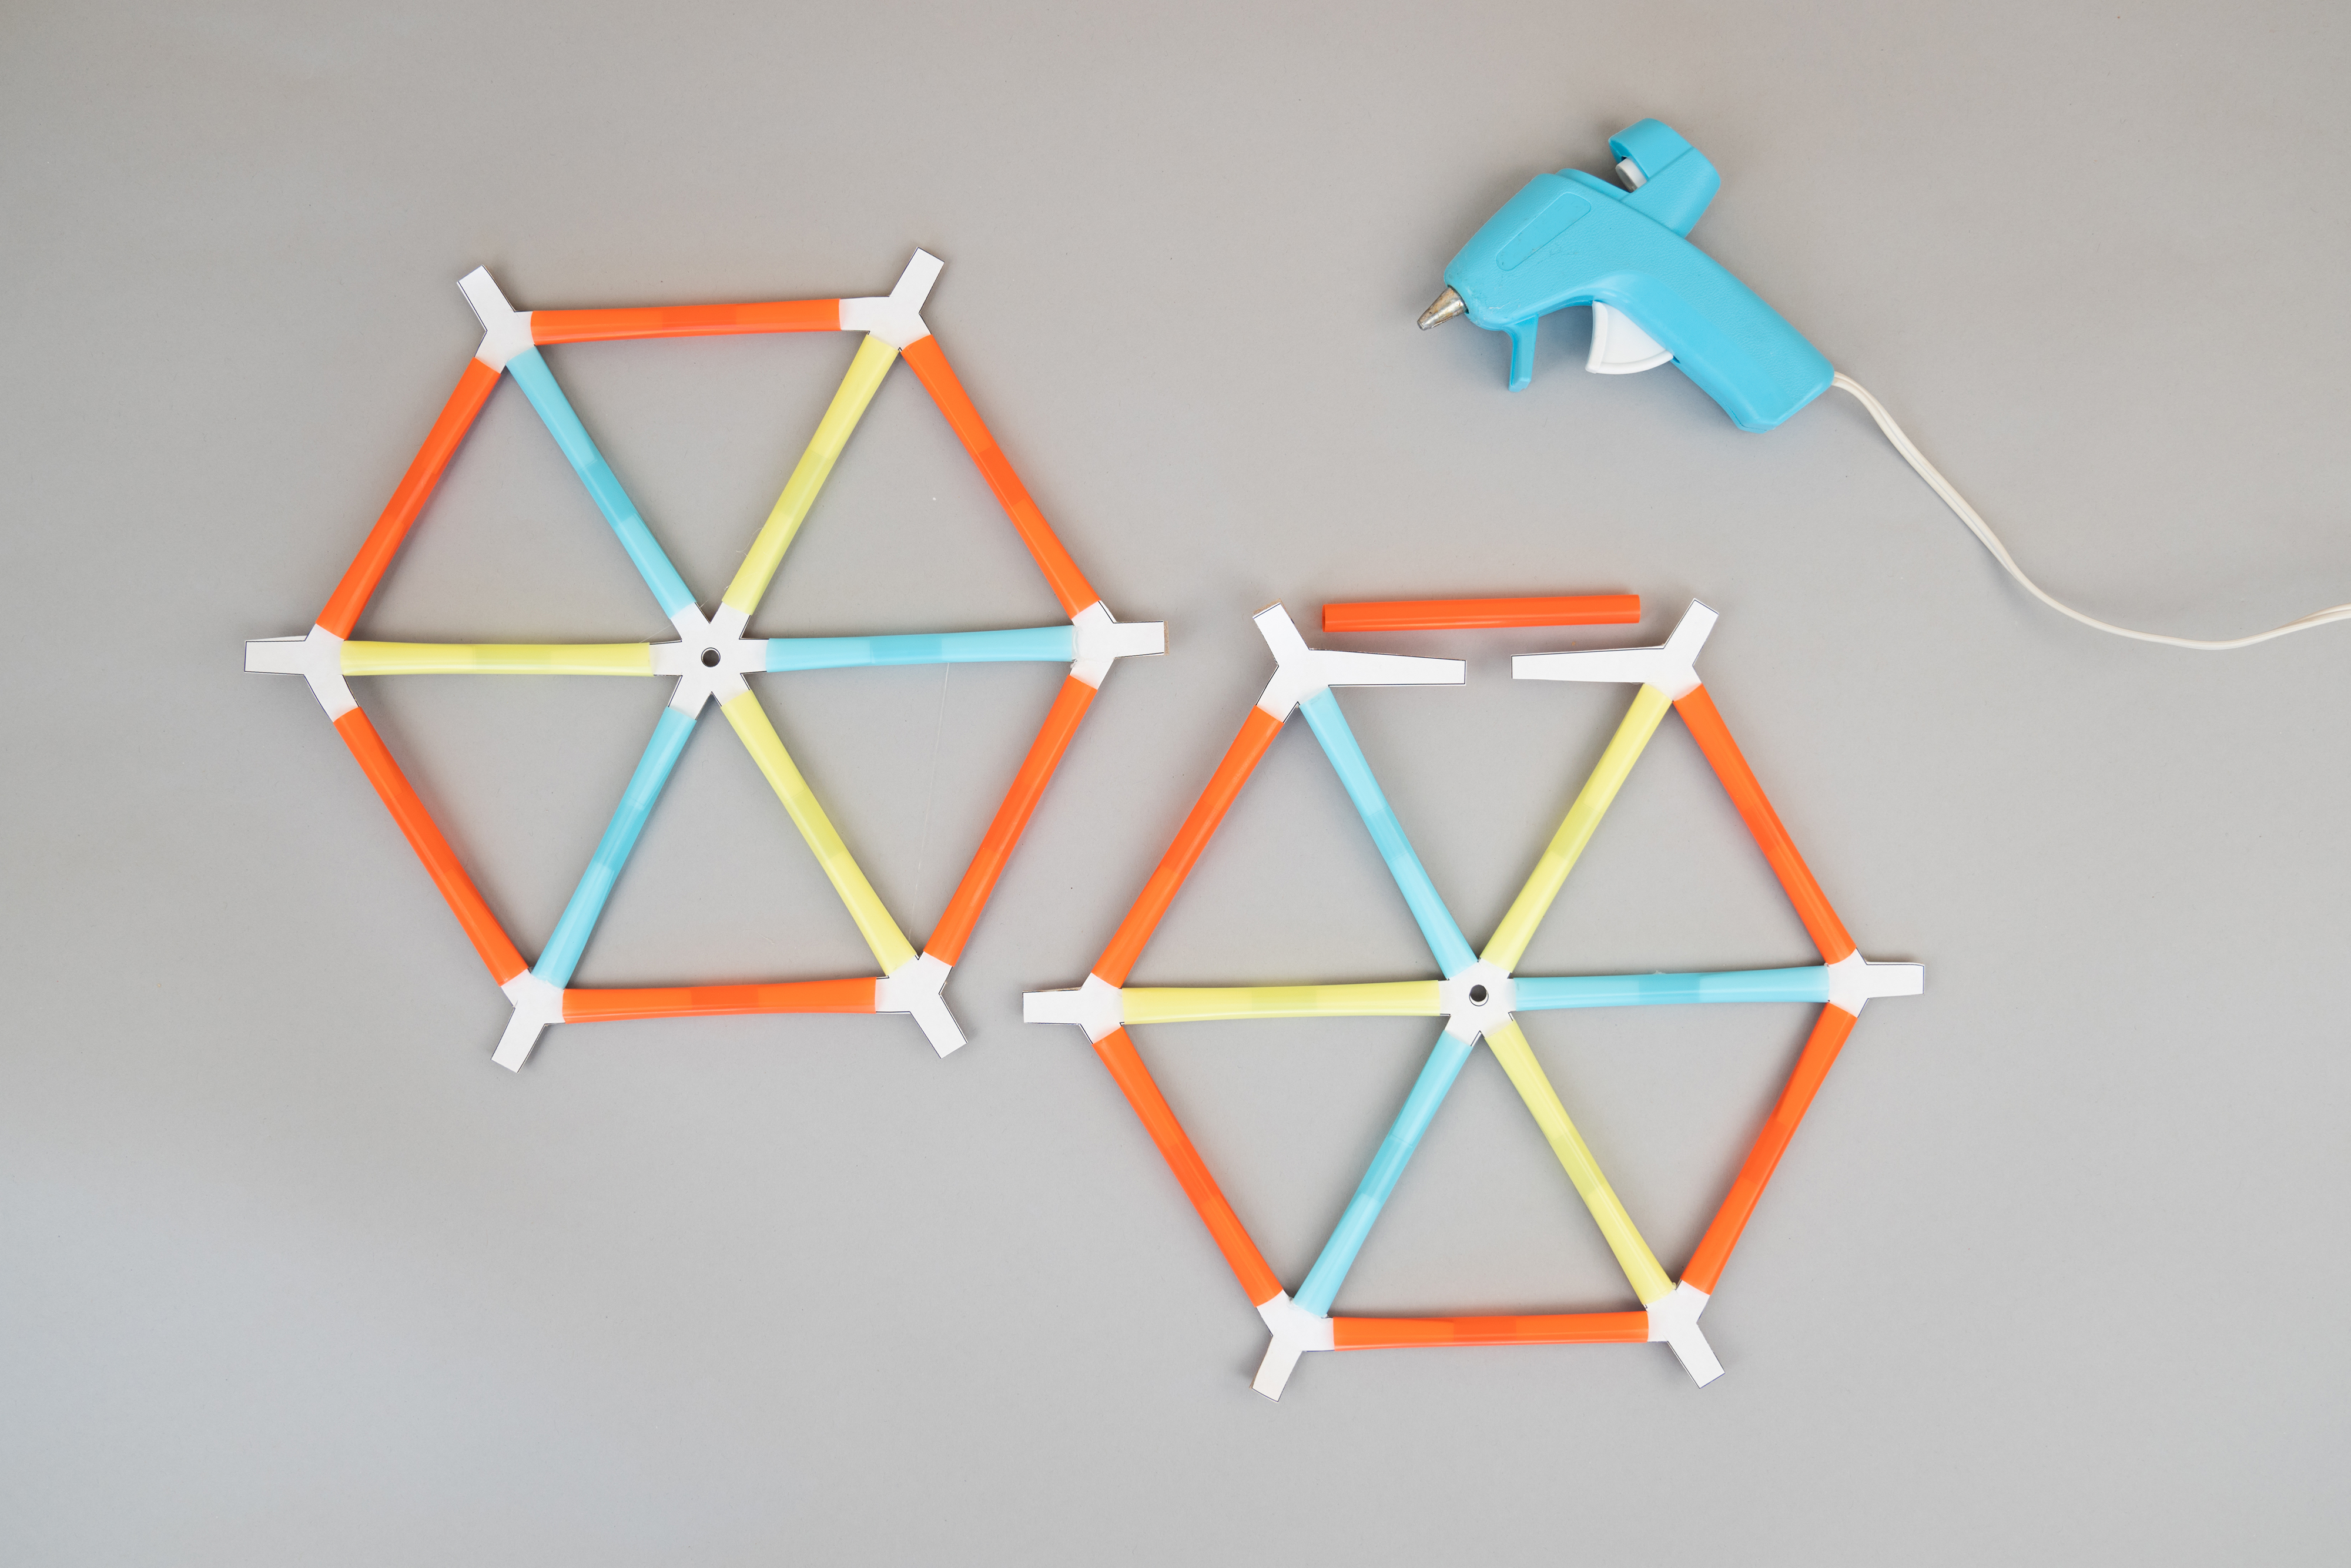
To finish the circular frame, take six 4-inch straw pieces and fit the side legs of two spoke-connectors into each end. Trim the legs, if needed, to ensure a snug fit. Repeat this for the second frame. With a hot glue gun, attach the straws to the spoke-connector legs. Let the glue dry. You should now have two wheels on which the shortest legs of the spoke-connectors stick out.
Step 8
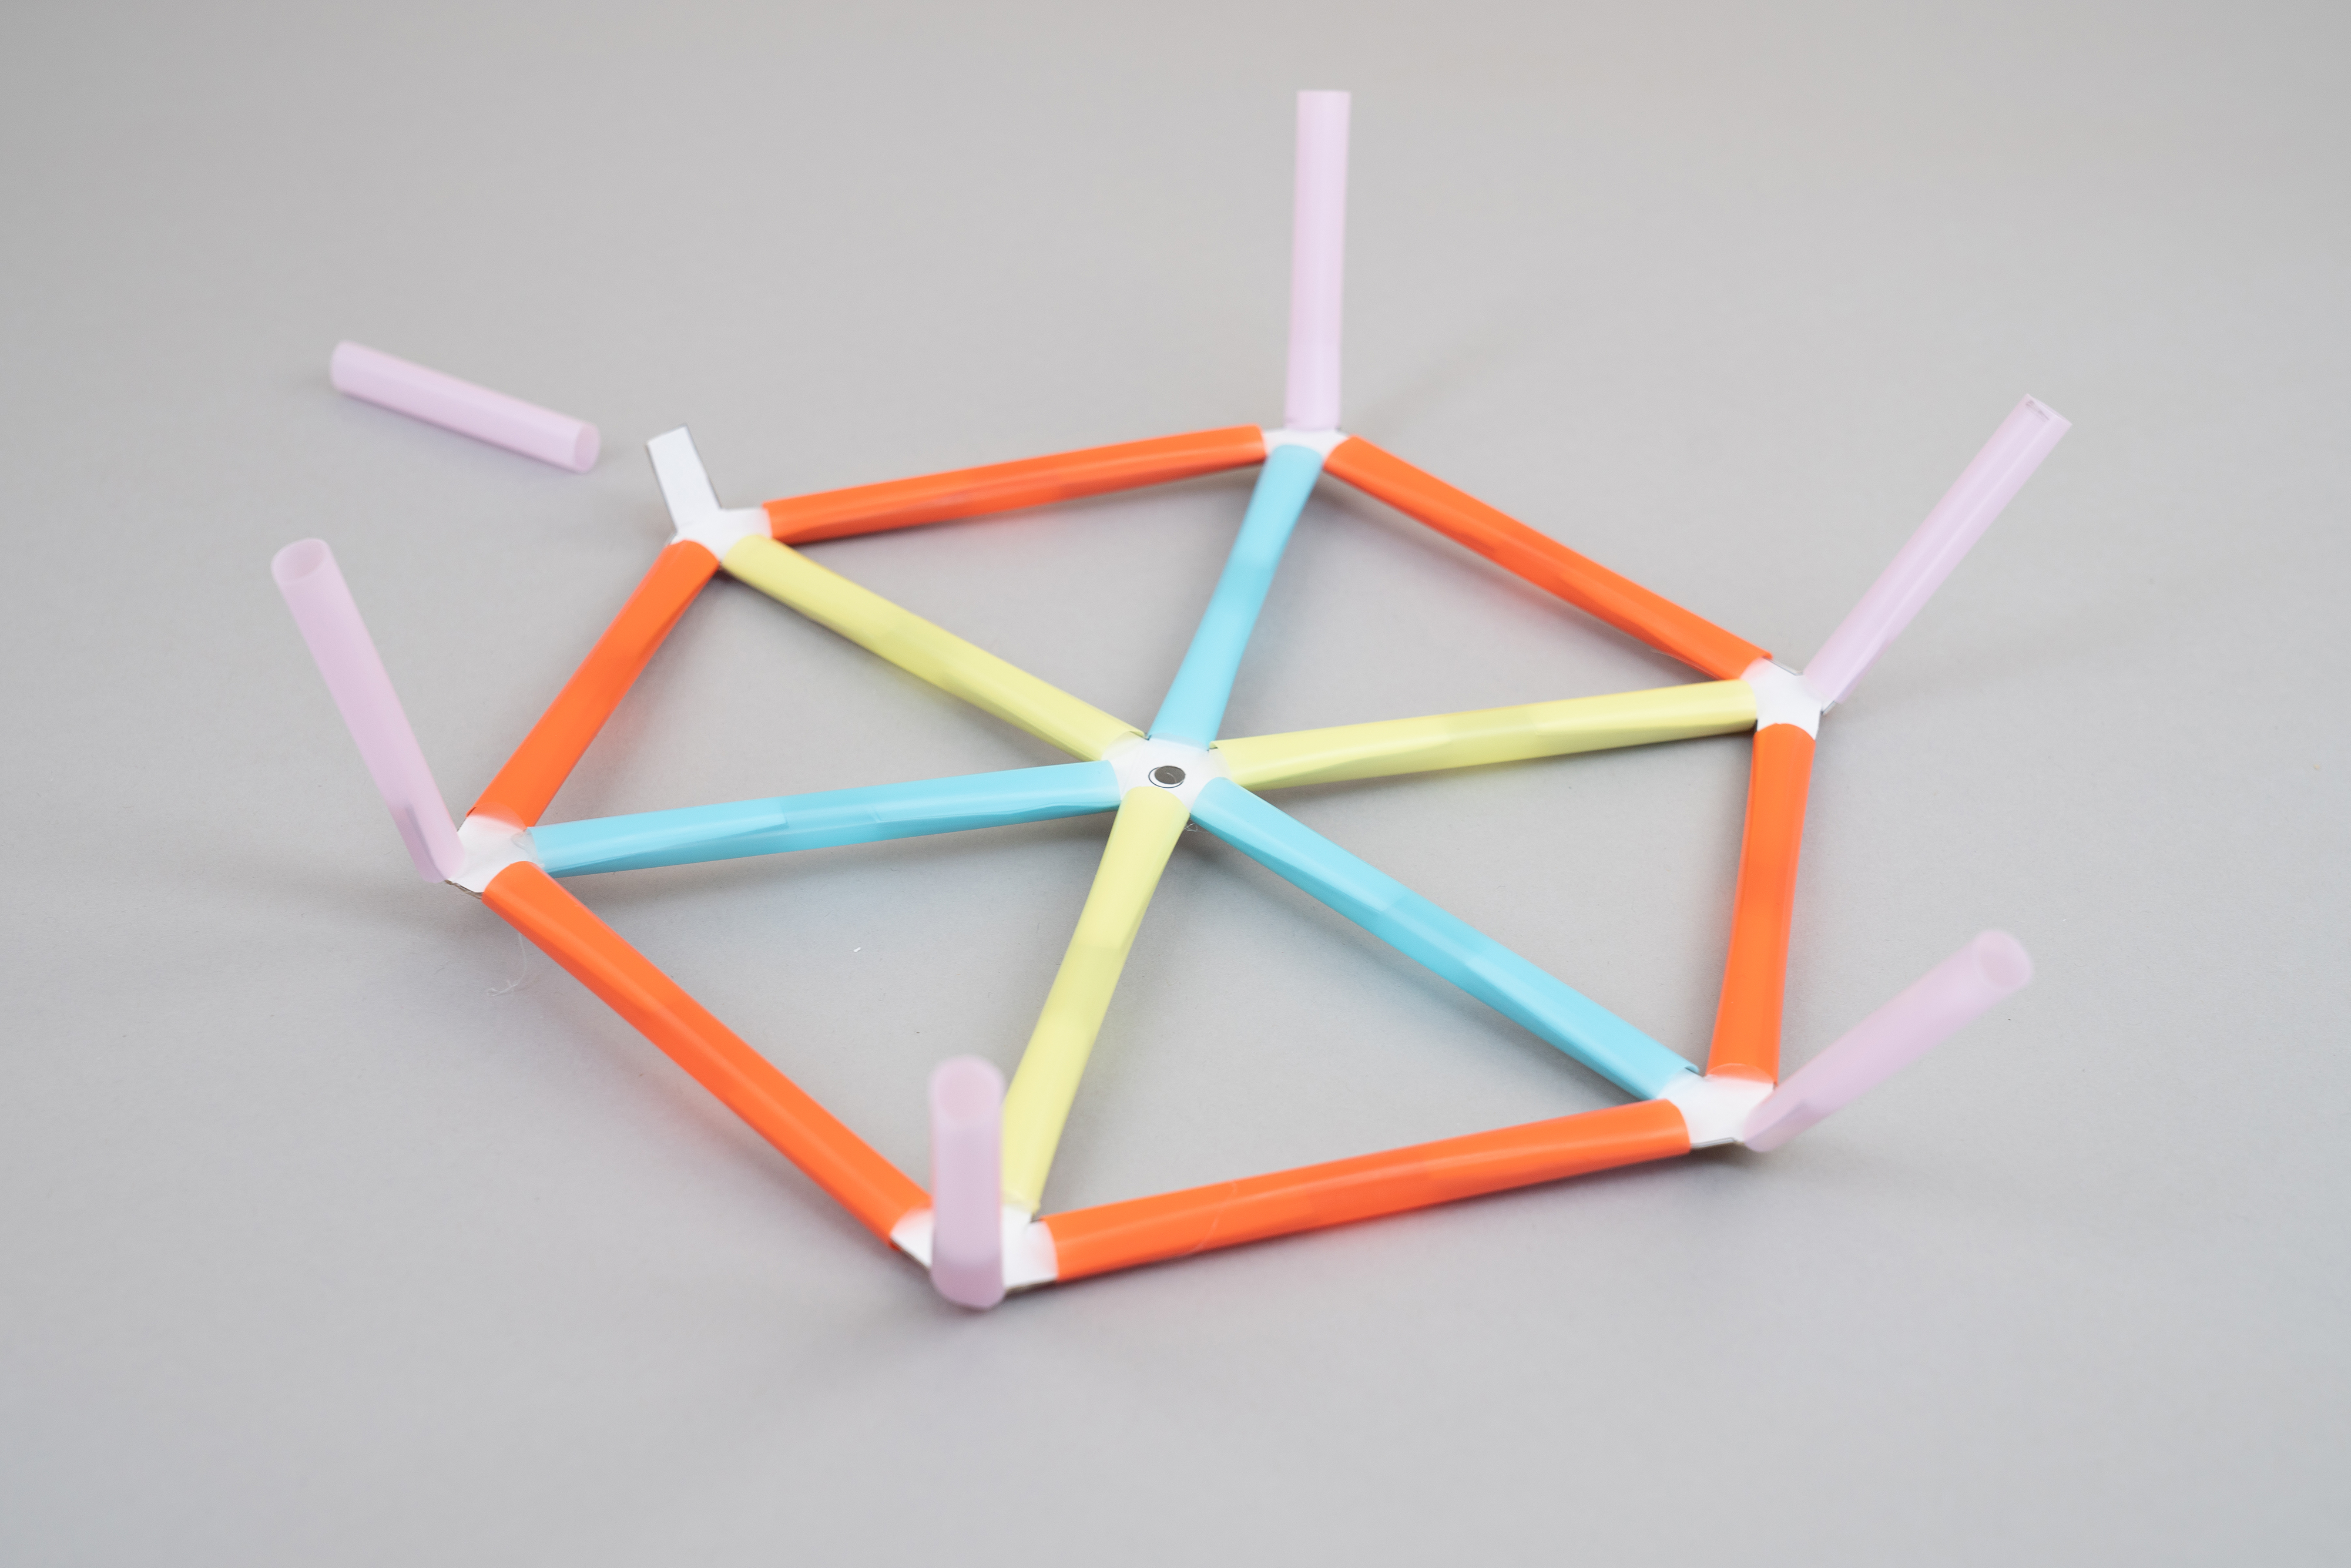
On each wheel, fold up the short legs of the spoke-connectors. Take one wheel and push a 2.5-inch straw onto each leg.
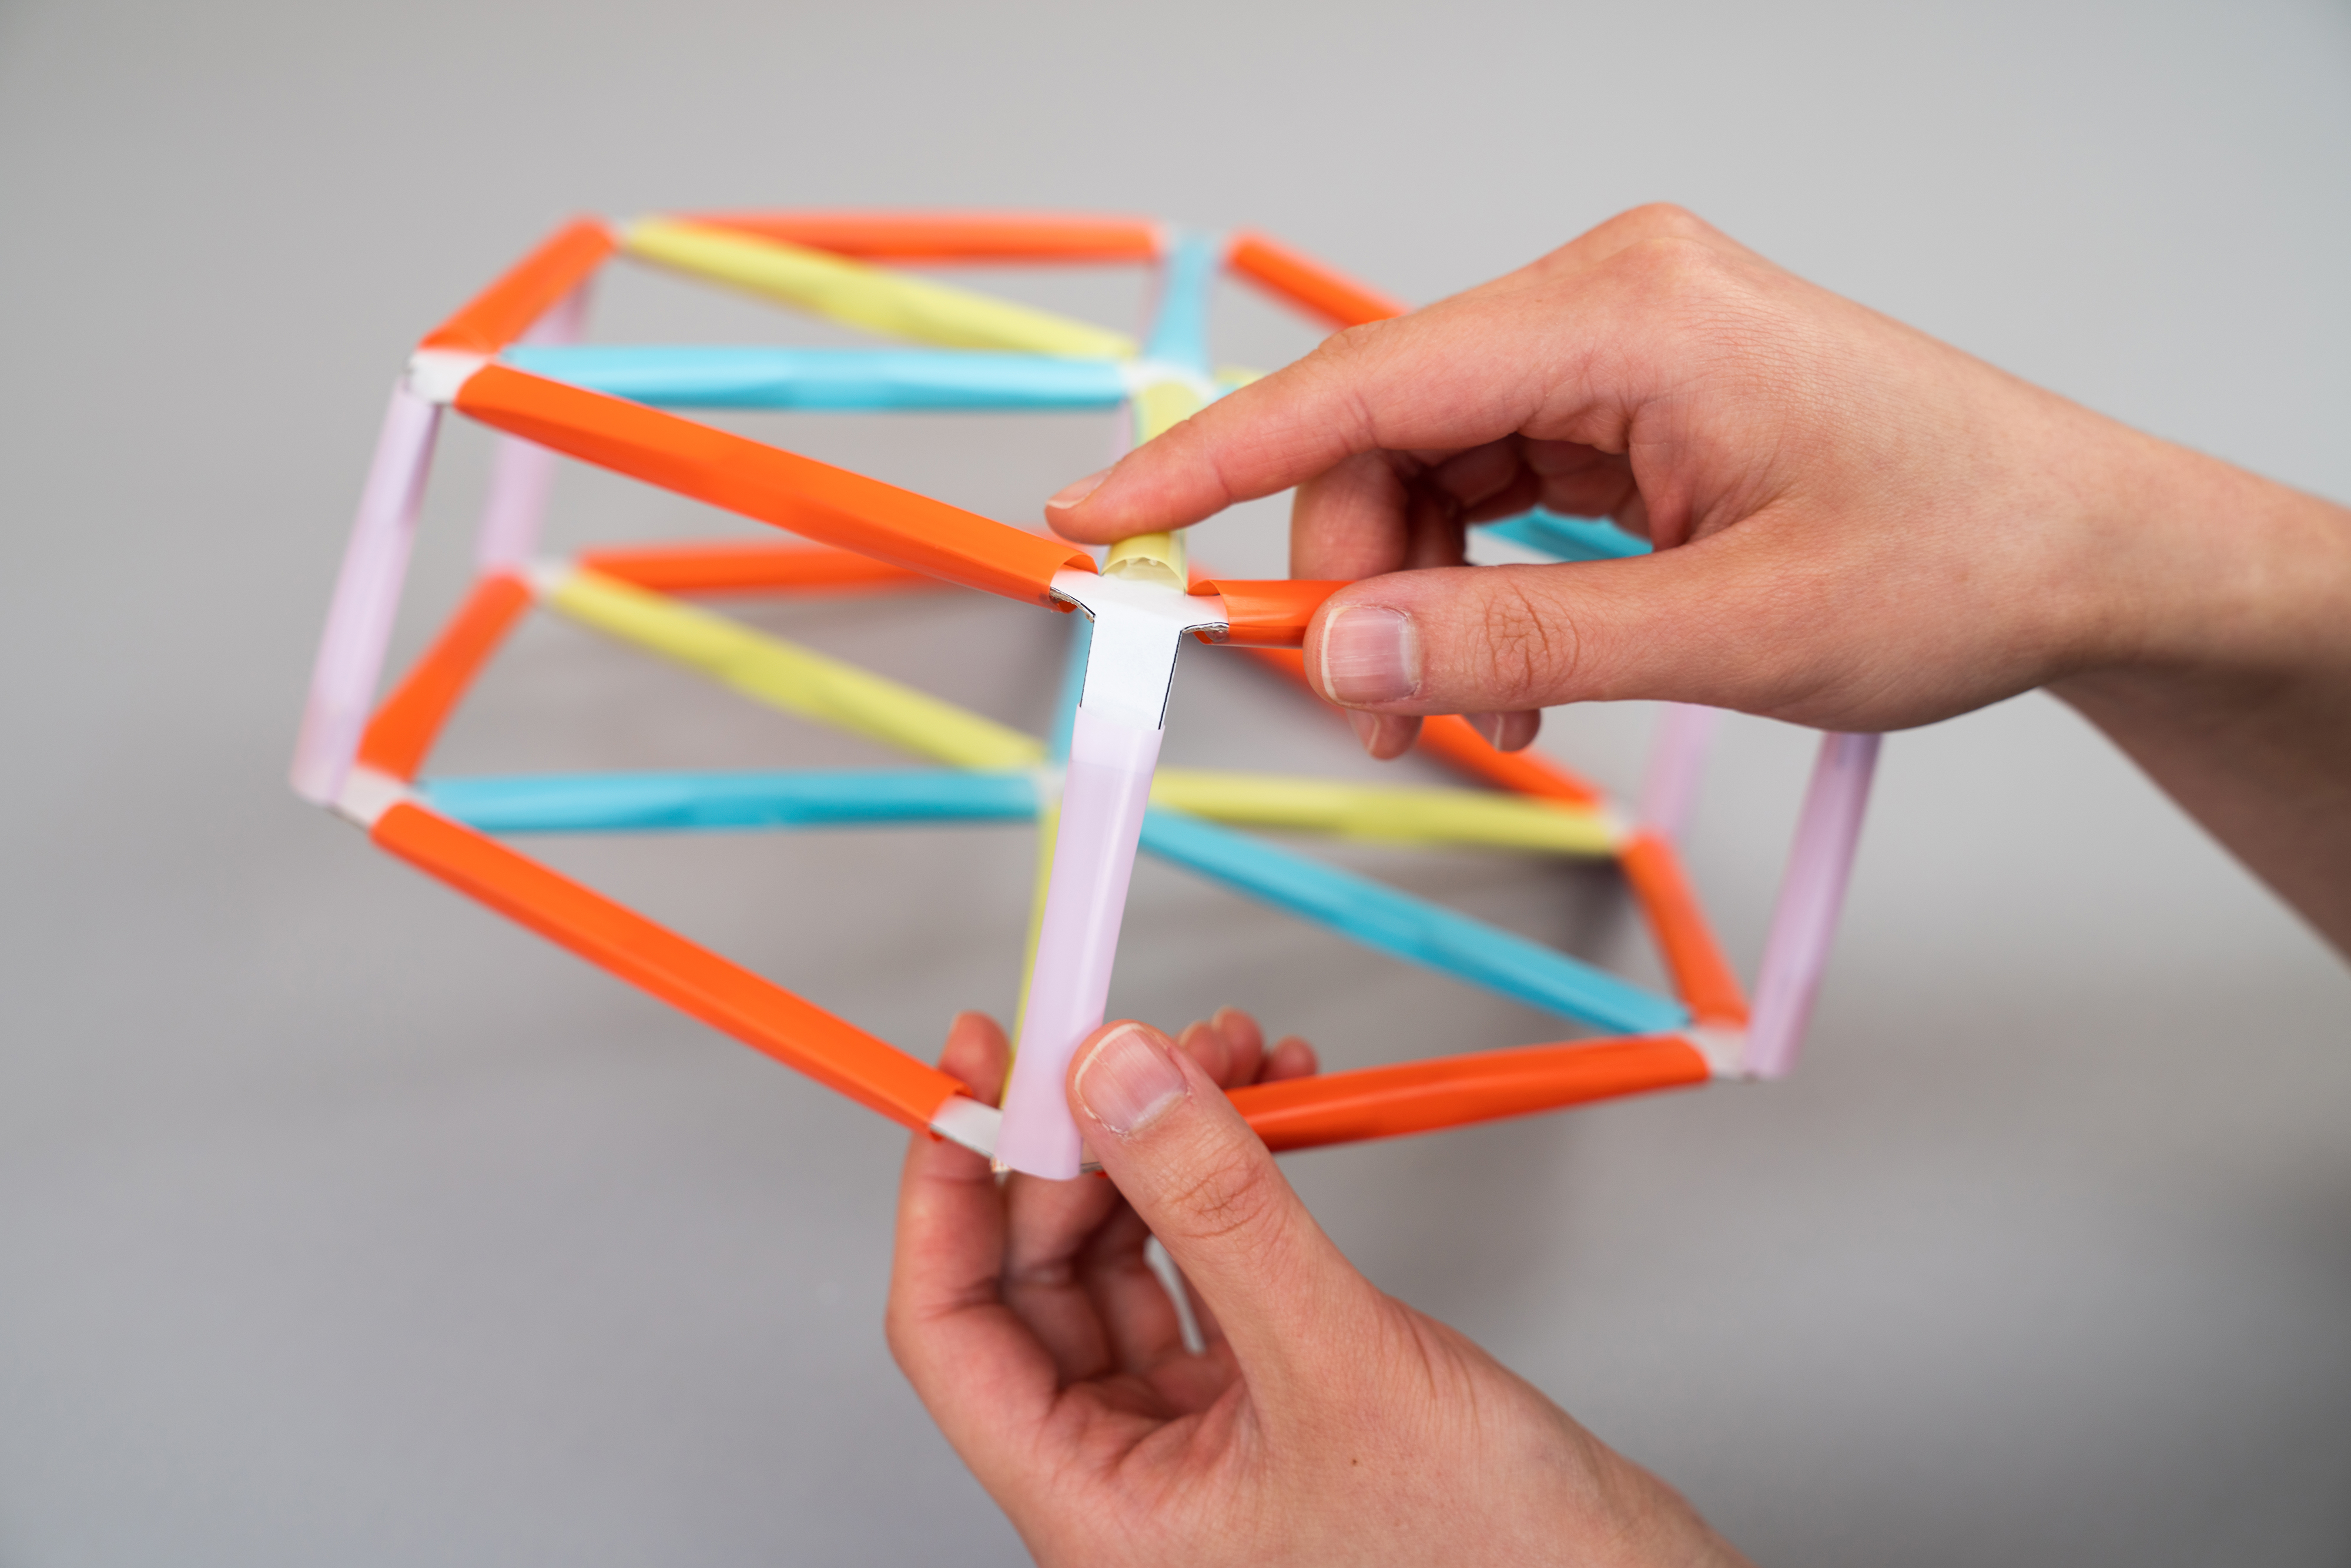
Step 9
Align the wheels and push the exposed legs of the second wheel into the open ends of the straws on the first one. Work your way around the wheel to join these parts together. Do not glue them just yet!
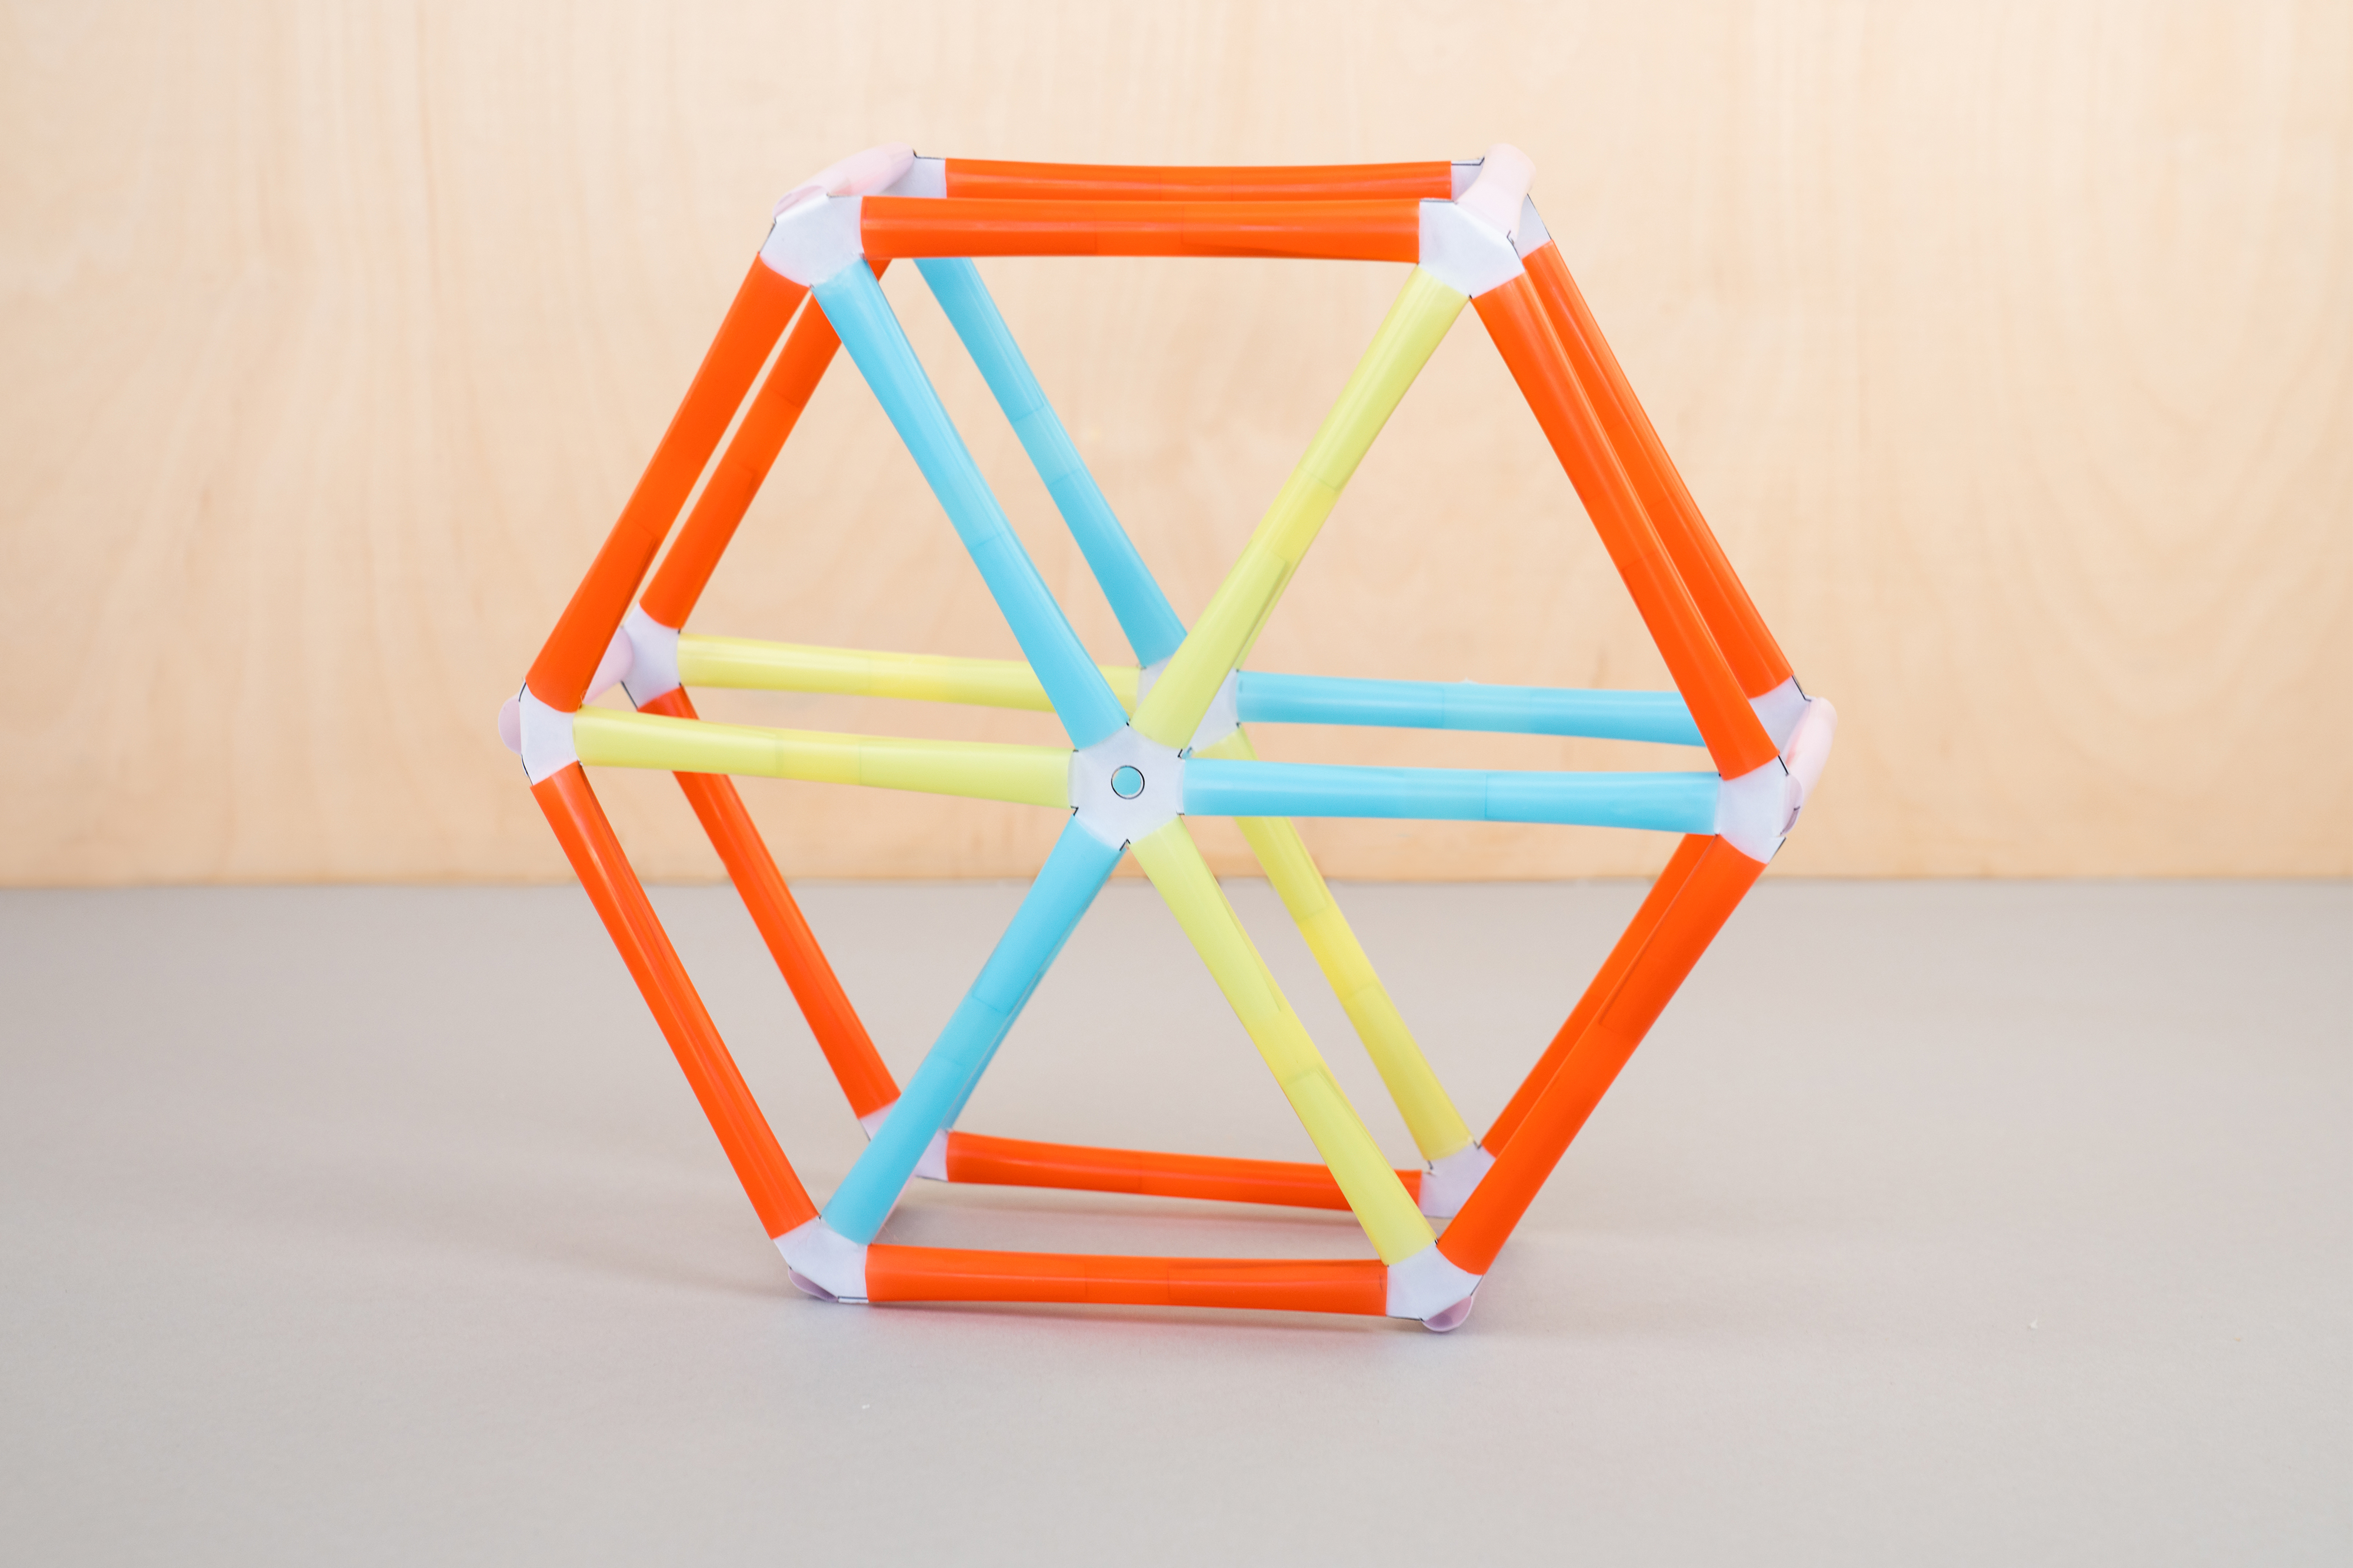
Step 10
You now have the main wheel of your desk organizer constructed! Good work!
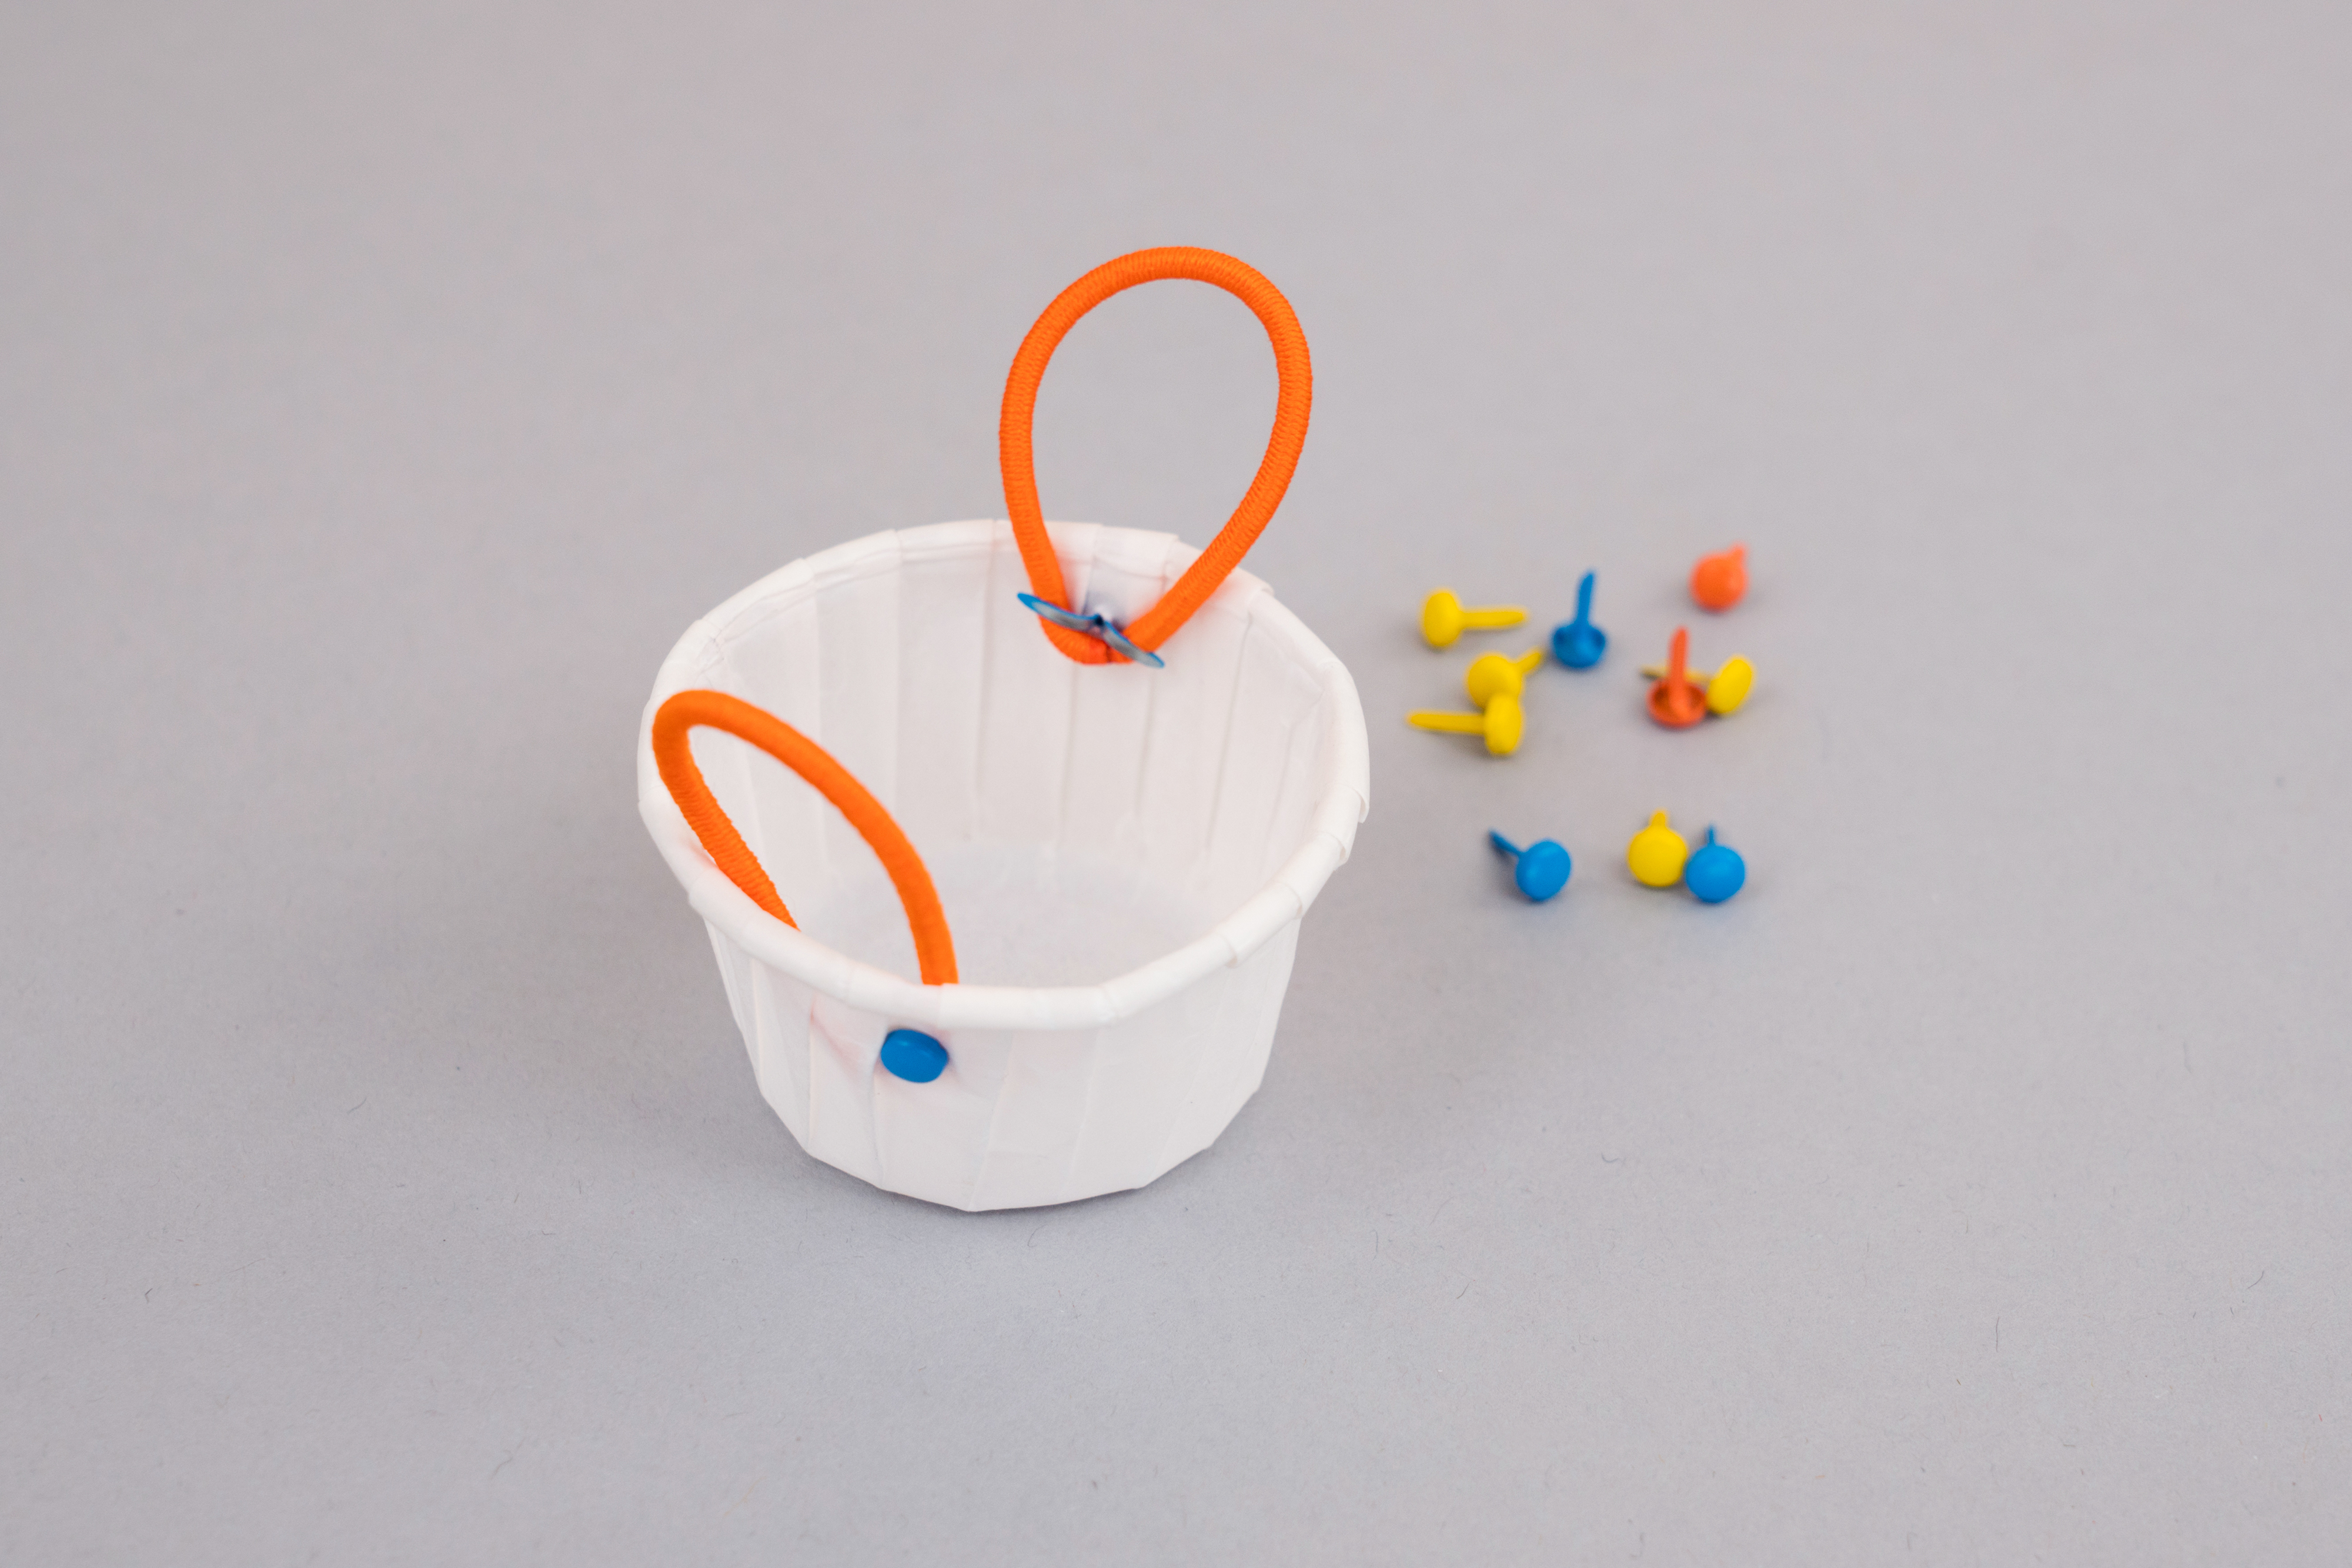
Step 11
To create a passenger car for the Ferris wheel, take a brad and poke it into the side of a paper condiment cup just under the rim. Loop an elastic around the brad’s legs and open the legs flat so that the brad pins the elastic to the inside of the cup. Repeat this for the other side of the cup. Create five more passenger cups for the Ferris wheel.
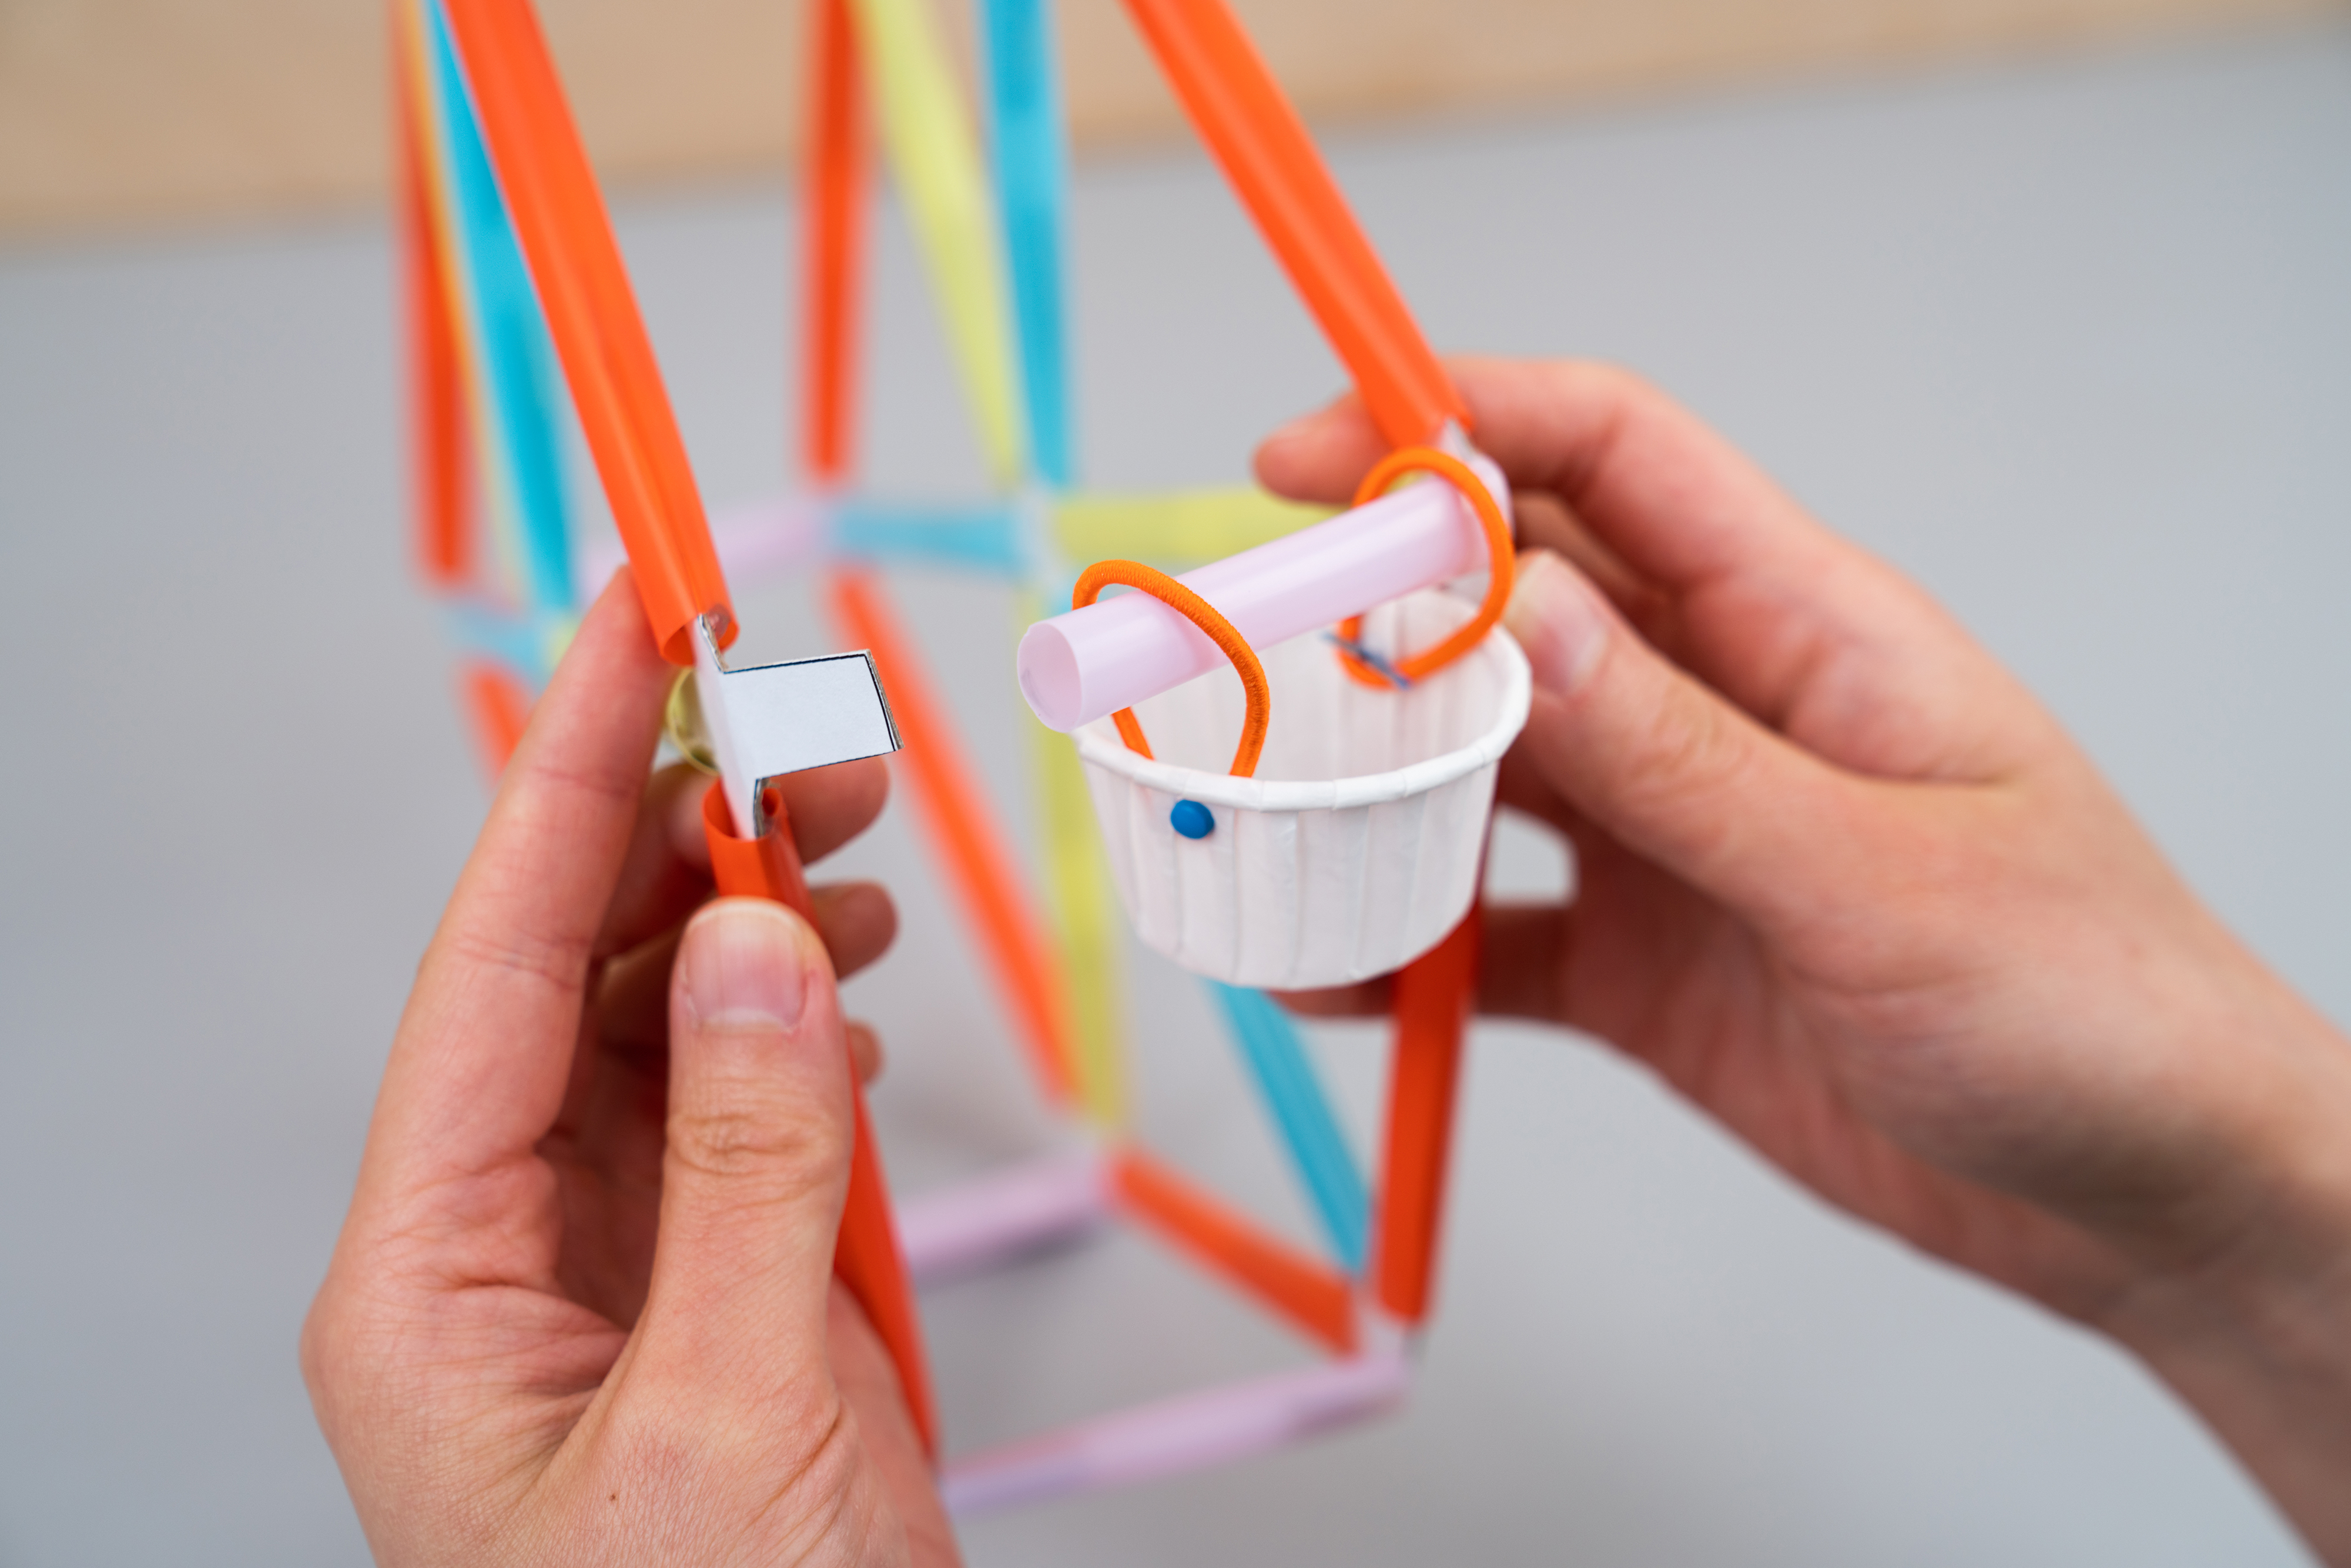
Step 12
To attach the passenger cars, gently detach a short straw piece from one of the wheels. Slide the two elastic bands of a passenger car onto the straw and reconnect the straw to the spoke-connector. With a hot glue gun, attach both sides of the straw to the connector. Let the glue dry. Repeat this step to attach all of the remaining passenger cars.
Step 13
To create the base, cut out the Ferris wheel base template. Mount the template to the foam board with double-stick tape. Use a craft knife to carefully cut slits along the four dotted lines marked inside the template.
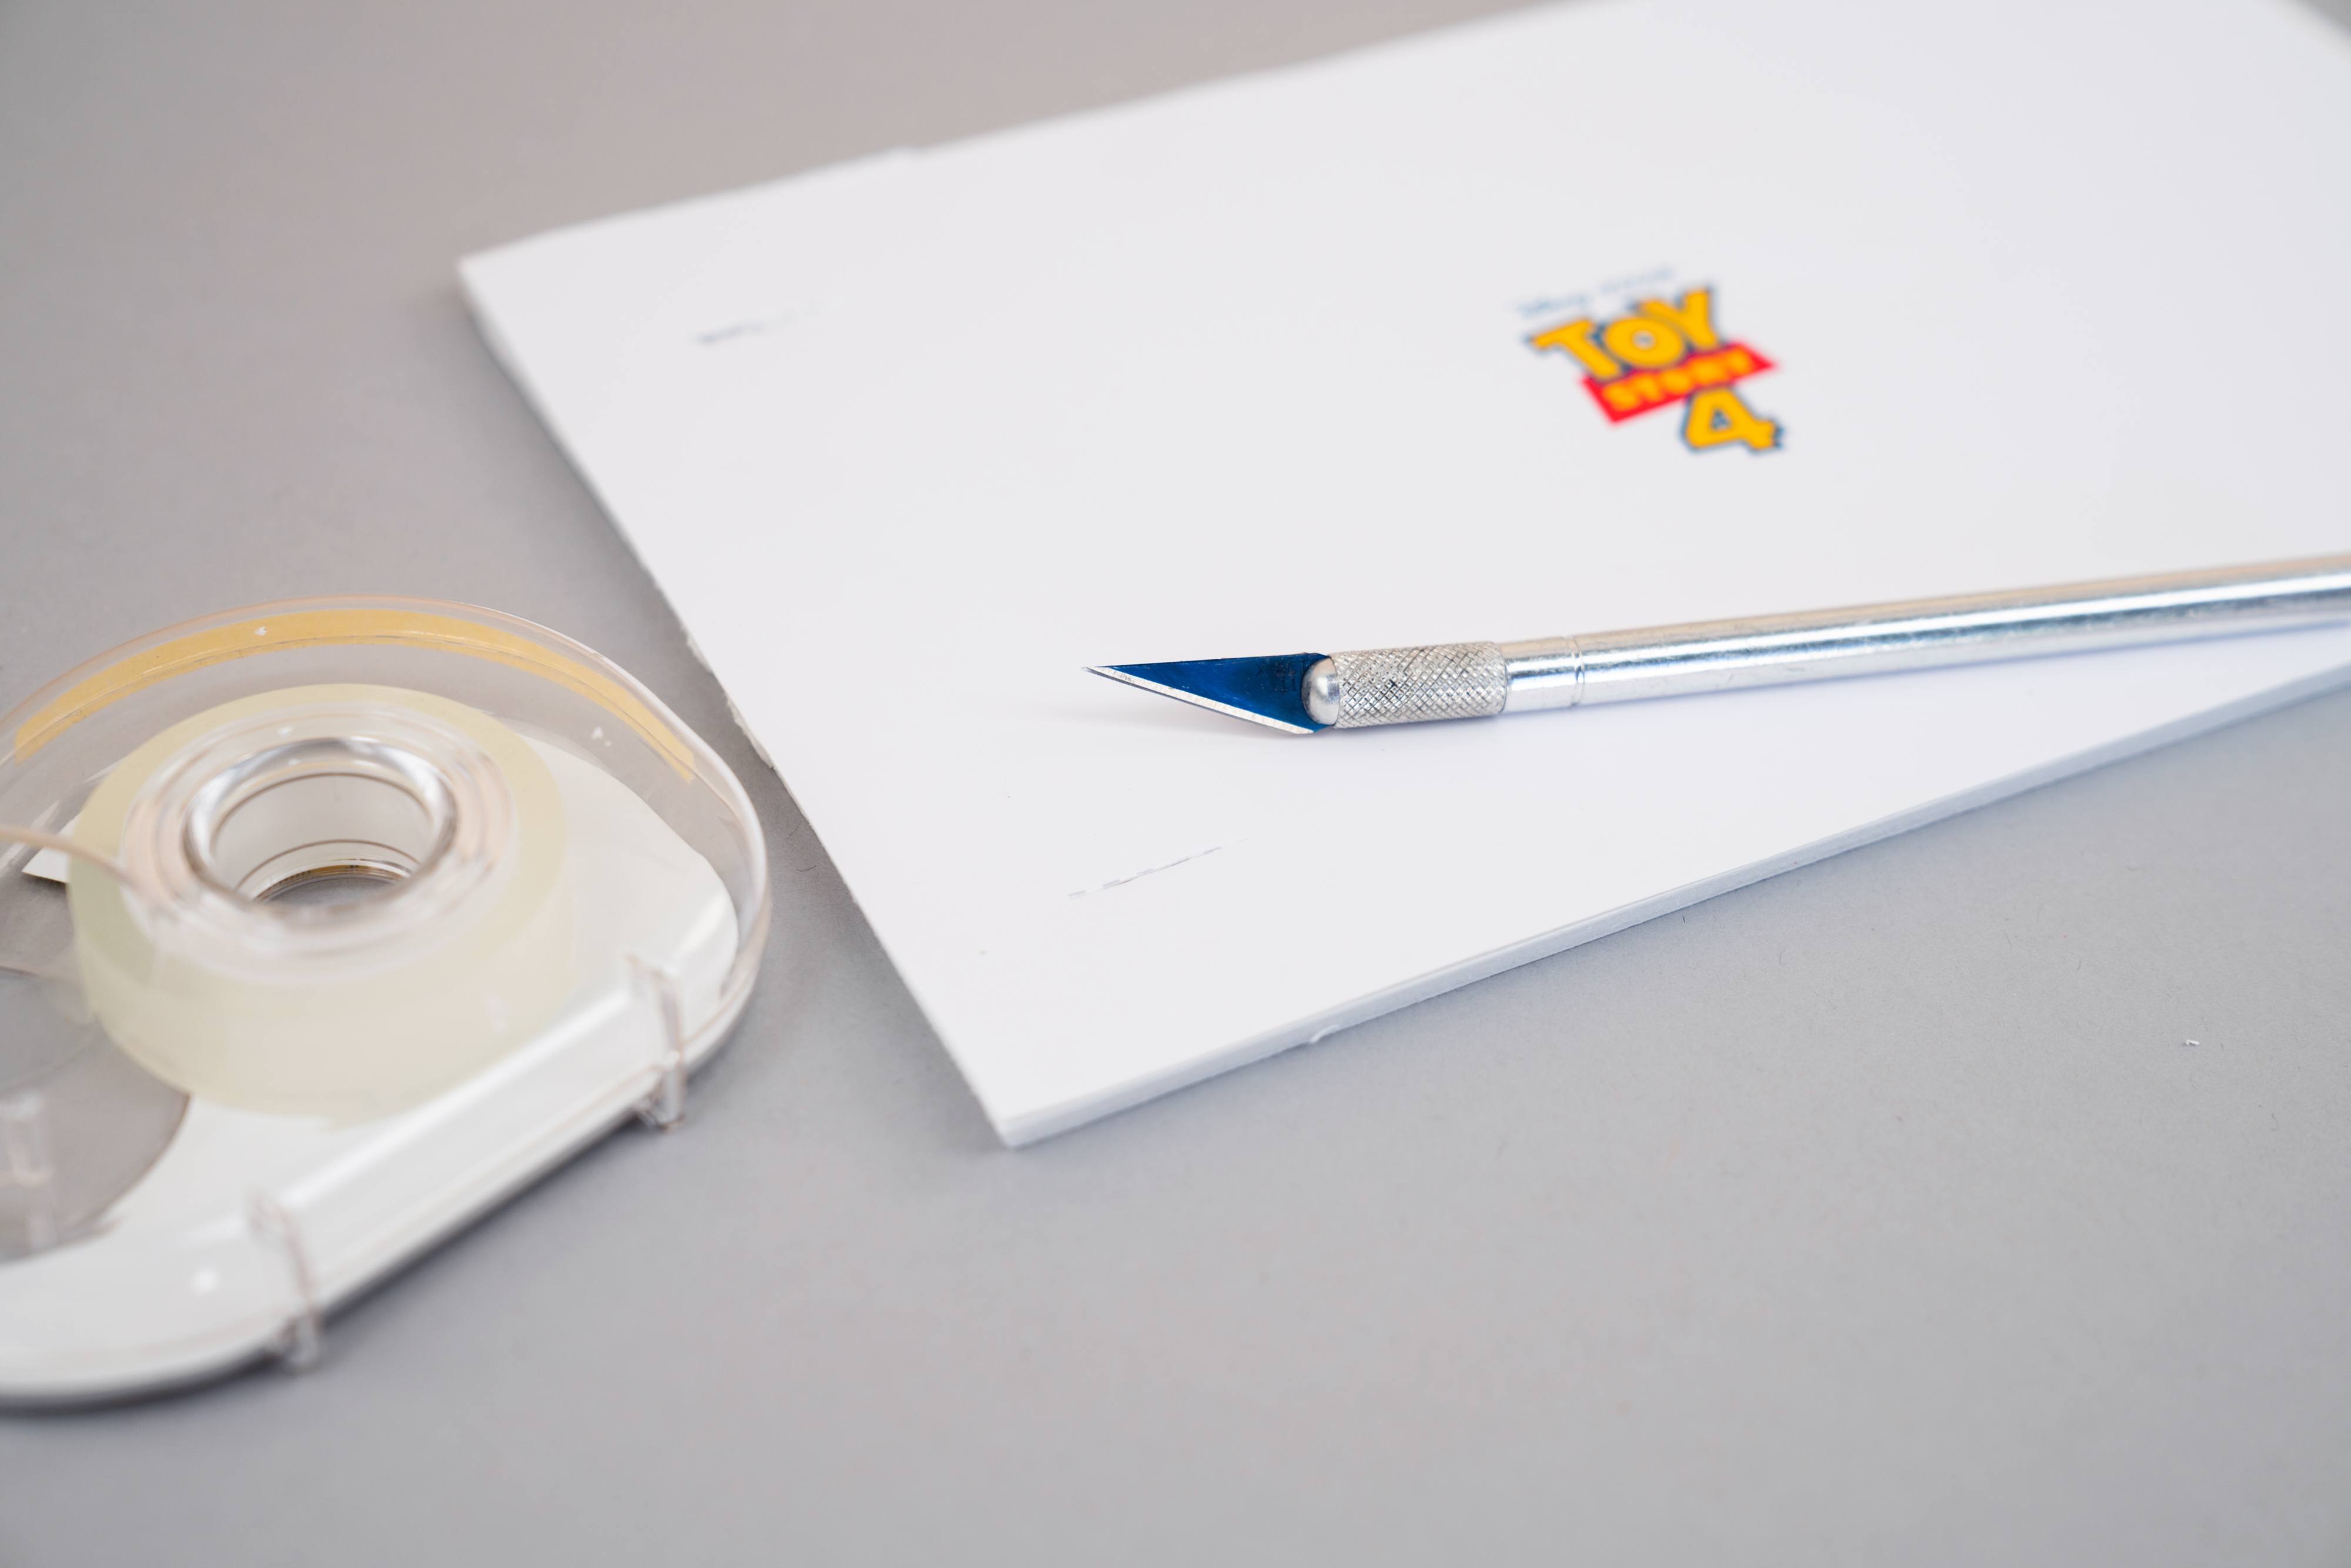
Tip
Handle the craft knife with care. If needed, a grownup assistant should handle this step.
Step 14
To create the base legs that will hold up the Ferris wheel, take four full-length straws and push them onto the two base-connectors’ legs. Trim the legs, if needed, to ensure a snug fit. With a hot glue gun, attach the straws to the base-connector legs. Let the glue dry.

Step 15
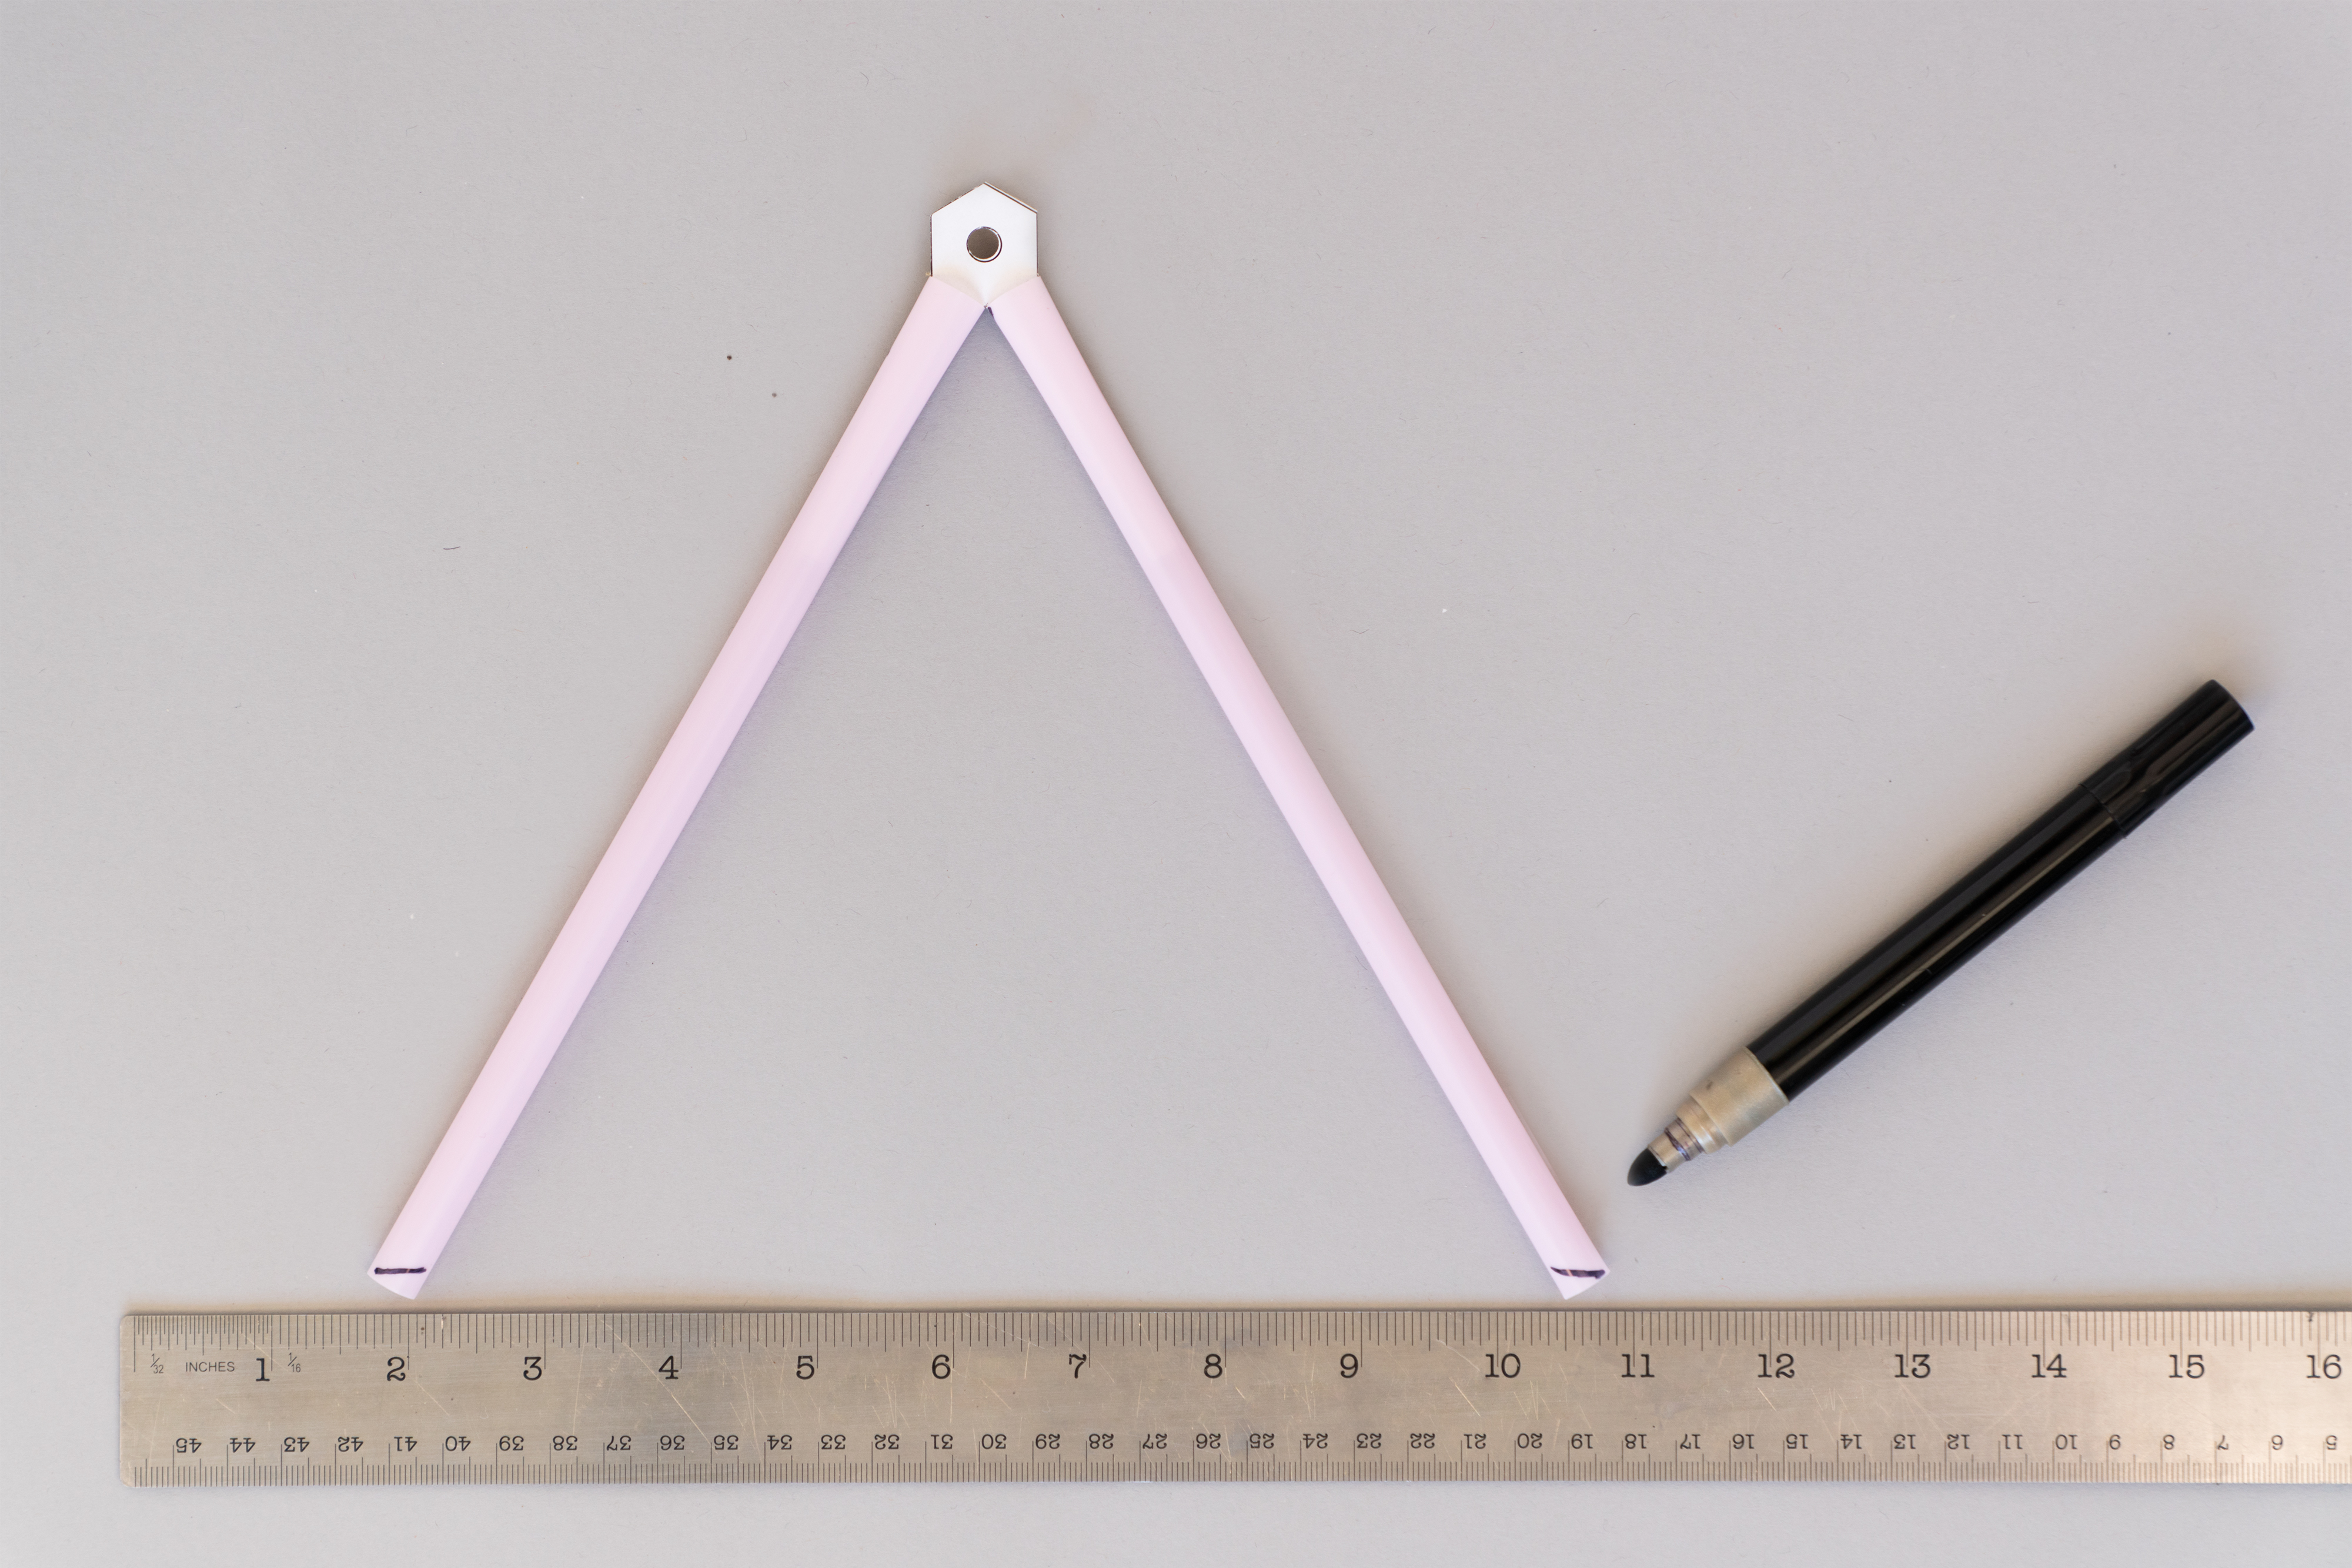
Hold the constructed base leg in an upside-down “V” shape on your workspace. Place the ruler horizontally by the straw ends. Note how the straw ends are at an angle and not parallel to the ruler’s edge. With a marker, draw a parallel line to the ruler at the edge of each straw.
Step 16
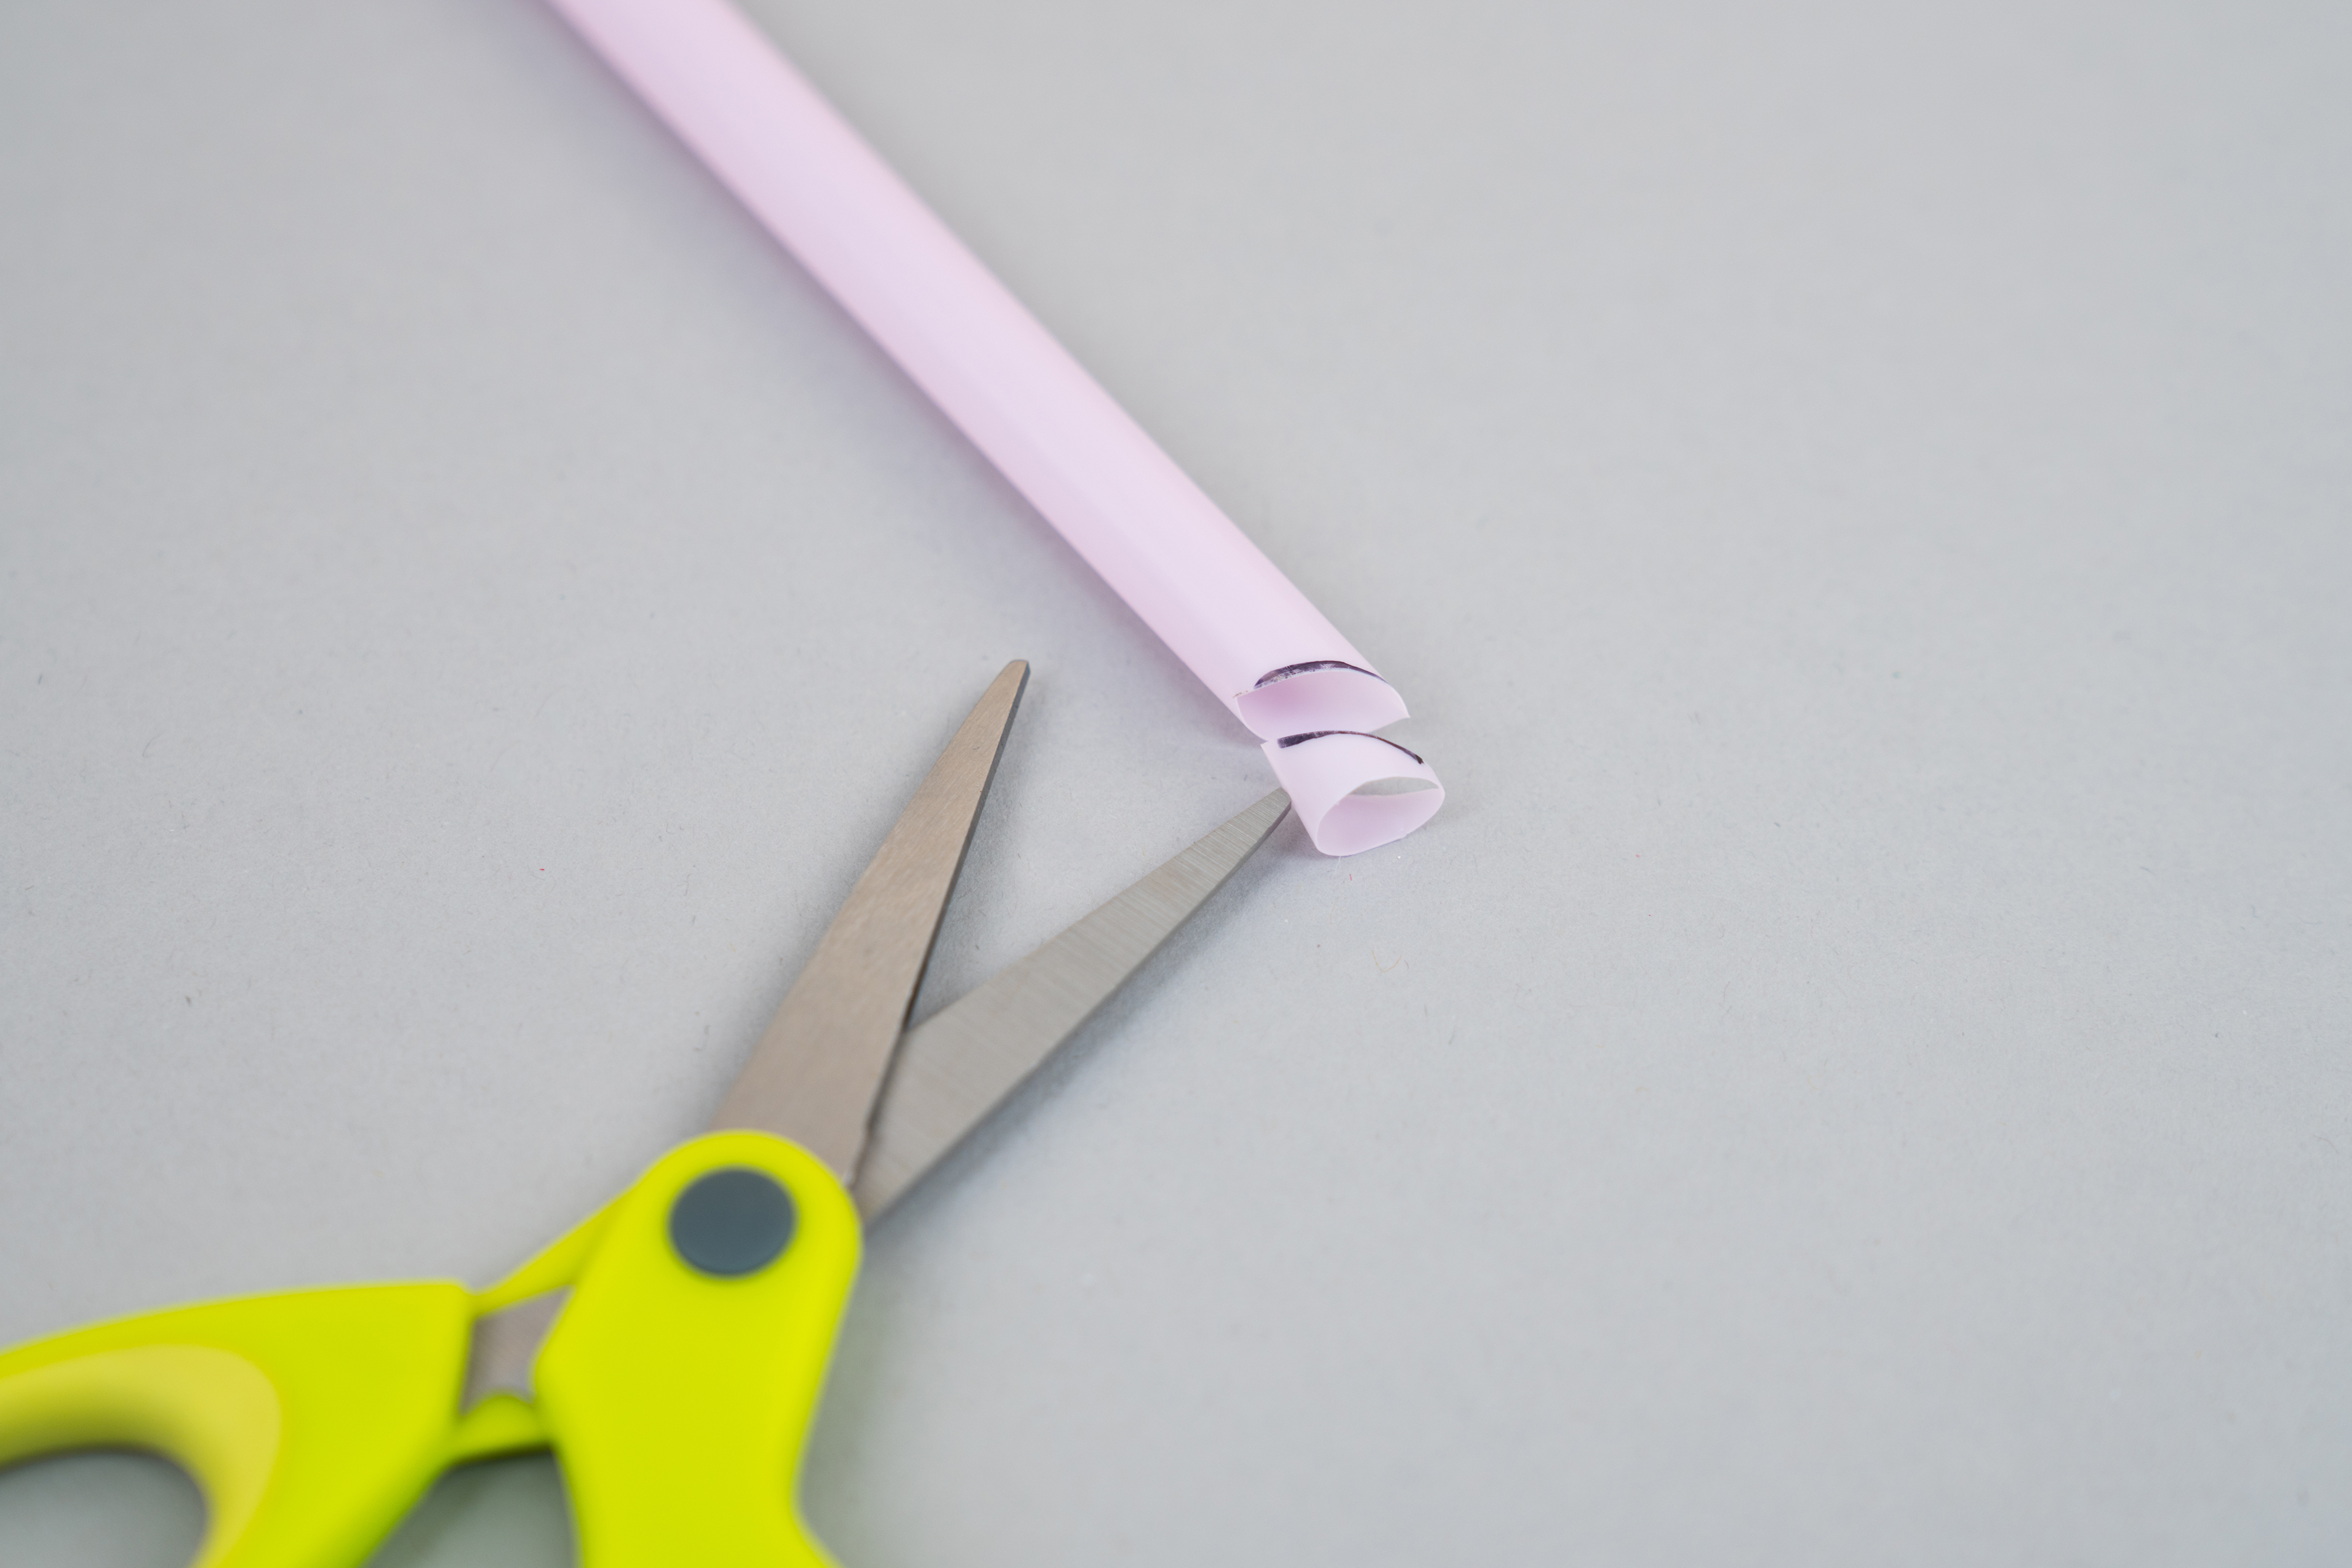
Pinch the ends of the straws flat and trim them with scissors, following the marker lines as your guide. Now when the constructed base legs are held in an upside-down “V” shape, the bottom ends of the straw should be parallel with the ground. This allows the base legs to stand up straight.
Step 17
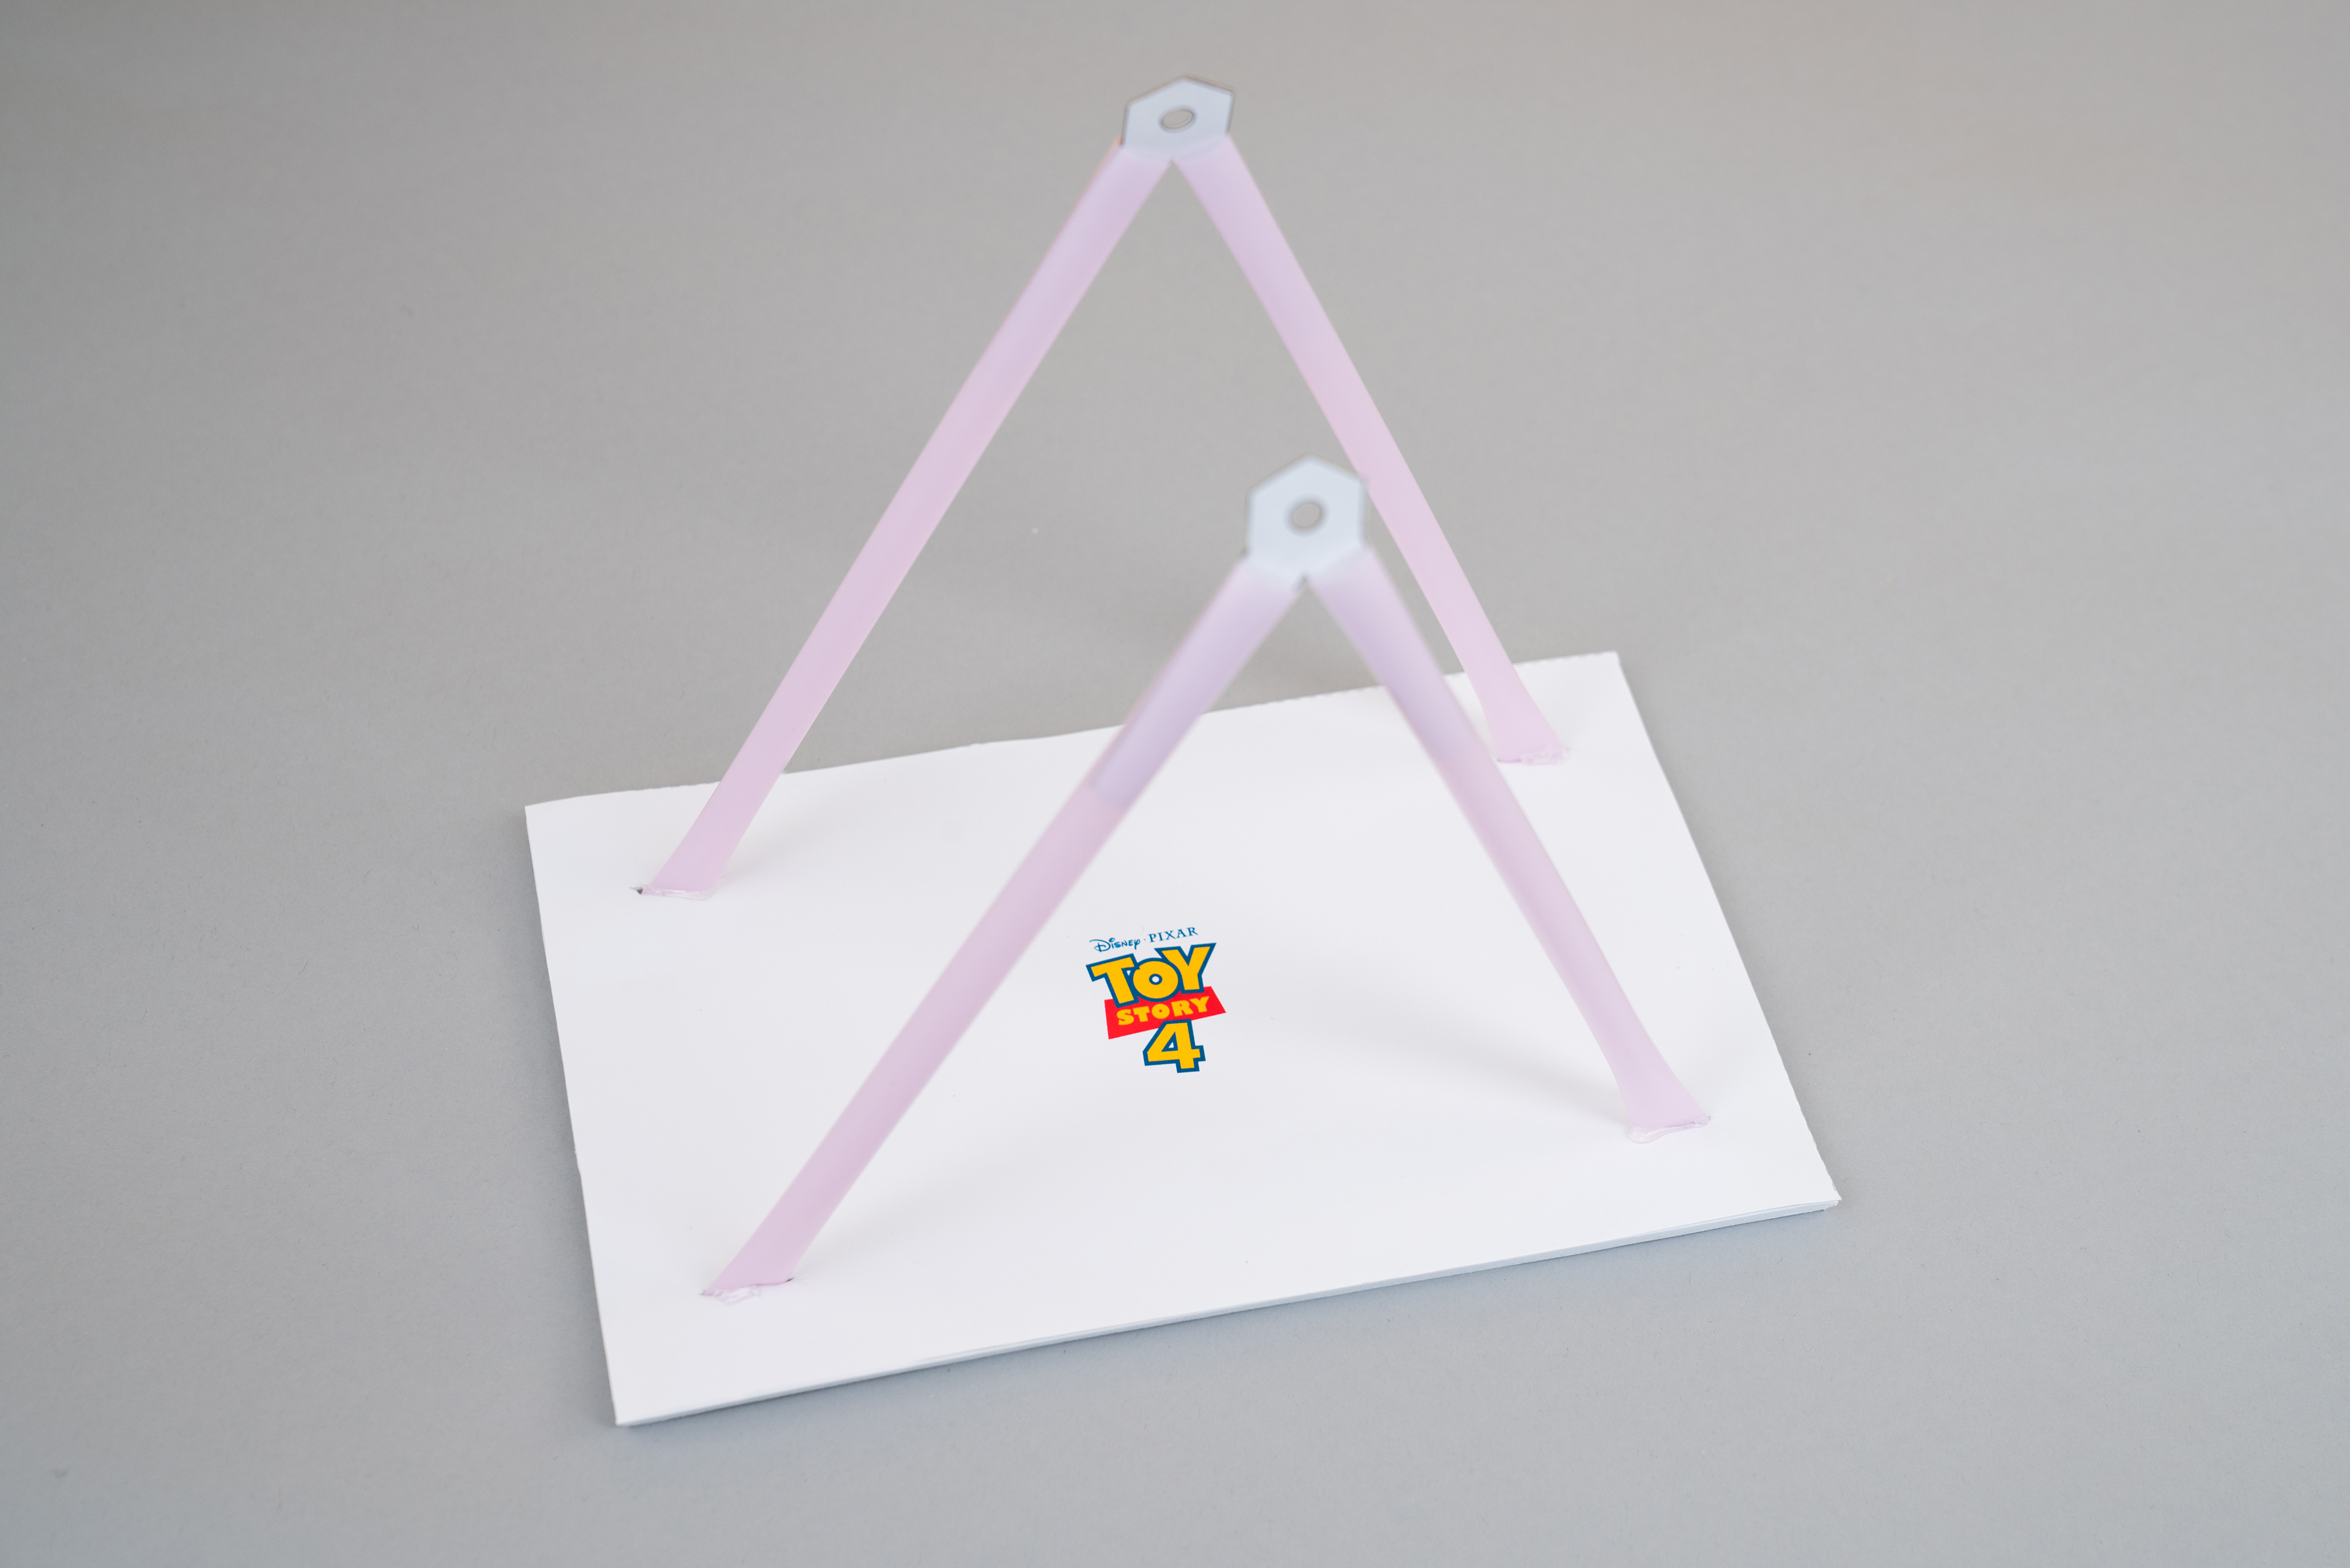
Pinch the straw ends and insert them into the slits you made in the foam board in Step 13. The base legs should now stand up. With a hot glue gun, attach the straws to the foam board. Let the glue dry.
Step 18
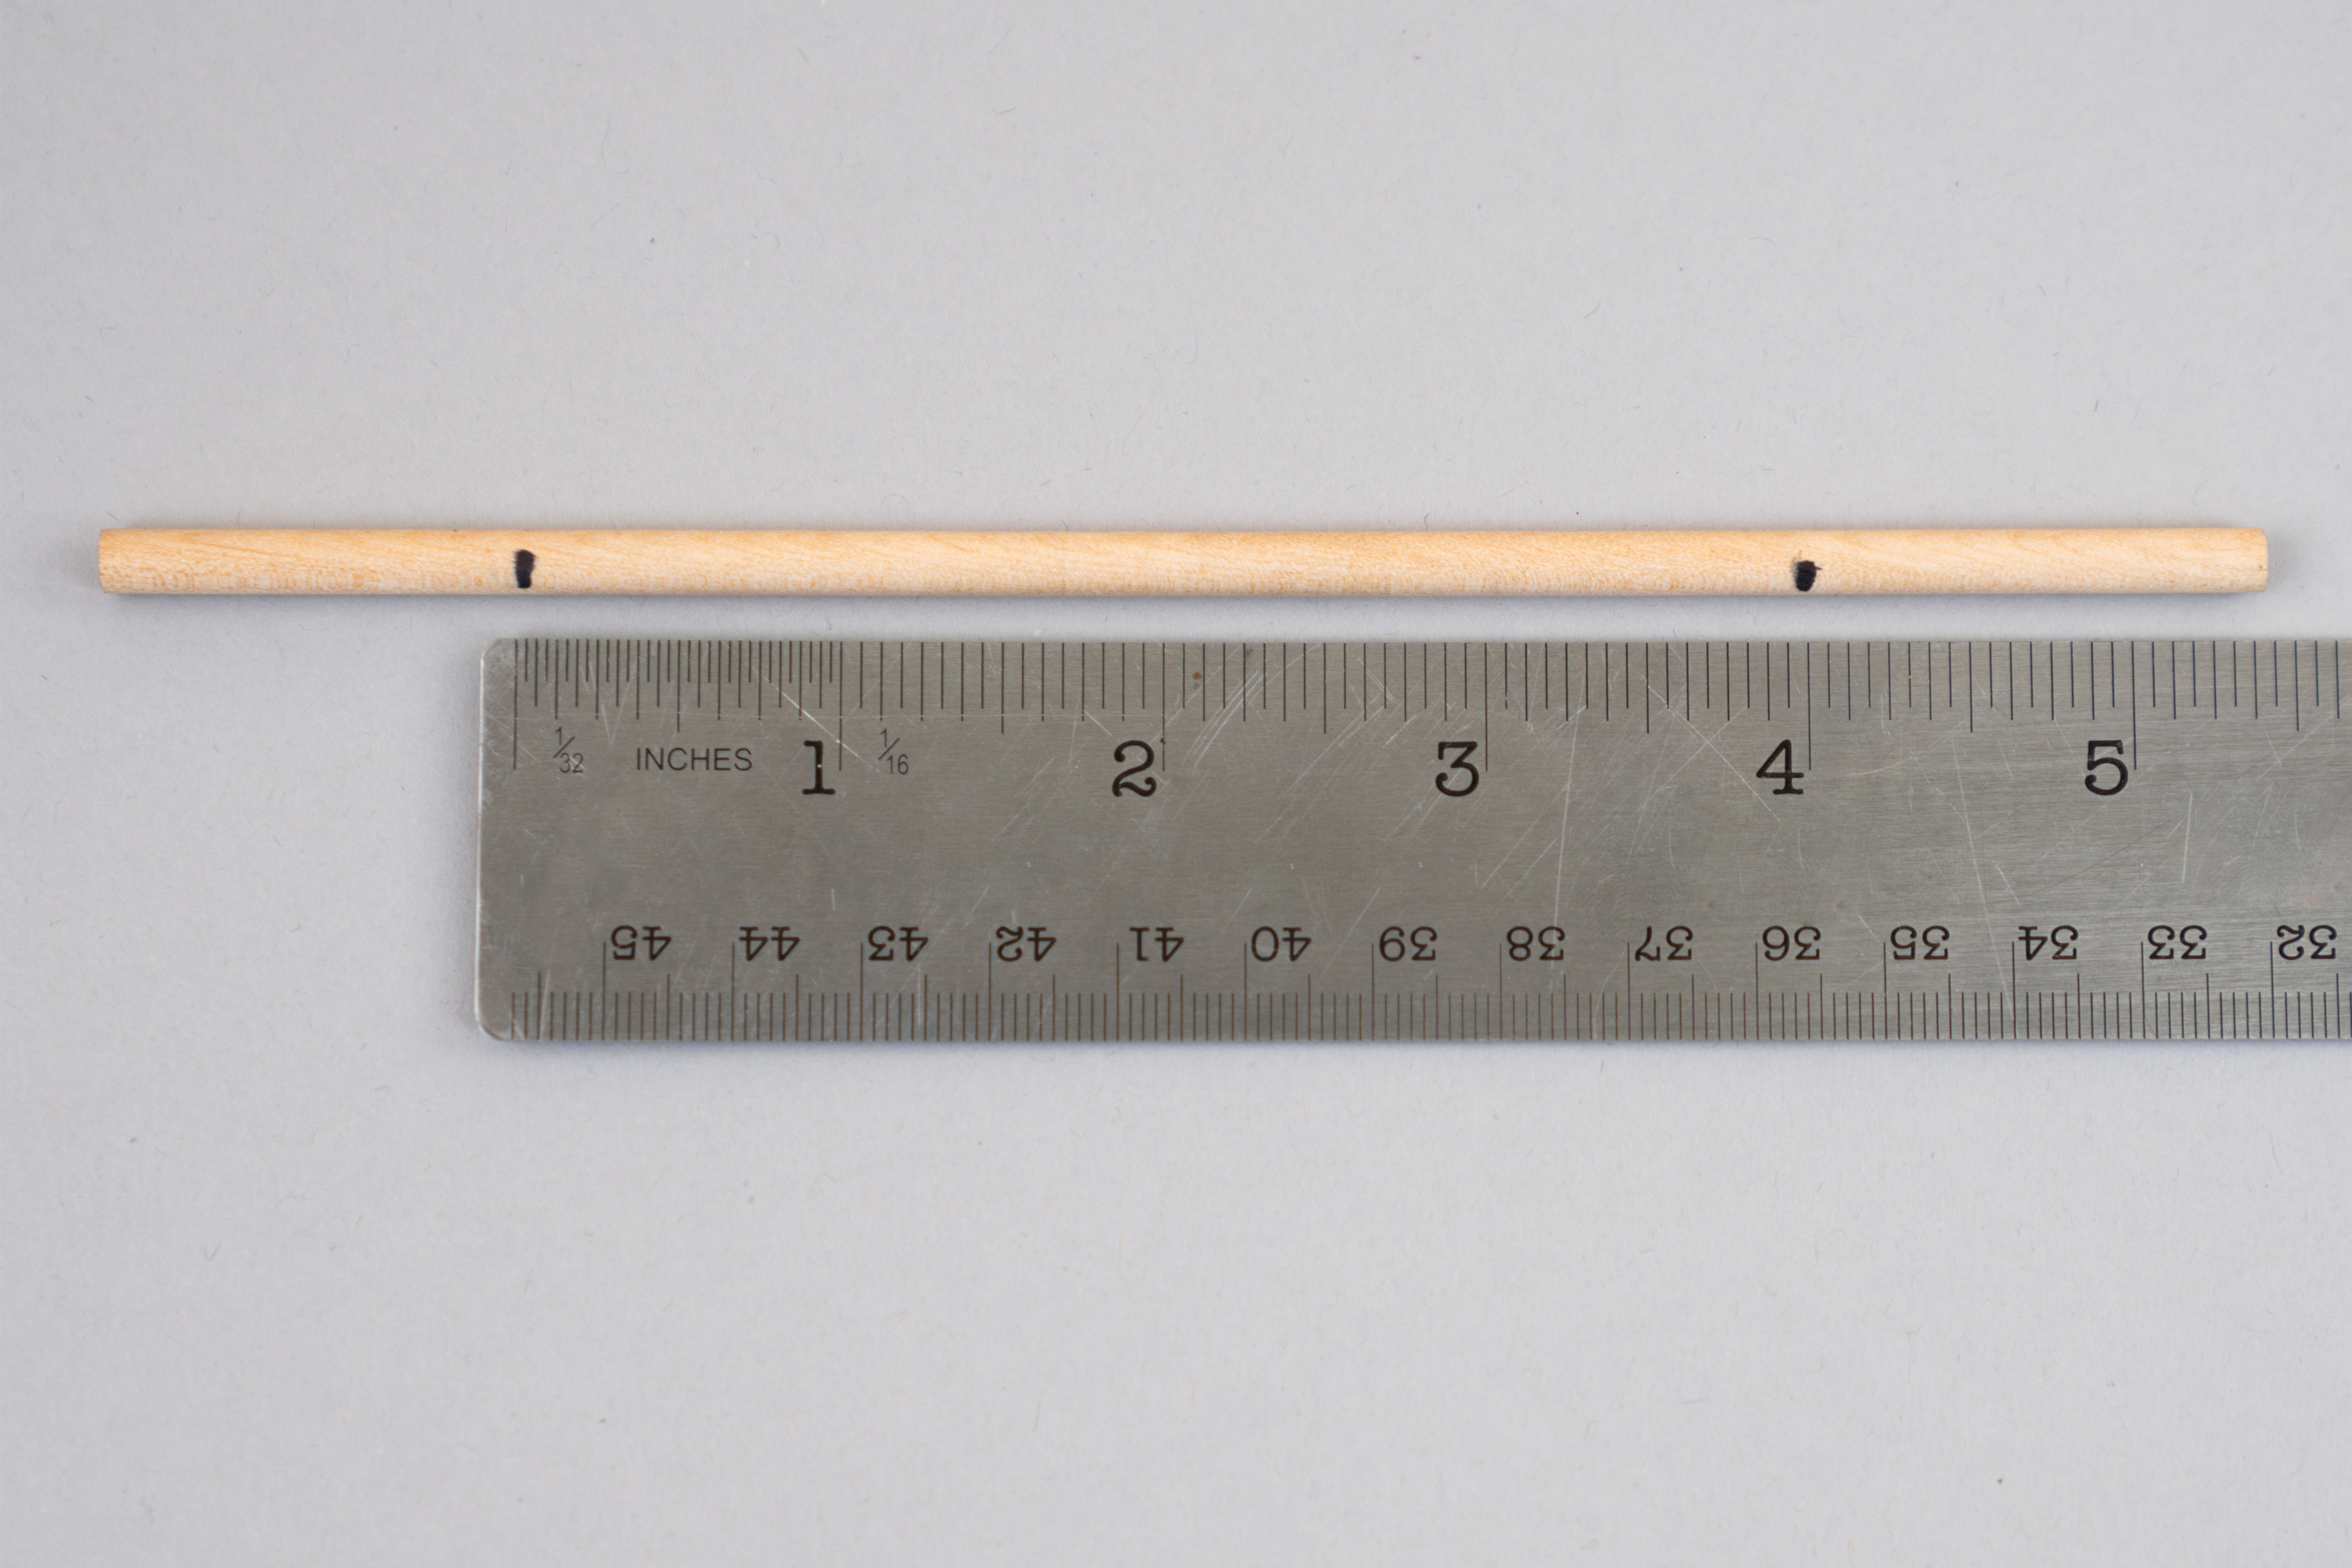
The dowel will act as the axle for the Ferris wheel. Use a ruler and a marker to draw two dots that are four inches apart on the dowel. Keep the two dots about the same distance from the ends of the dowel.
Step 19
To put the Ferris wheel together, hold the wheel between the base legs. Insert the dowel through the holes in the hub-connectors and base-connectors. Align the base-connectors with the marks on the dowel. Give the wheel a spin to make sure it moves freely. With a hot glue gun, attach the base-connectors to the dowel on the marks. (Remember not to glue the hub-connectors to the dowel! The wheel should spin freely on the axle.) Let the glue dry. (Optional) While the glue should make the base stable, if you’d like to make it even more sturdy, add modeling clay to the bottom of each base leg.
Tip
If your Ferris wheel doesn’t spin freely, check that the holes in the connectors are wider than the dowel. If not, have a grownup assistant use a craft knife or hole punch to make them just a little wider.
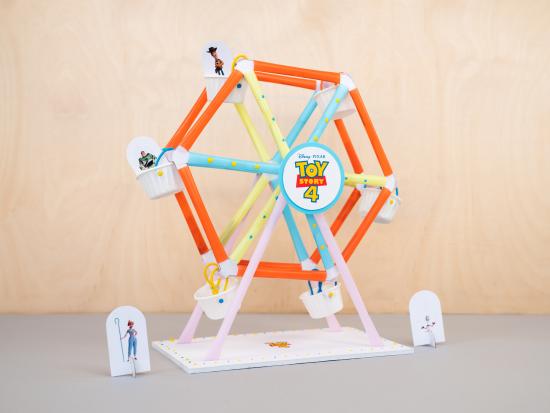
Step 20
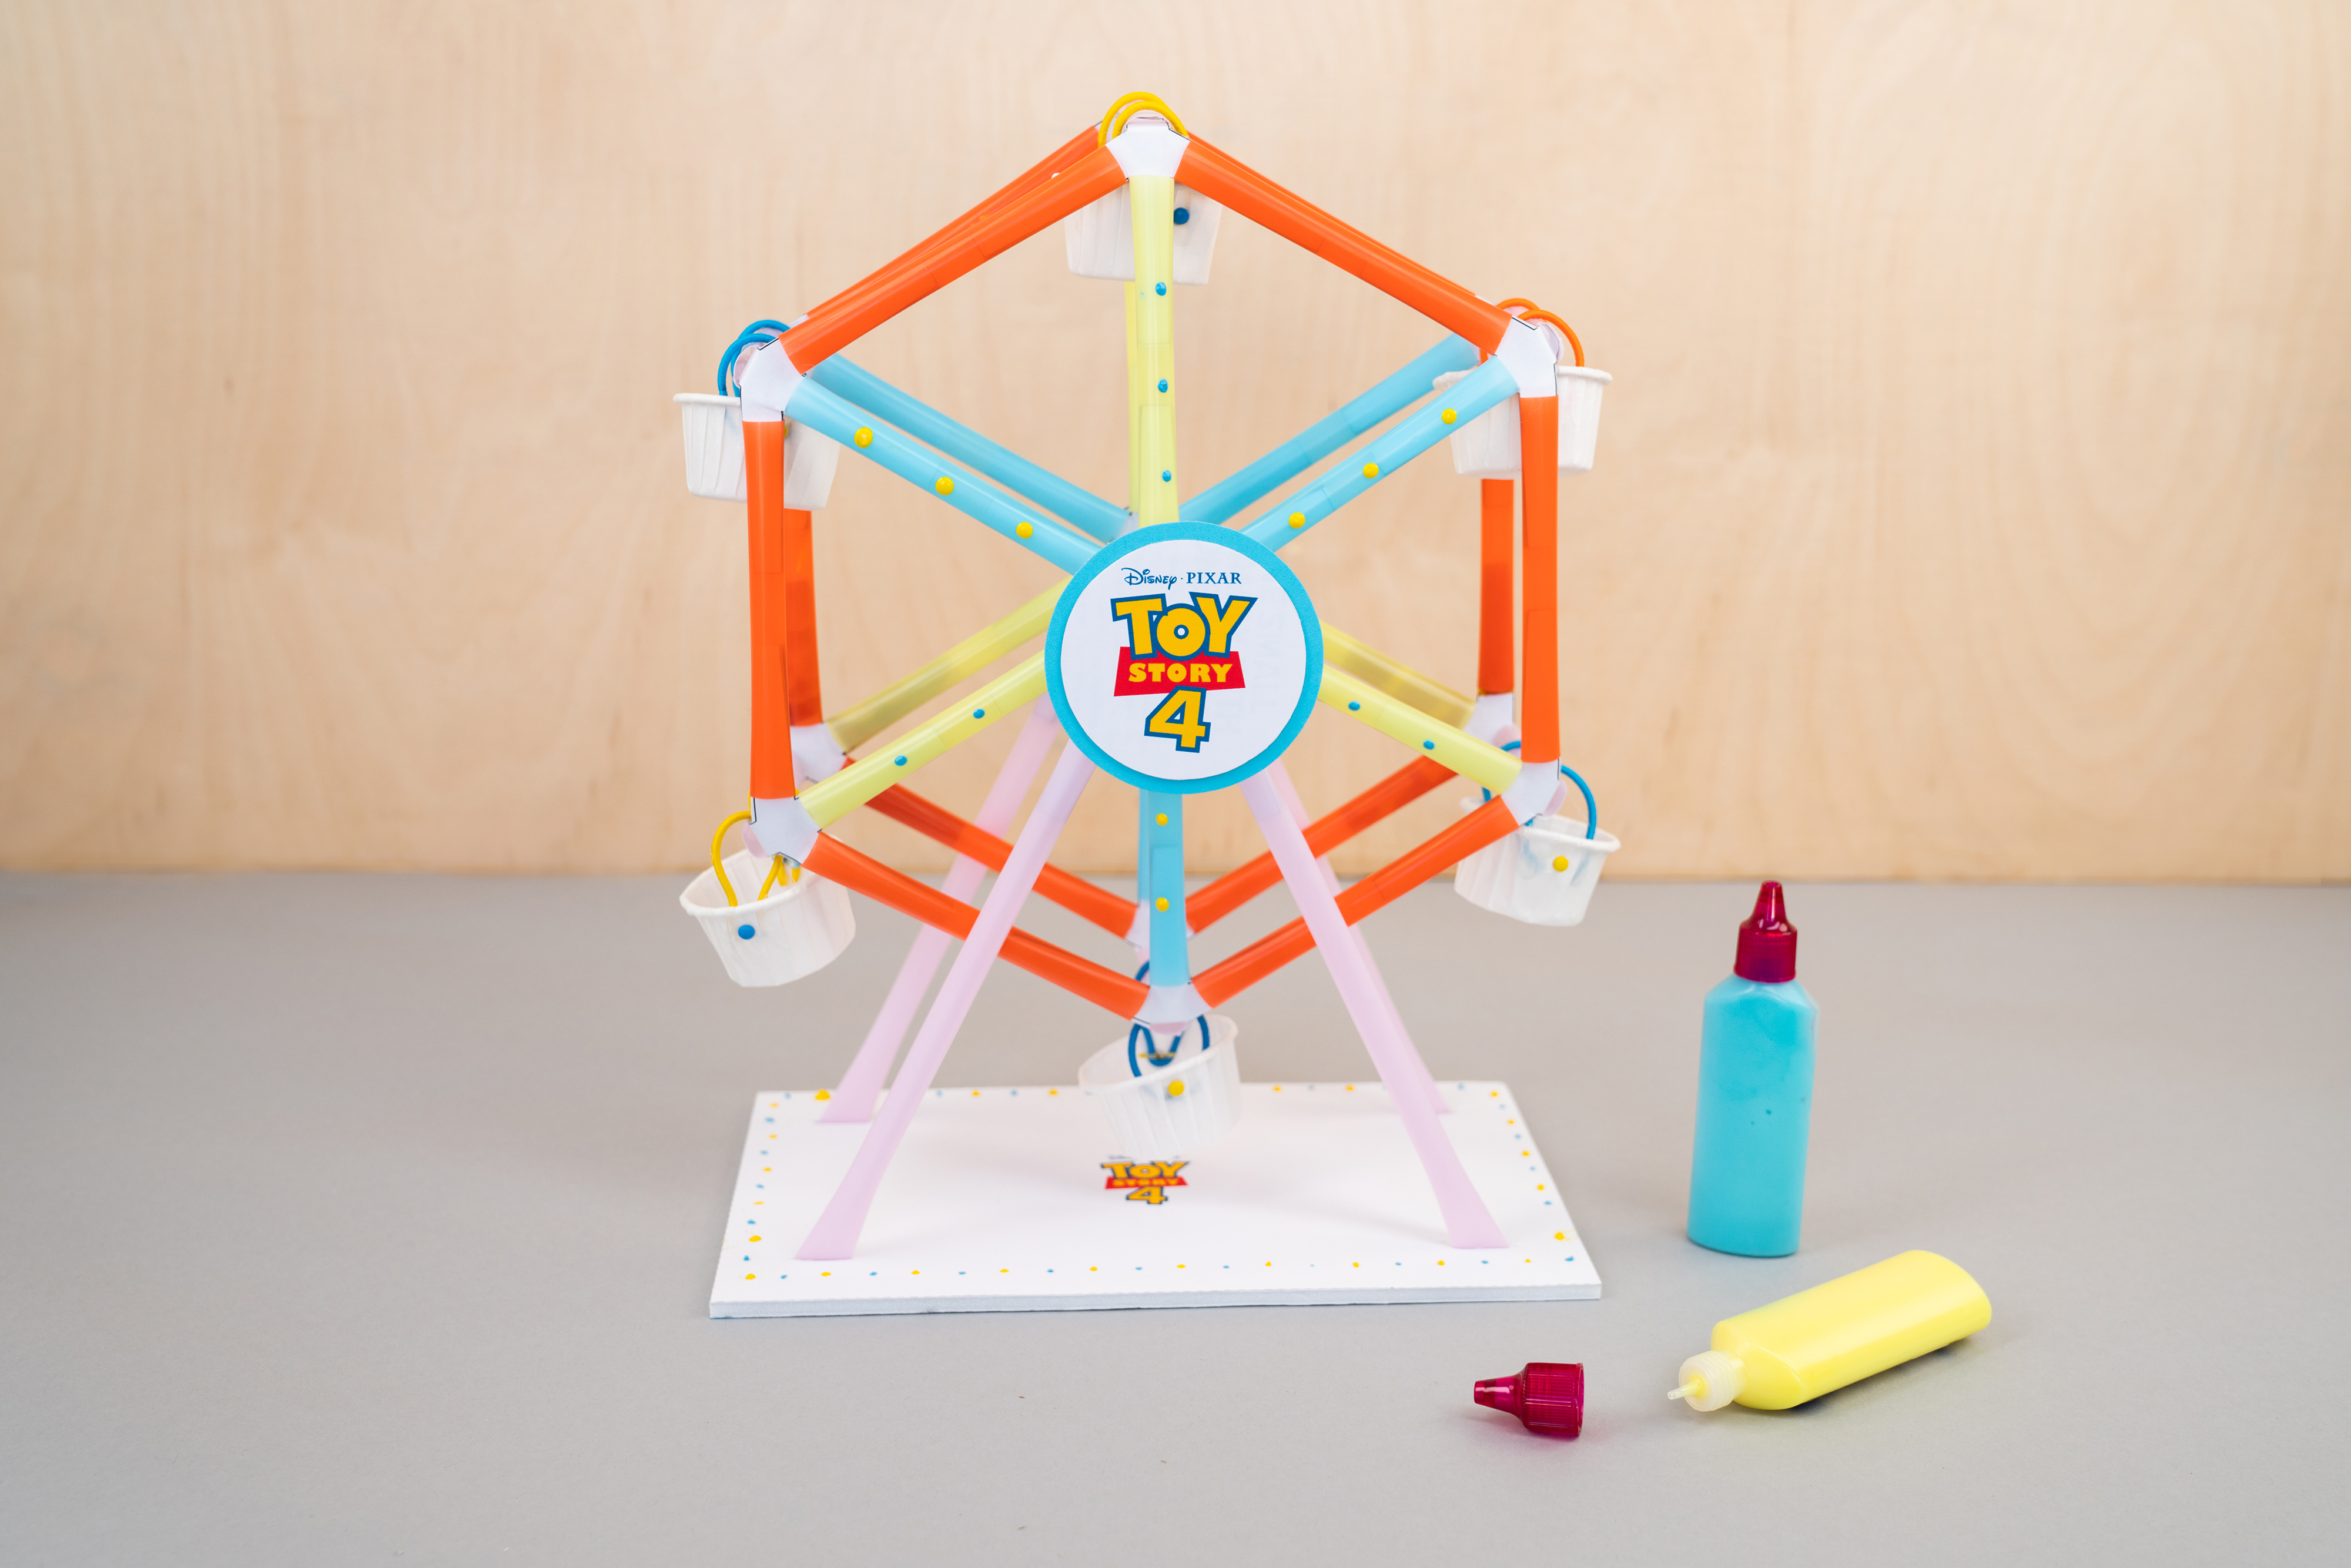
Your Ferris wheel build is complete! Now it’s time to decorate! First, cut out and use hot glue to attach the Toy Story 4 logo found in the template. Use 3D paint or other art supplies to make it truly your own and bring the Toy Story Ferris wheel to life. Let the paint dry if needed.
Step 21
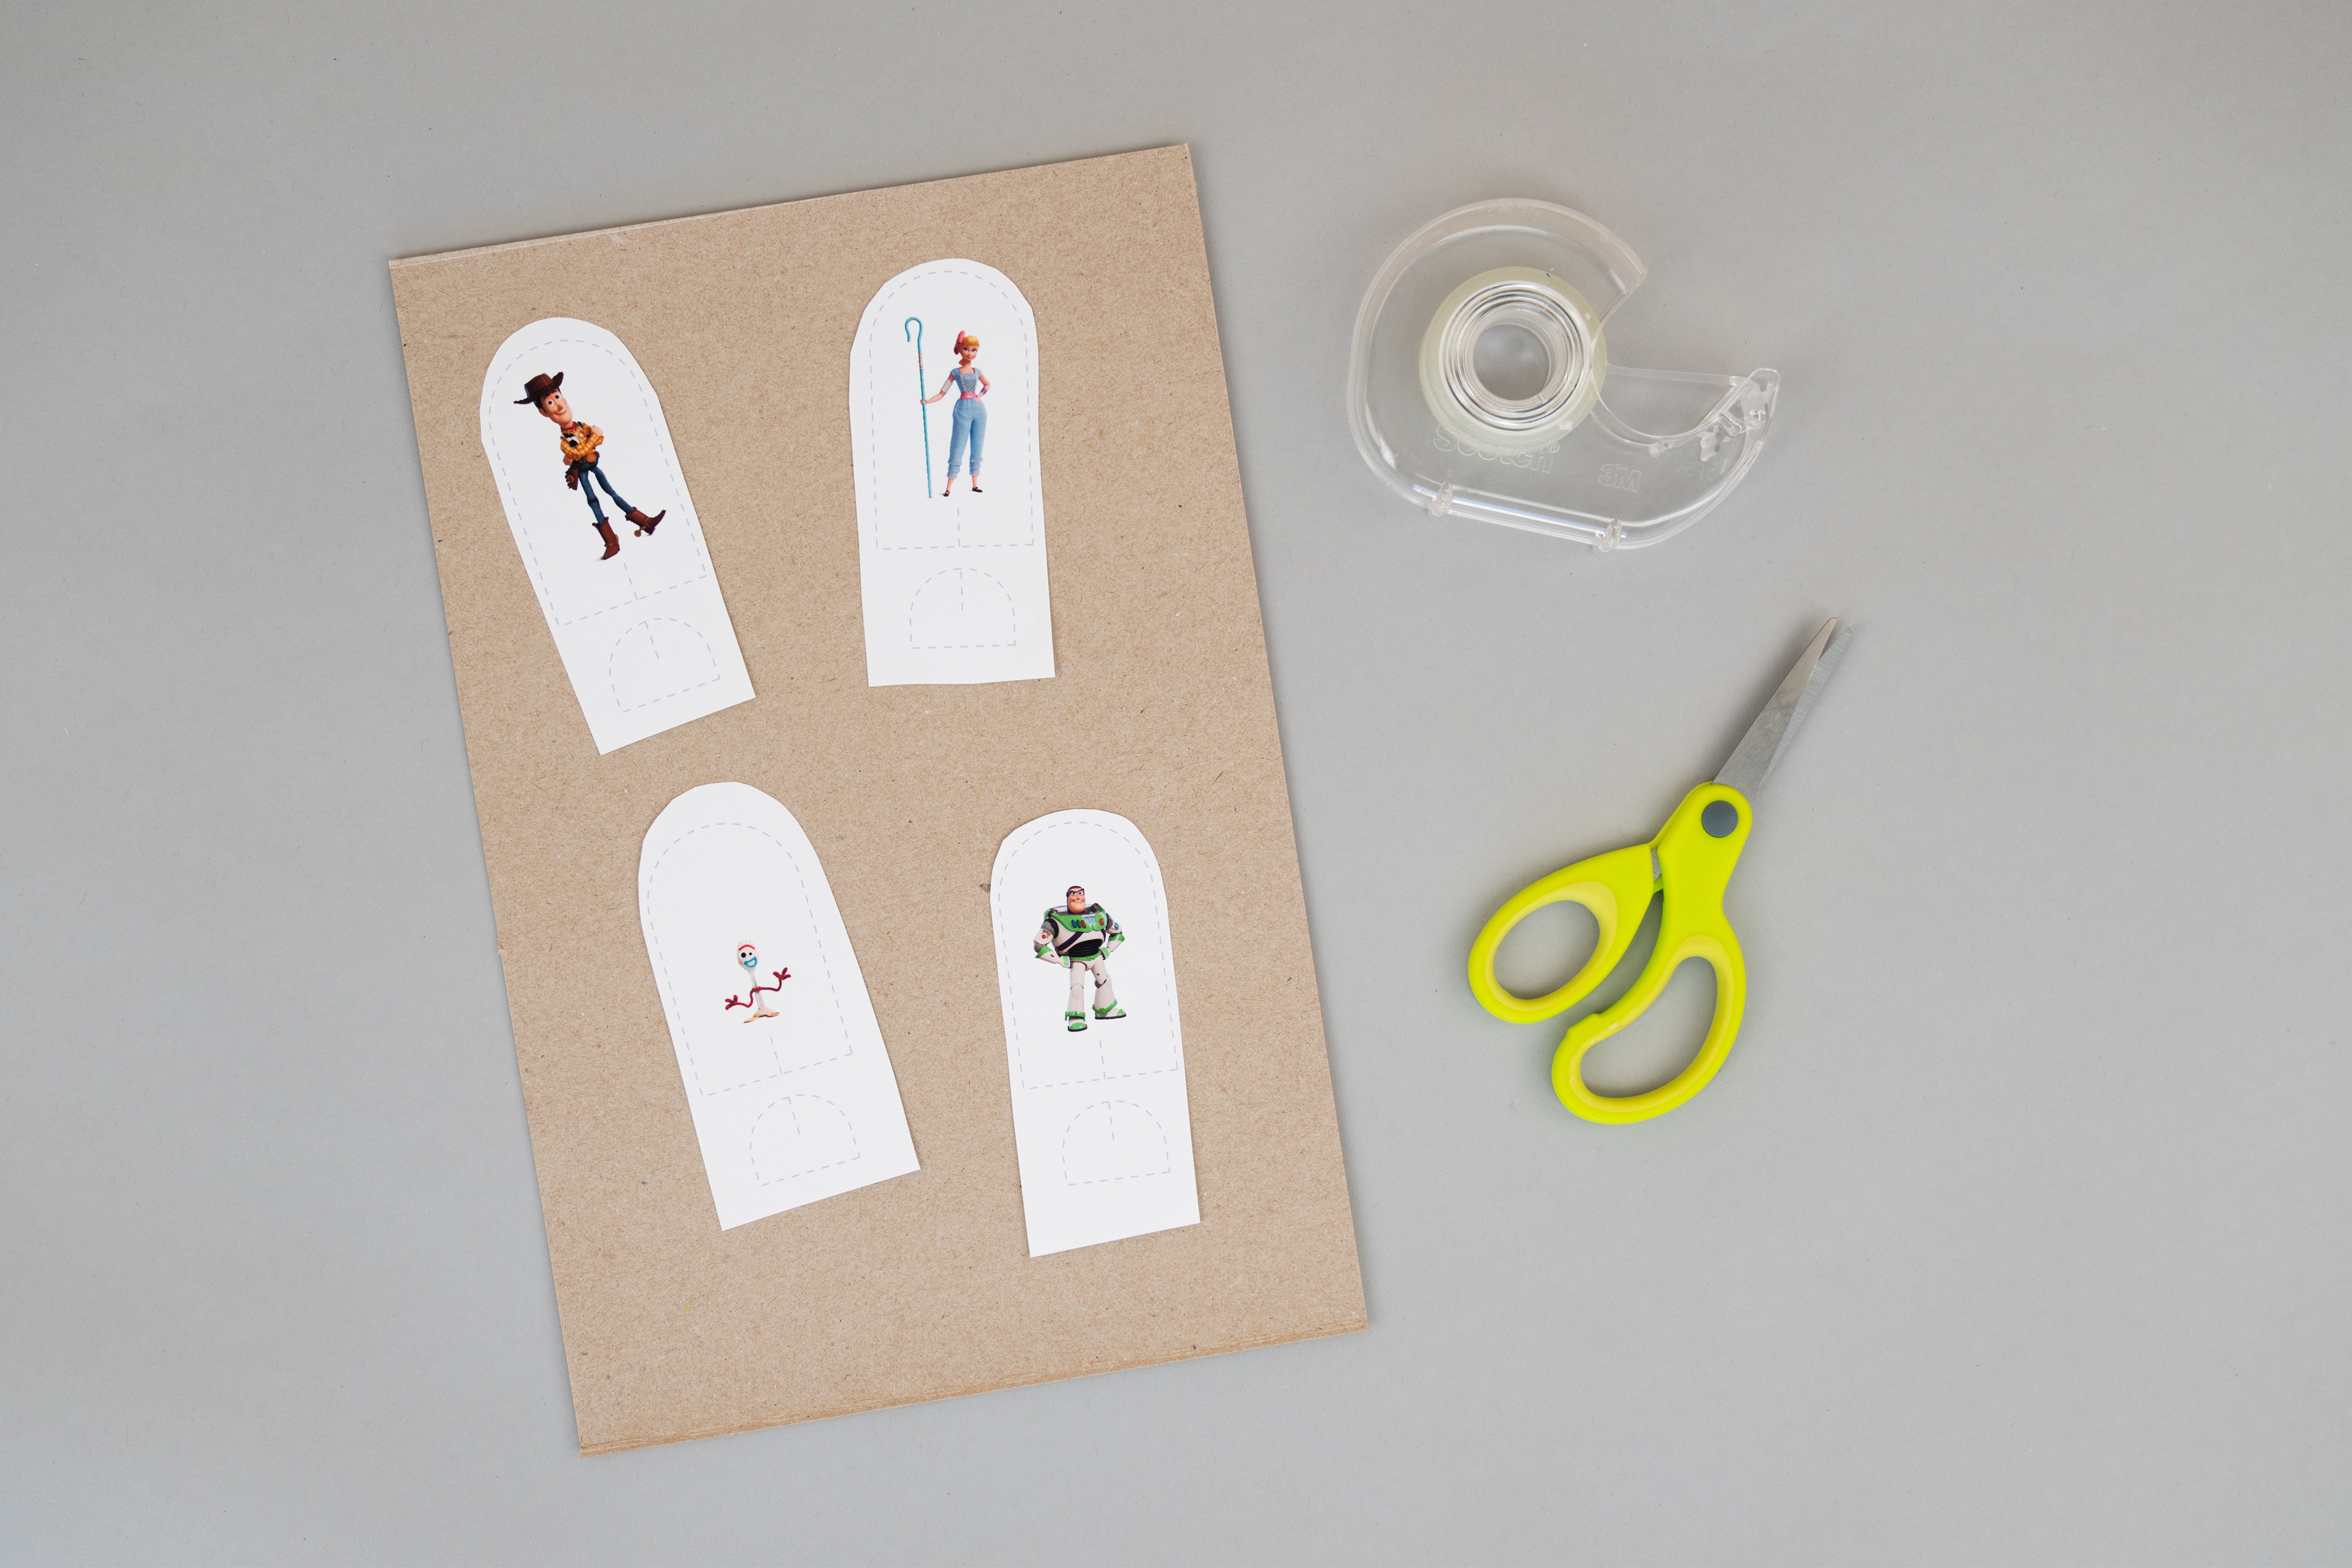
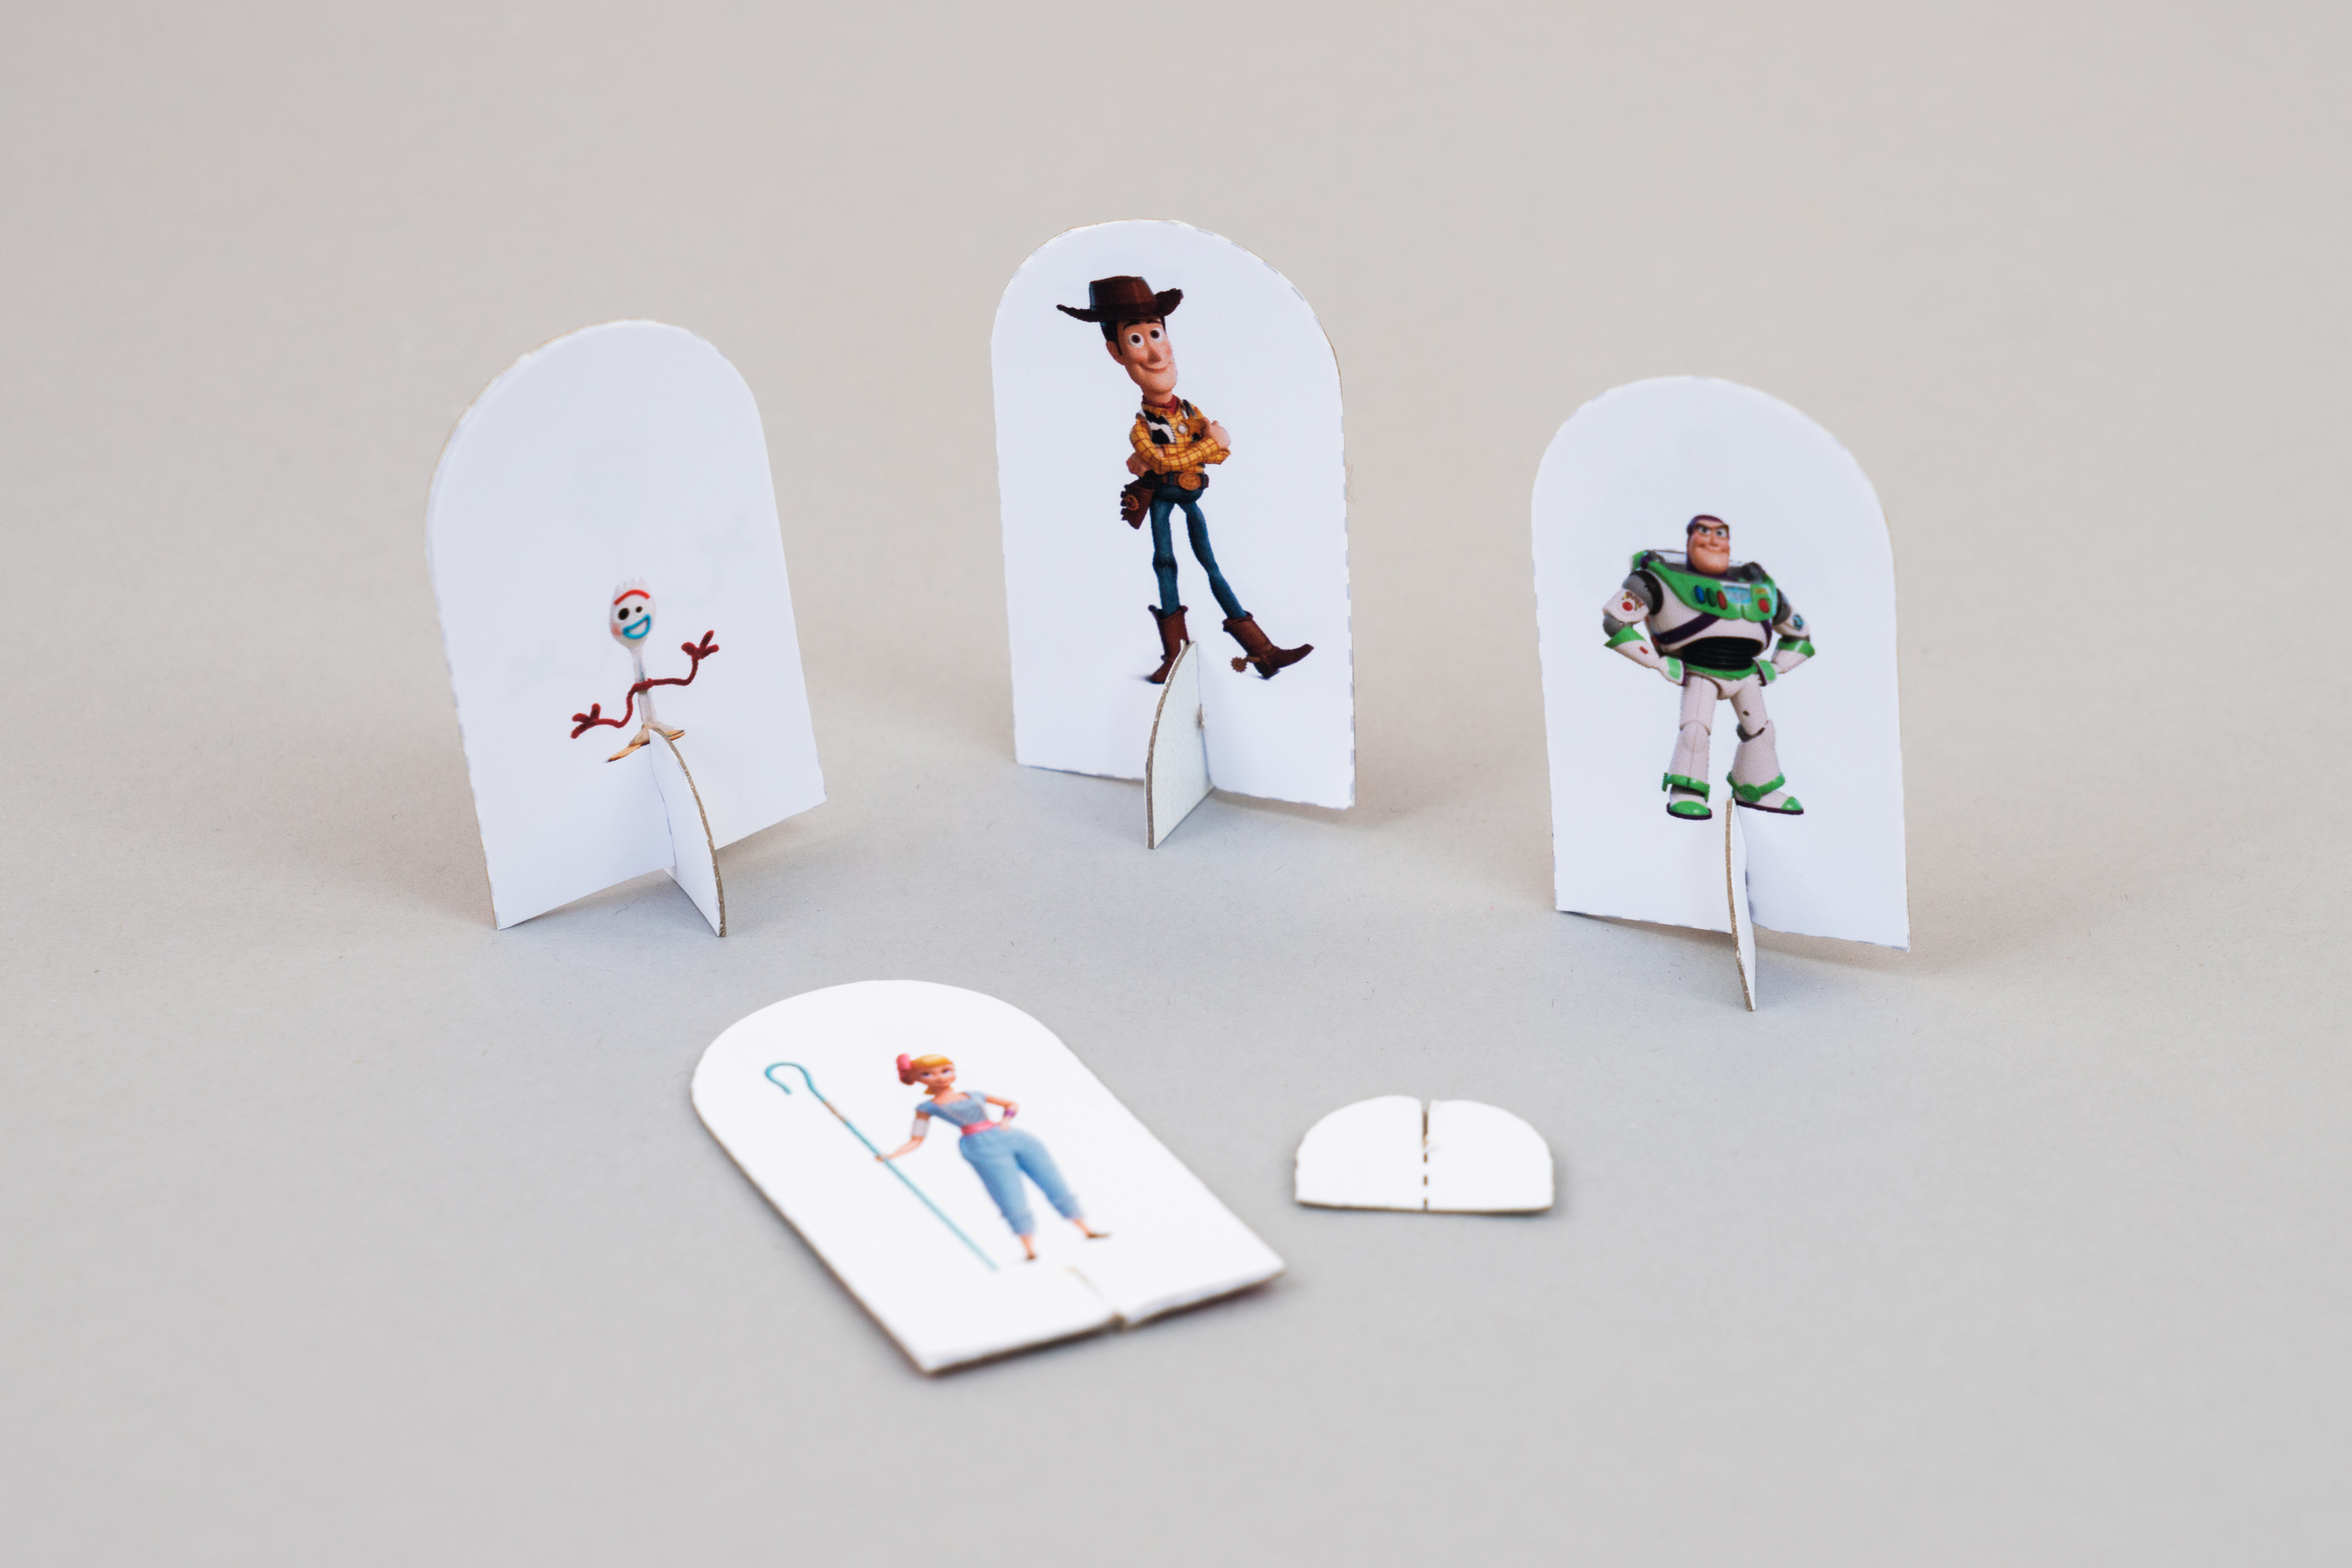
Once your Ferris wheel is decorated, it’s ready for some friends! Find the template with Woody, Buzz, Bo Peep, and Forky and roughly cut them out. Arrange the pieces on an opened cereal box and mount them with double-stick tape.
Step 22
Carefully cut out all the shapes with scissors. Cut slits into the bases and character pieces along the dotted lines. Insert the slits on the bases into the slits below the characters to make your Toy Story friends stand up. Put your characters in your Ferris wheel’s passenger cars and give them a spin. Now everyone is ready to join the carnival fun!
Step 23
Fill the passenger cars with small school supplies to help keep your desk clear—from paper clips to erasers, your new organizer will help you stay tidy all year long. And your Toy Story friends will be there when you’re ready for a study break!
Learn more

How does this work? A Ferris wheel is like any other wheel that spins on an axle. For your Ferris wheel, you’ll create a spoked main wheel with the straws and connectors, then you’ll use a dowel to act as an axle. Gravity keeps the paper passenger cars hanging straight down as they go around the Ferris wheel. How will they go around? With a small turn from you! Thanks to science, some of your favorite Toy Story characters (and mini school supplies) can take a smooth and easy ride!


