Step-by-step tutorial
Step 1
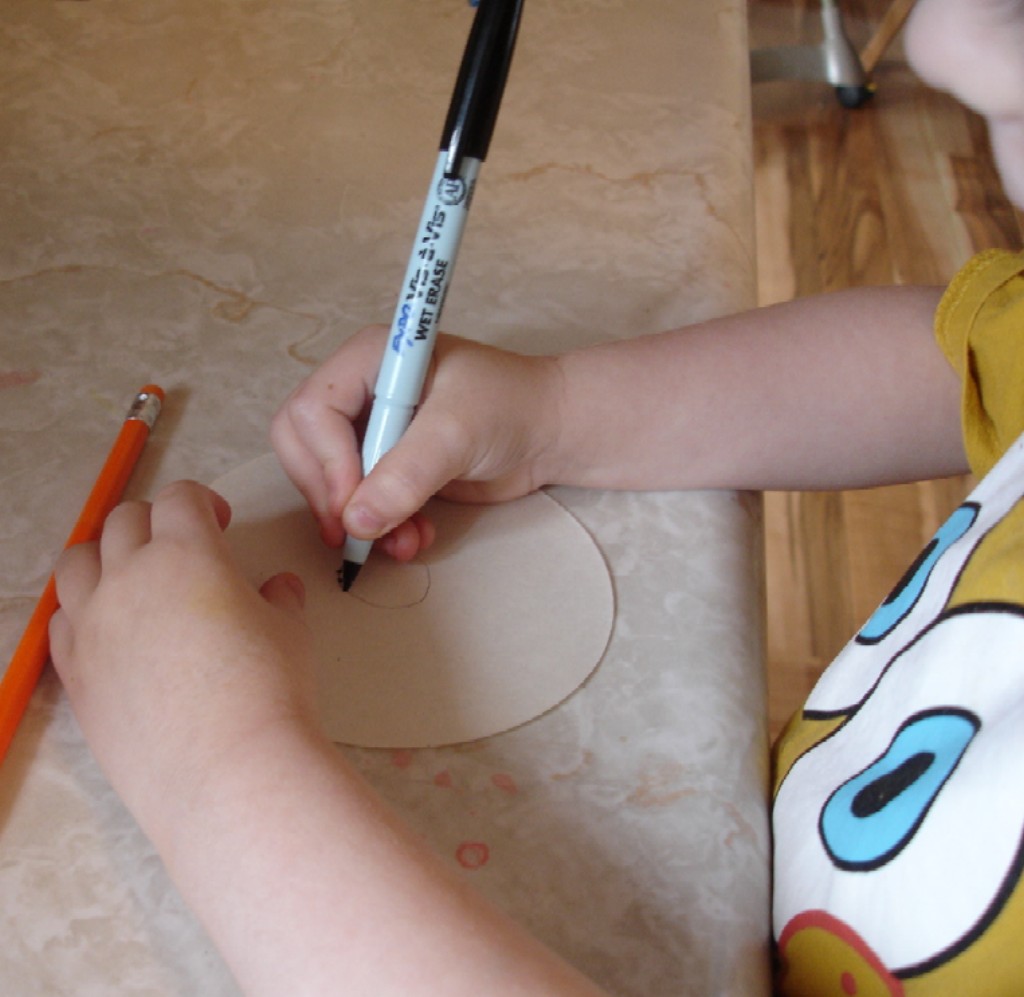
Cut your pipe cleaner in half and fill your cup about halfway with water. The paper will need to be cut into a circle. I drew the circle on the paper and my daughter cut along the line, cutting the circle out. This makes great scissor control practice.

Step 2
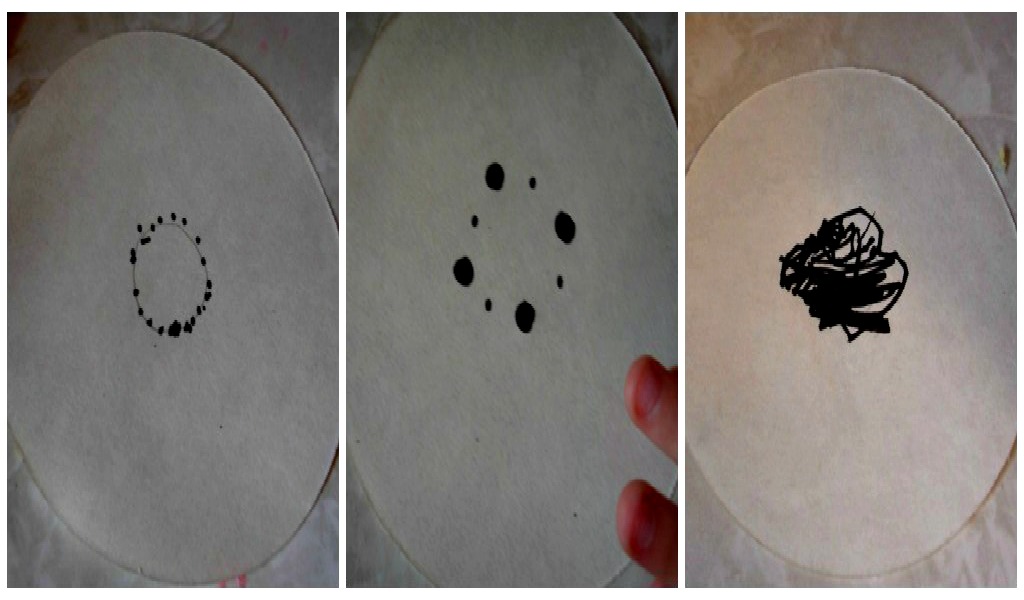
Around the center of your paper draw some dots or a circle with a black washable marker, about the size of a penny. In order for this experiment to work the marker needs to not be permanent or water-soluble. My daughter tried out a variety of patterns and coloring.
Step 3
Get the pipe cleaner wet, take off any excess water, and poke through the center of your paper. Try not to get the paper wet yet. Set your paper on top of the cup with the bottom of the pipe cleaner in the water. Now watch and see what happens to your black dots or lines.

Step 4
Within a few minutes, you will start to be able to see the colors coming out of the black. If your child is impatient, like mine, explain to them that it might take a couple of minutes before they can start to see any changes.
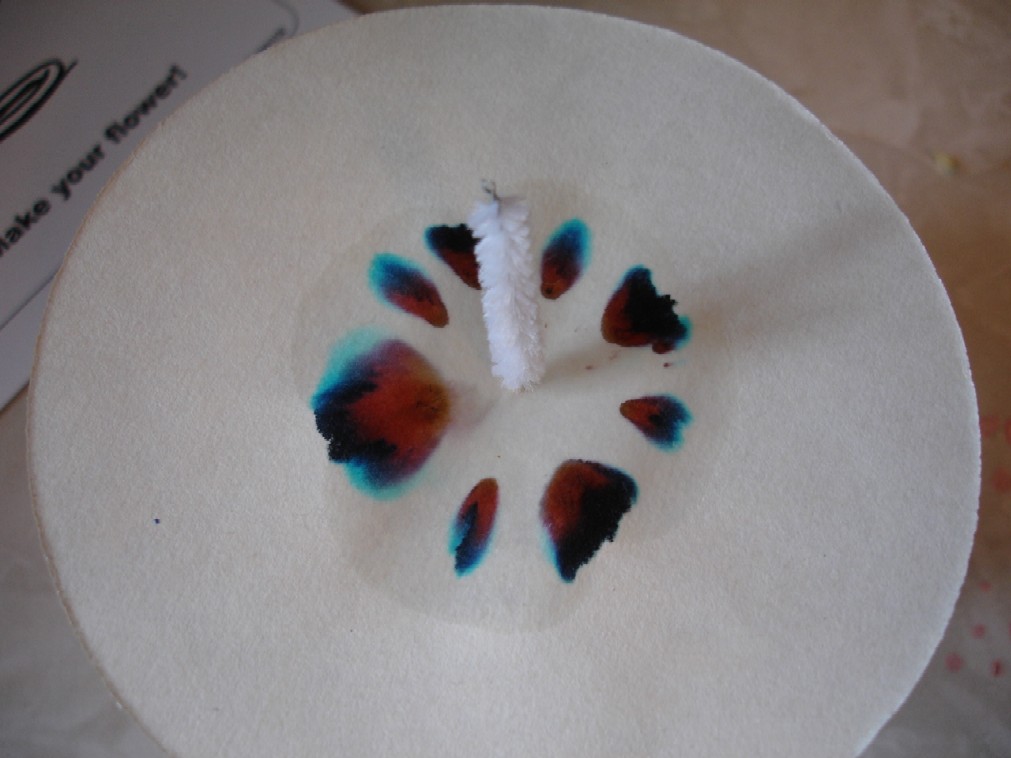
Step 5
After some more time, more of the colors will have separated from the black. My daughter kept running back over to check on them to see how much they had changed since the last time she had looked.
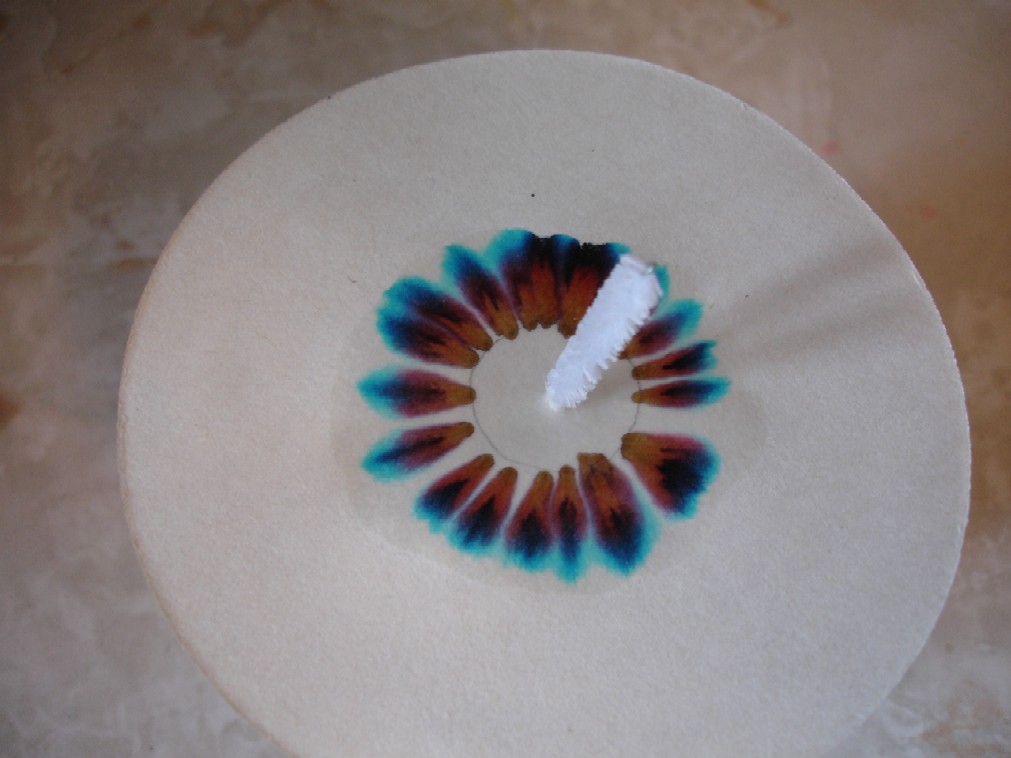
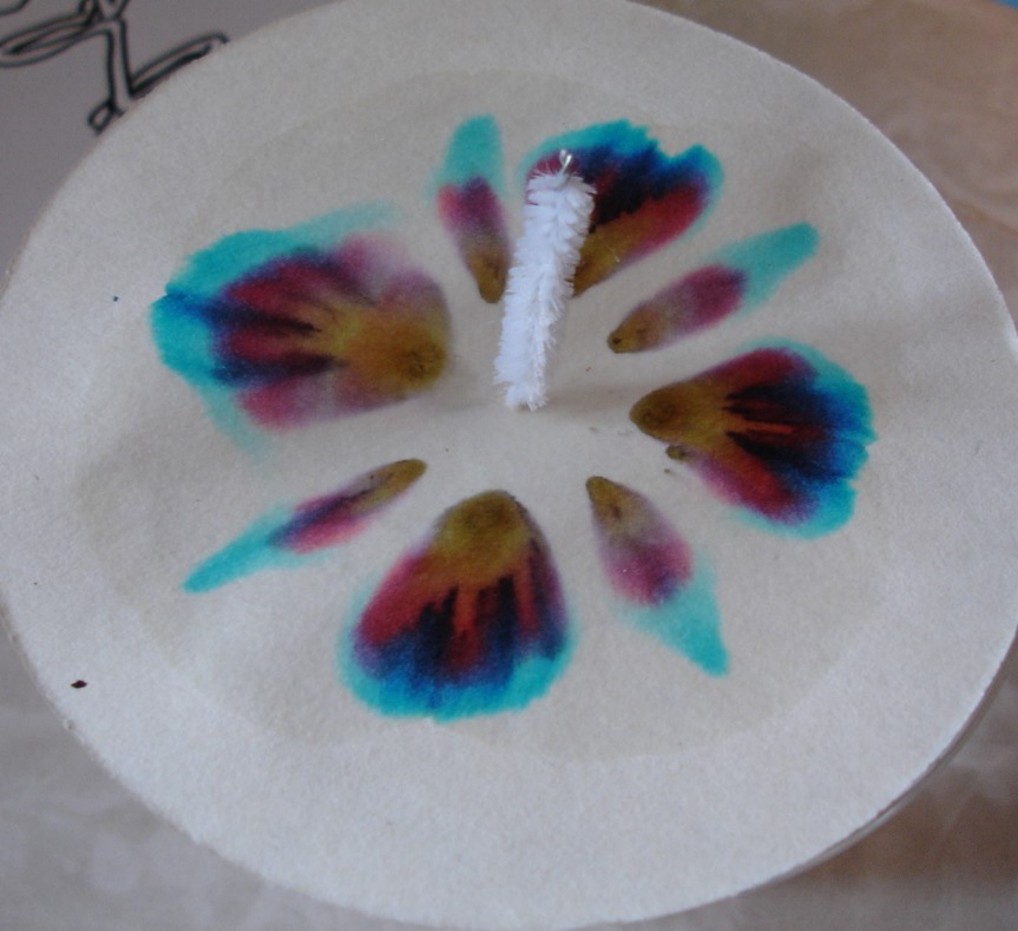
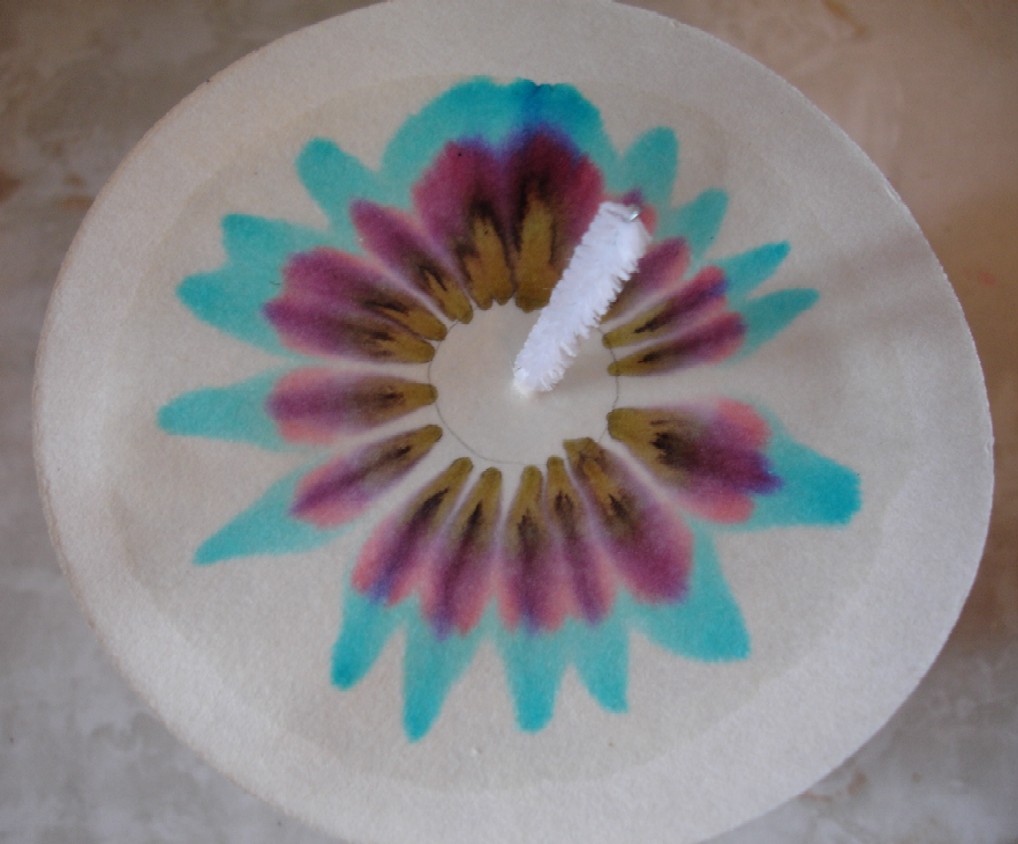
Final result!
About 20-30 minutes later, all the colors will have come out of the black. We found that waiting any longer didn't really bring any more changes. It was so neat to see how black really isn't black and to see how the different patterns of dots and lines made the results look so different from one another. This one almost looks like a flower.